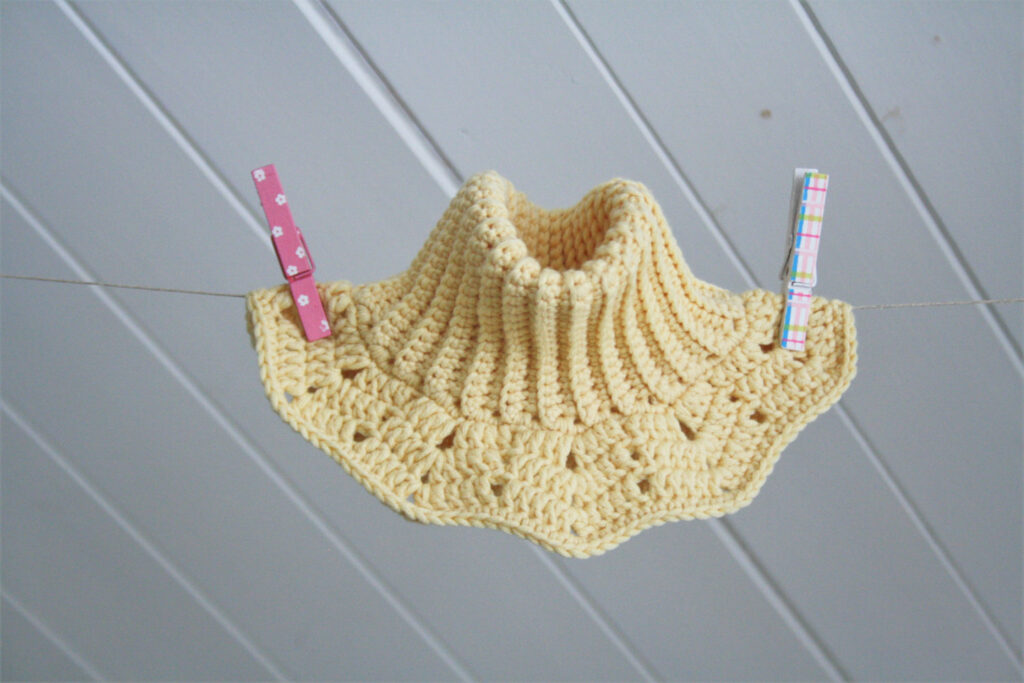
When the chill of the season sets in, there’s nothing quite relaxing like wrapping yourself in warmth, and that too maintaining your personal style. Crochets have been with us since childhood, and their warmth is unparalleled to any other winter warmers. Just like crochet sweaters and warmers for covering our entire body, there’s an accessory particularly to cover the neck as well, the Crochet Neck Warmer.
A Crochet neck warmer is a perfect accessory to style yourself up in the harsh winters that ensure that your neck is covered properly. It also adds a style element to the overall appearance as well.
Crafting this piece of accessory requires a proper tutorial, and here we are, with our easy Crochet Cotton Neck Warmer tutorial to help you gear up your style element. This tutorial will guide you through the materials needed and the steps required for crafting the crochet neck warmer.
So, let’s quickly hop on to help you make this gorgeous winter essential!
Materials Needed for Crochet Neck Warmer
Making the crochet neck warmer doesn’t require much of materials. But what it does require is quality materials. Crocheting especially requires quality yarns and yarn needles.
Here are the materials majorly required for the crochet neck warmer.
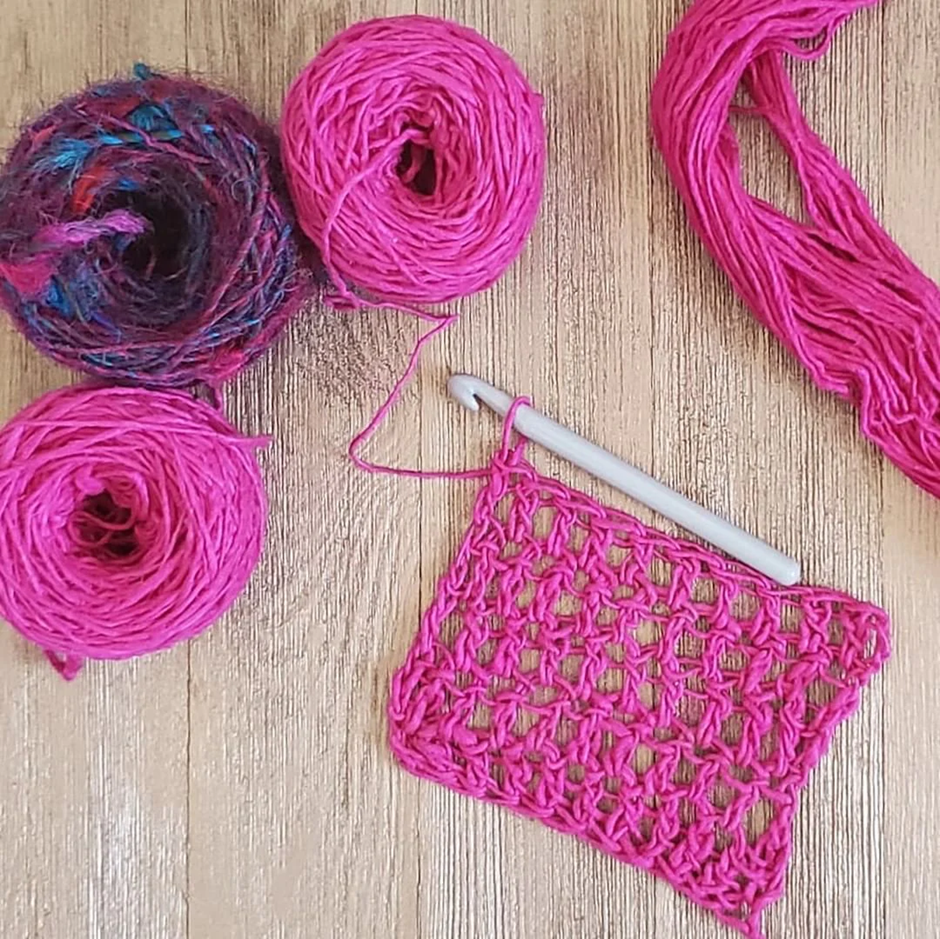
1. Worsted Weight Cotton Yarn

- 【Big Cotton Yarn Set for Crochet Pleasure】This Big Yarn Set contains 6 x 60g Cotton-nylon blend yarn which is made of 68% cotton and 32% nylon. Weight: 6 x 60 grams; Length: 61 meters (66 yards); Experience the ultimate crocheting pleasure with our ample, smooth, and soft material.
- 【Great for Beginners】This beginner yarn is great for learning to crochet or knit; Stitches are easy to see and unlike traditional yarns, beginners can easily pull this yarn apart with a crochet hook. Our Worsted medium 4 yarn for crocheting is not only soft and smooth but also has a beautiful, vibrant color that's sure to inspire your creativity.
- 【Crochet Specifications】Worsted Medium #4; 4” x 4” (10 cm x 10 cm) 13 sc 14 rows with 5 mm (U.S. H-8) crochet hooks.
- 【Knit Specifications】Worsted Medium #4; 4" x 4" (10 cm x 10 cm) 20 sts 28 rows, 5.5 mm (U.S. 9) needles.
- 【Multiple Uses】This custom cotton yarn is soft and stretchy, with rich and true colors. Great for crocheting and knitting beginners; you can use this yarn for clothing, socks, gloves, headwear, toys, jewelry making, and a variety of other yarn craft projects. Whether you're making gifts for friends or simply indulging in your own crafting passions, this cotton yarn is perfect for all craft projects.
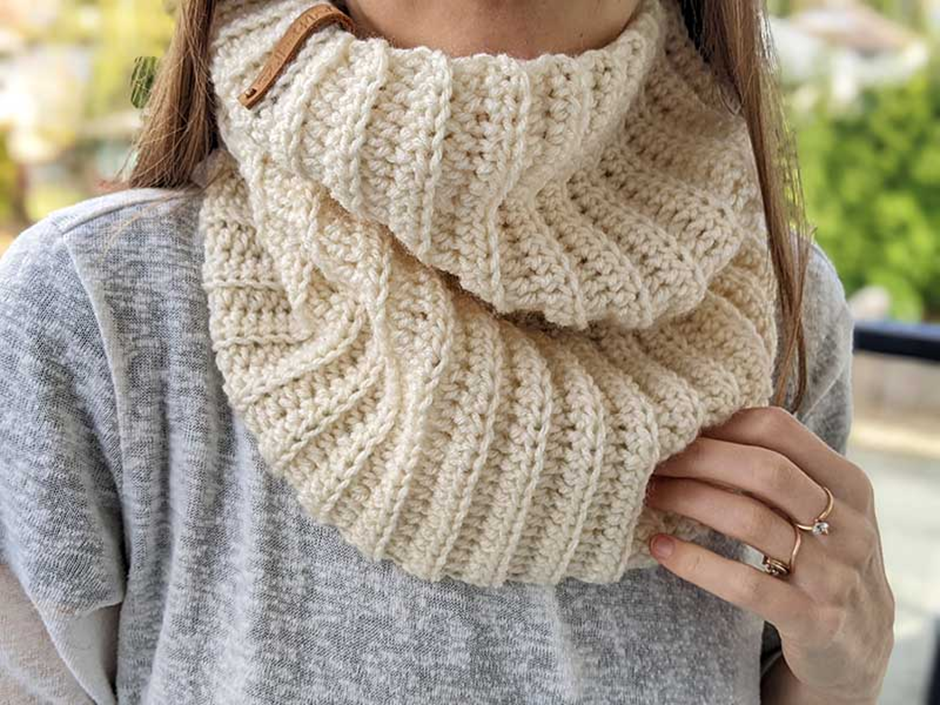
The Worsted-weight cotton yarn gives a perfect balance to craft the crochet neck warmer that is comfortable yet stylish. It has a medium thickness that makes sure that the neck warmer doesn’t have much heaviness when worn. The yarn’s softness and breathability make it a good accessory for winter that can be worn for a longer time as well. Pick any color of yarn that suits your personal taste.
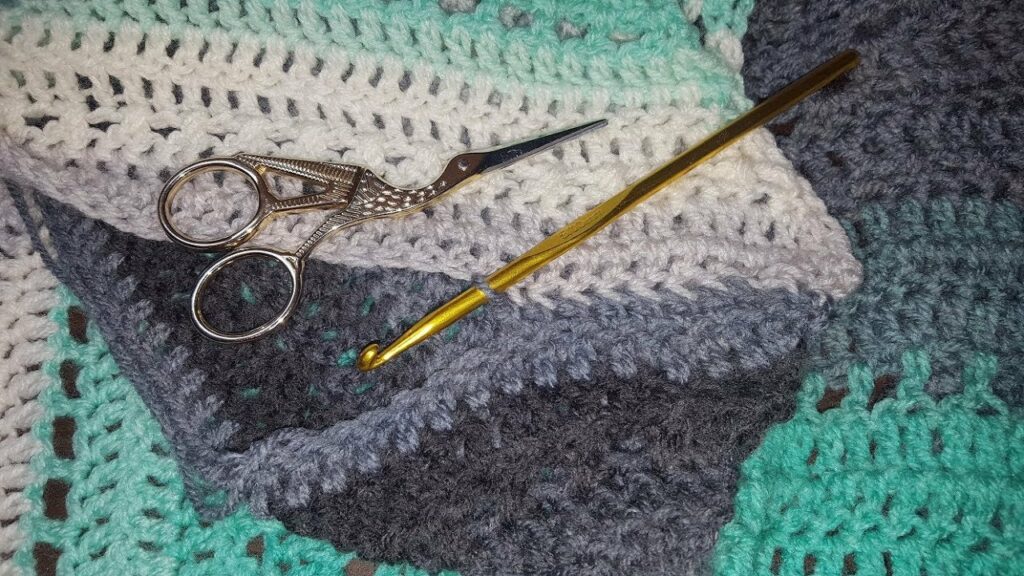
2. Crochet Hook

- Wide Range of Sizes: The crochet hooks are about 5.6 to 6.3 inches in length, with 18 options of crochet hook sizes in 1mm, 1.25mm, 1.5mm, 1.75mm, 2mm, 2.5mm, 3mm, 3.5mm, 4mm, 4.5mm, 5mm, 5.5mm, 6mm, 6.5mm, 7mm, 8mm, 9mm, 10mm
- High-end Aluminium Shaft: Each crochet hook is selected to ensure its performance. The shafts of the crochet hooks are the entire length down to the silicone handle, so they won't pop out like other brands
- Softer and Firmer Grip: The crochet hook has an ergonomic curve that facilitates a gentle and firm grip for easy-going crocheting, even if you tend to have sweaty palms or arthritic hands
- Color-coded Design: There is an easy-to-read metric size engraved on the handle, and each crochet hook comes in a color-coded design that makes it easy to spot the different sizes at a glance
- Worth Investing: Whether you are a beginner or a Pro crocheter, those crochet hooks are your ideal crocheting partner - smooth like a hot knife through butter, comfortable, and reduce hand stress
It is preferred to use a crochet hook of size G/4.0mm to craft the crochet neck warmer. This particular size makes sure that the stitch definition gives a perfect balance of comfort and style. Using a good-sized crochet hook also ensures you have a comfortable experience crafting this winter essential.
3. Scissors

- ARTS AND CRAFTS STAPLE: Fiskars SoftGrip Scissors All Purpose for cutting a wide variety of materials including wrapping paper, paper, cardboard, and more
- PRECISION ART SUPPLIES: Durable, hardened stainless steel blades offer a sharp edge for scissors that cut all the way to the tip
- LONG LASTING AND RELIABLE: A dependable addition to your paper cutter, crafting, stationary, and scrapbook supplies; Fiskars craft supplies and materials are built to last
- COMFORTABLE AND CONVENIENT: SoftGrip touchpoints enhance comfort and control; Ergonomic handle is sculpted to fit your hand
- QUALITY TOOLS FOR ARTS AND CRAFTS: From scissors and cutting mats, rotary and paper cutters for crafting, to classroom essentials, scissors for kids, and quilting and scrapbooking supplies; Essential as holiday gift wrapping supplies
Scissors are needed to cut the yarns. Pick good and sharp scissors that give a clean and clear cut to the yarn that helps in a polished look. A good pair of scissors gives a professional look to your crochet neck warmer that feels good to yourself as well when worn.
4. Yarn Needle

- Includes (2) blue yarn sewing needles.
- Needles measure 3'' L and are thicker around than standard sewing needles.
- Durable and easy to use, our yarn needles are the perfect addition to your at home or on-the-go sewing supplies.
- These needles can be used for plastic canvas and other similar sewing projects.
- Also perfect for weaving in ends in knitting and crochet projects.
For the finishing touches on your crochet neck warmer, use a yarn needle. Worsted-weight cotton yarn fits well in its big eye, making it easier to weave in loose ends and create a flawless design. To give your neck warmer design an elegant appearance, a yarn needle is a necessary material.
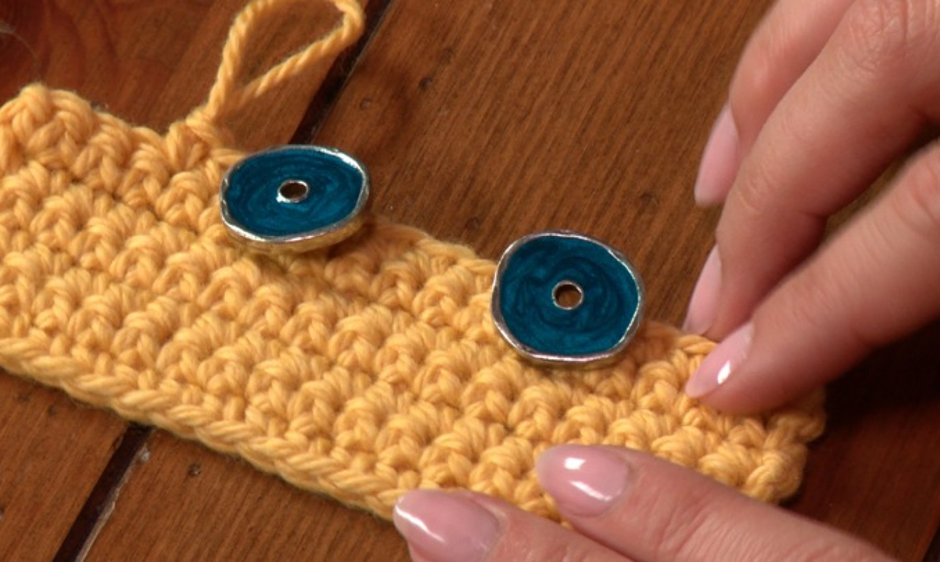
5. Buttons

- Quantity and weight: weighing 150g, 2-hole and 4-hole decorative buttons.
- Material: these buttons are made of resin, waterproof and durable, with smooth surface.
- Dimensions: diameters range from 0.7 cm / 0.28 inch to 3 cm / 1.18 inch.
- Wide application: suitable handicrafts, clothing sewing, decoration, knitting, DIY projects.
- Perfect gift: The perfect gift for relatives and friends.
For the closure of the crochet neck warmer, the buttons are required. The buttons can be picked according to the size suitable for the neck warmer, considering that it also looks good. Any color of a button can be picked; make sure to keep in sync with the neck warmer because it will enhance the look of your neck warmer even more.
6. Measuring Tape
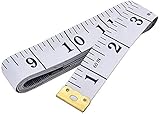
- Measuring range: 0 to 60 inches and 0 to 150 centimeters. There is a centimeter scale on the back, which is accurately printed in inches and centimeters. Both sides can be measured according to your requirements. You can put one in your pocket or backpack without taking up too much space
- Great Material: Tailor Vinyl tape measure won't stretch or deform, provides superior measurement consistence; Soft tape measure, a flexible and portable tape measure, made from soft plastic material, white color
- Operate and Read: Black markings on bright white tape is big enough for you to read, the tape has metal tabs on each end of the cloth tape measure to butt-up against the item your measuring; The metal ends also can prevent fraying
- Wide Application: Cloth tape measure; body tape measure,sewing tape measure,measuring tape tailor. Good sewing tool, accurate tape measuring for sewing, tailoring, body, waist measurement or measuring any curved surface. can provide you accurate measurements, suitable for a seamstress, a crafter, a quilter or whoever just need a flexible measuring tape
A measuring tape is needed to measure the neck circumference and the length properly for crafting the accurate size of the crochet neck warmer. With proper measurements, you can make sure that you don’t have to work again and again on the neck warmer. Having the sized warmer with proper measurement will give a proper fit.
Now that we have all the materials needed with their quality descriptions for the crochet neck warmer, let’s look at the main plot for crafting this beautiful and stylish winter accessory.
Steps for Crafting the Quintessential Neck Winter Warmer
We’ve looked up to the materials needed above, and craft magic with them is something that will be done with these steps. Here are the steps that have to be followed carefully to craft the gorgeous crochet neck warmer:
Step 1: Choose Your Yarn and Hook
Pick a color of the worsted-weight cotton yarn that suits your personal preferences. These cotton yarns are available in plenty of colors. One can choose any as they like without being restricted. If you’re making this crochet neck warmer for a particular event or a dress, go for the color that suits the color scheme for both because staying color-coordinated gives a very polished appearance to the overall look.
Pair the yarn with the crochet hook of size G/4.00mm for an equal combination of comfort and stitch. Using an appropriate size of the crochet hook is necessary as it plays a big part in crafting the crochet neck warmer. Being effortless while crafting this winter accessory ensures that you have a wonderful experience that pushes you to craft more neck warmers for the winter syles.
Step 2: Foundation Chain
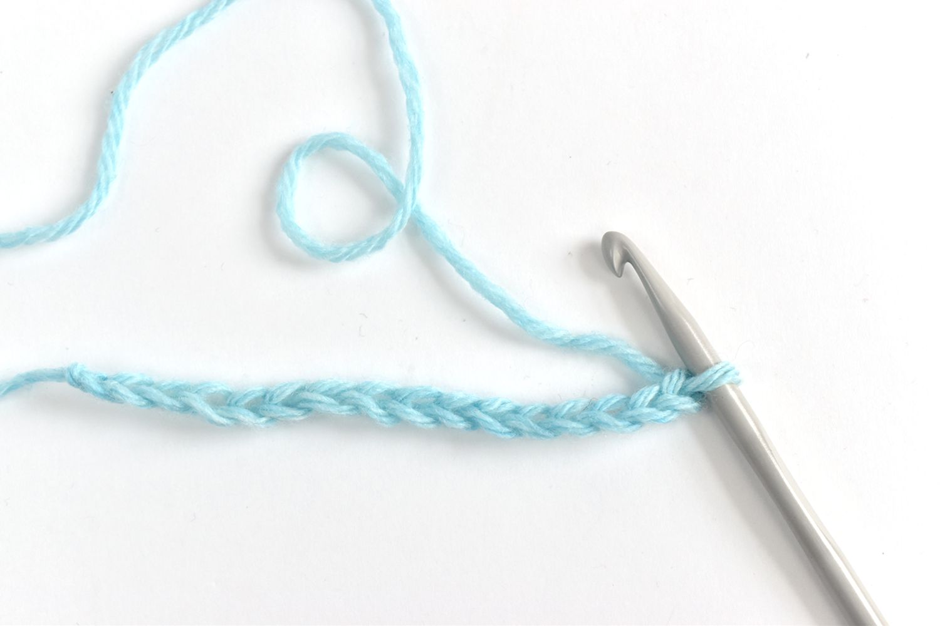
The process of crafting the crochet neck warmer starts with a very important element: The foundation chain. Begin by skillfully chaining 23 stitches, which basically serves as a basework for crafting the neck warmer. The number of stitches used can be changed, allowing the width of the neck warmer to be customized for individual tastes.
It’s important to understand, though, that the final width could vary somewhat from the initial count due to the basic features of crochet stitches, which might shrink during later rows. This step is important as it ensures that the later stitches and rows building upon this chain craft a cozy and stylish neck warmer.
Step 3: Stitching the Rows
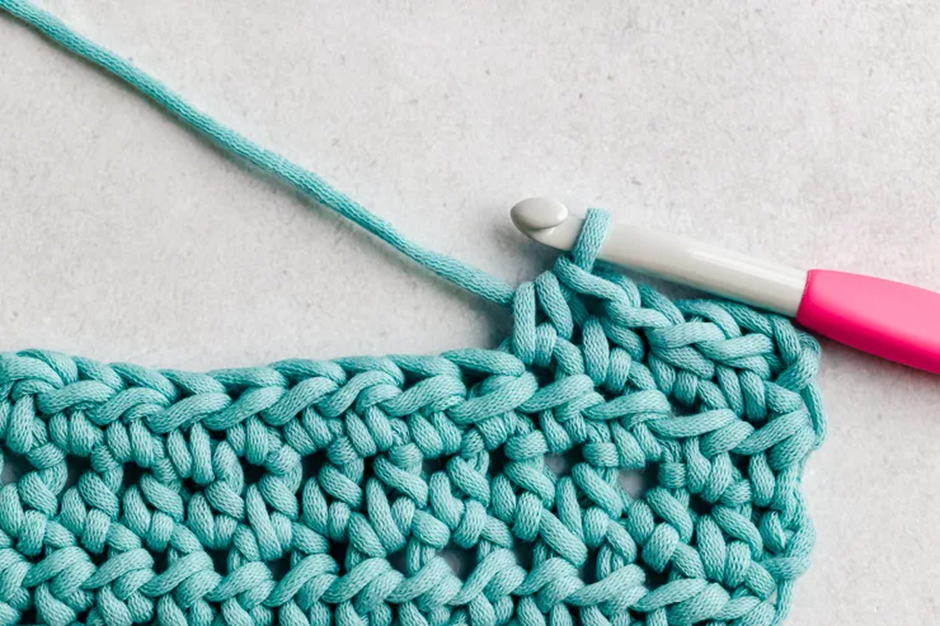
Stitching the rows involves the process of crafting the crochet neck warmer by stitching the rows together. For the main body of the neck warmer, we’ll use a simple stitch called the Half Double Crochet (HDC). The neck warmer gets a very warm sense of feeling to the skin when touched by this stitch, in addition to the lovely look.
The HDC requires inserting the hook into the specified stitch, pulling up a loop, yarn over, and then running the yarn through all three loops on the hook. This pattern is followed across the rows until a unified fabric is created. Stitching the rows together with HDC makes sure that the neck warmer is shaped properly with a snug fit and a constant pattern.
Step 4: Adding Buttonhole
Adding buttons to your crochet neck warmer is optional, as some people like to have a free neck pattern, and some like to have a button pattern for a proper, stiff look. Adding a buttonhole makes your warmer more practical as it helps to adjust the neck warmer securely. Here’s how it can be done: When you’ve reached the end of the town, change what you usually do by making a chain of 10 stitches.
This number is totally adjustable as per the button size. After this, skip the first 2 stitches and then an HDC stitch in the next stick and keep doing HDC stitches across the row. This creates a space in your work where the button fits. Once this is done, continue the regular HDC stitches in the later rows.
Step 5: Finishing Touches
The finishing touches to your crochet neck warmer are done when it’s totally completed and has reached your desired length of neck warmer with proper measurements. If everything is in place with the warmer at the correct length, fasten it off and neatly weave in all the loose ends using a yarn needle to secure it. This makes sure that the warmer has a polished appearance and stays in place for a long without any yarn coming up immediately.
For the buttonholes weaved in the prior step, attach buttons on the end of the neck warmer just opposite where the buttonhole was crafted. The button serves as a practical and comfortable closure and a styled decorative element to the neck warmer. Remember to align the buttons and buttonholes properly for a snug fit.
By ensuring every step mentioned above is followed meticulously and carefully, you can get the comfortable fit of your neck warmer. Giving proper attention to final touches will make sure that your neck warmer is aesthetically appealing, which ultimately enhances your overall appearance when you wear this winter accessory. Crafting the neck warmer perfectly shows your absolute dedication and craftsmanship. Still, some things have to be considered and kept in mind very carefully when creating this gorgeous piece of accessory.
Essential Points to Adhere While Making Crochet Neck Warmer
Crafting the crochet neck warmer can be an absolutely fun experience, but to ensure a successful result, there are several important things to keep in mind. Here’s a list of things to take care of when crafting your crochet neck warmer:
- Gauge: Gauge is basically the measurement of a specific number of stickers per row and rows per inch using a stitch. Checking the gauge before you start is important. Crochet a small swatch with the yarn that you’ve picked and the hook to ensure your stitches match the needed gauge in the pattern. This will ultimately help you to achieve the correct size and fit.
- Consistency of tension: It is always preferable to maintain a good tension consistency throughout the crafting of your crochet neck warmer, as inconsistent tension can lead to uneven stitches and a disturbing appearance overall.
- Foundation chain: Pay attention to the tension of your foundation chain, as it should be a bit looser than the rest of your other stitches. It prevents the neck warmer from becoming too tight at the starting edge and gives a comfortable fit overall.
- Stitch count: Ensuring each row has an equal stitch count is necessary. Count the stickers at the wand of each row and follow the same pattern across your neck warmer. Missing out or adding extra stitches can result in a distorted appearance.
- Buttonhole placement: If opting for a buttoned neck warmer, make sure that the placement of the buttonhole is done appropriately so that the buttons pass through and fit comfortably. Improper button setting can also lead to a shabby appearance of this neck warmer on wearers, which also keeps them uncomfortable.
- Turning chains: Keeping an eye on turning points is essential. They count to be the first stitch of the town and affects greatly the overall height of the row. Adjust your turning chains accordingly to maintain a constant stitch height.
- Measurements: It is very important to measure your neck appropriately for a desired neck warmer size that fits perfectly and comfortably to your neck. It is also essential to keep the measurements of the neck warmer at particular intervals as you crochet. This ensures that your crochet neck warmer is being crafted at the right length, avoiding it being either too short or too long and giving a wonderful fit.
- Color changes: If you’re going for a multicolor crochet neck warmer, be careful about switching colors to create proper and neat color transitions. Colorful crochet neck warmers look amazing only if the colorful yarns used are in the right places.
- Blocking: Once the crochet neck warmer is crafted, consider blocking it to help even out stitches that ultimately will give an organized look.
- Button choice: Pick a button that goes with the style and color of the crochet neck warmer, as it gives a very polished appearance. Ensure that the button is perfect in size in accordance with the buttonhole, as it will give you a comfortable fit.
- Weaving in ends: Make sure to neatly and securely weave in all yarn ends. If you want to avoid any visible knots on the front, weave the ends through the stitches on the backside of your neck warmer using a yarn needle.
- Customization: Feel free to customize our crochet neck warmer per your preferences. You can add decorative elements such as small crochet flowers and beads to give a stylish and unique touch to your neck warmer that can also help you reflect your individual personality.
These are a few things to take care of when crafting your crochet neck warmer, as anything crafted carefully and meticulously ultimately results in a stunning outcome. Now, since we are prepared with the basic crafting of a crochet neck warmer, let’s look at the different patterns and designs of these neck warmers that can gear up your style game wonderfully.
Patterns and Designs Related to Crochet Neck Warmer
Crochet neck warmers can range from the simplest of designs to pretty and stylish patterns, making them a versatile accessory for all wardrobes. Here are some pillar patterns and design elements that you can look for when crafting your crochet neck warmer:
1. Basic Stitch Pattern
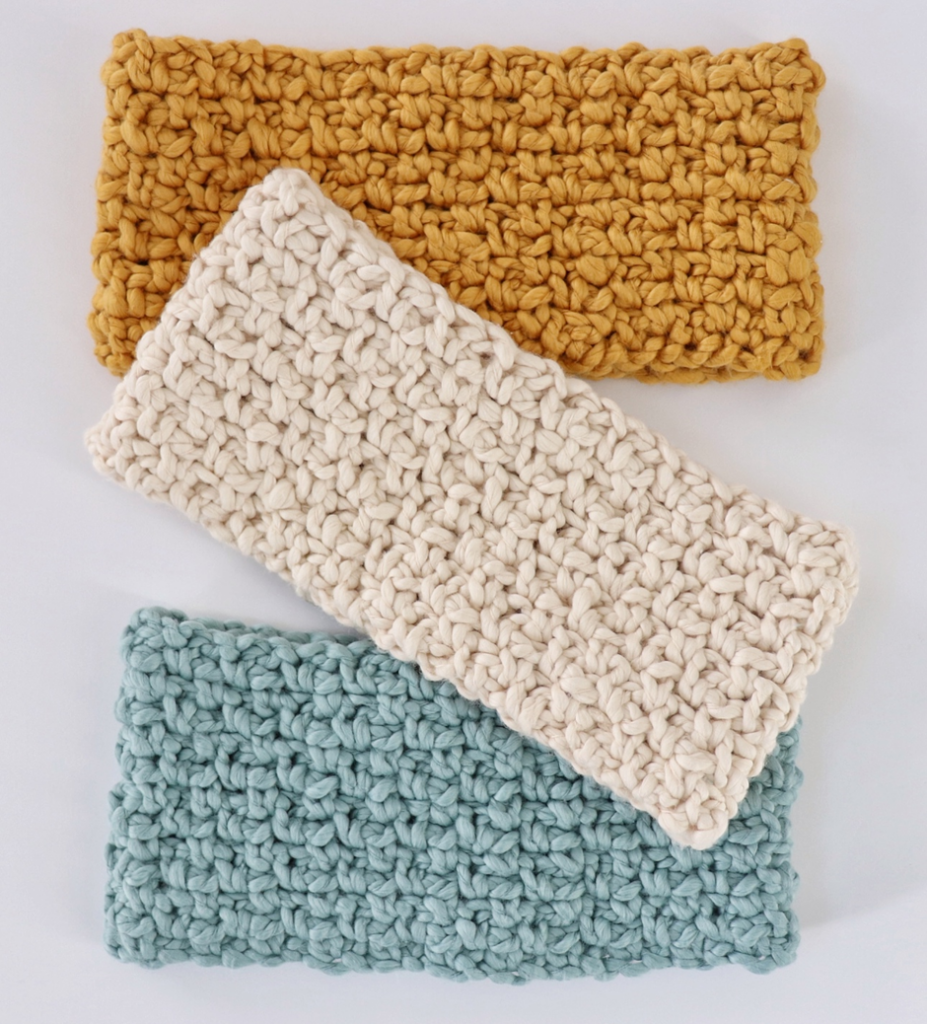
The basic crochet neck warmers have simple stitch patterns like single crochet, double crochet, HDC, and more. These basic stitches can give an organized and classic look, making them appropriate for casual and formal events.
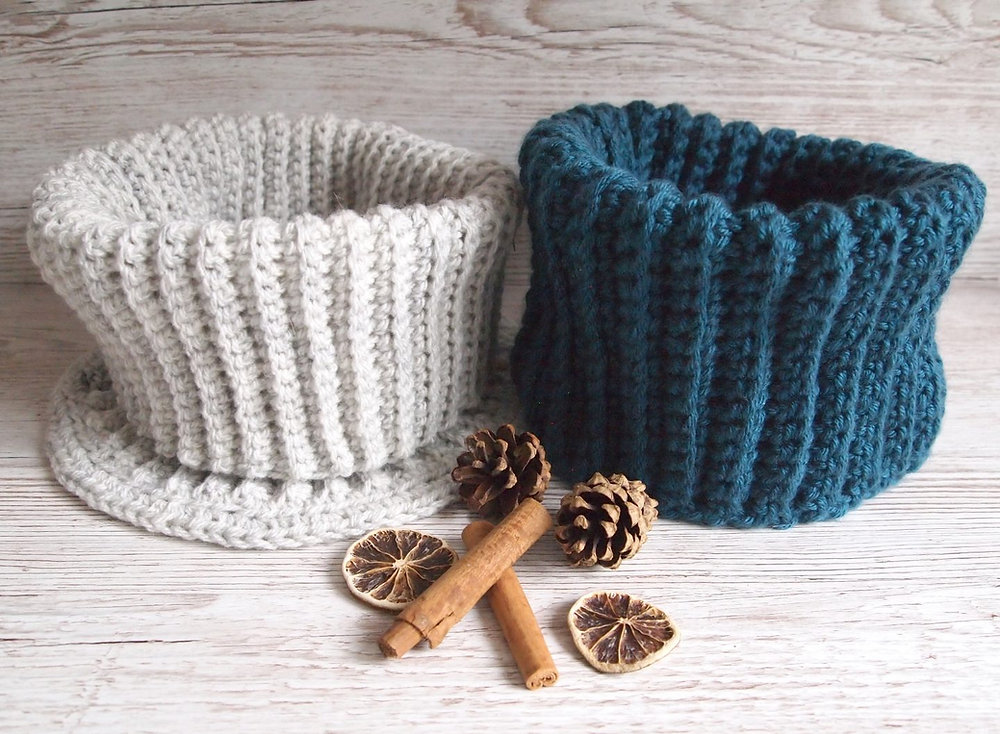
2. Ribbed Patterns
The ribbed pattern for the crochet neck warmer is crafted by alternating between front post and back post stitches. This method creates a textured fabric that fits in the neck comfortably and gives much more warmth than other patterns.
3. Colorful
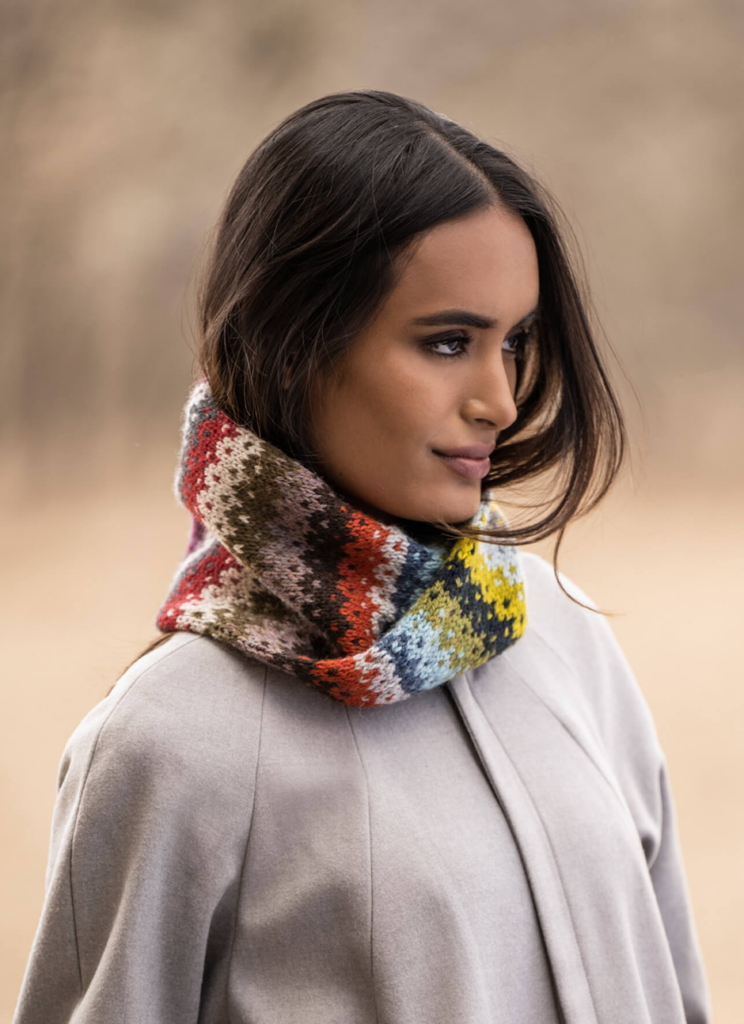
Integrating multiple colors of yarn can result in a wonderfully eye-catching design of a crochet neck warmer. You can go for any color pattern, like creating stripes, zigzags, alternate blockings, geometric patterns, and even more that fits your personal taste. Patterns with beautiful colors can create a gorgeous piece of neck warmer with stunning effects.
4. Cabled Designs
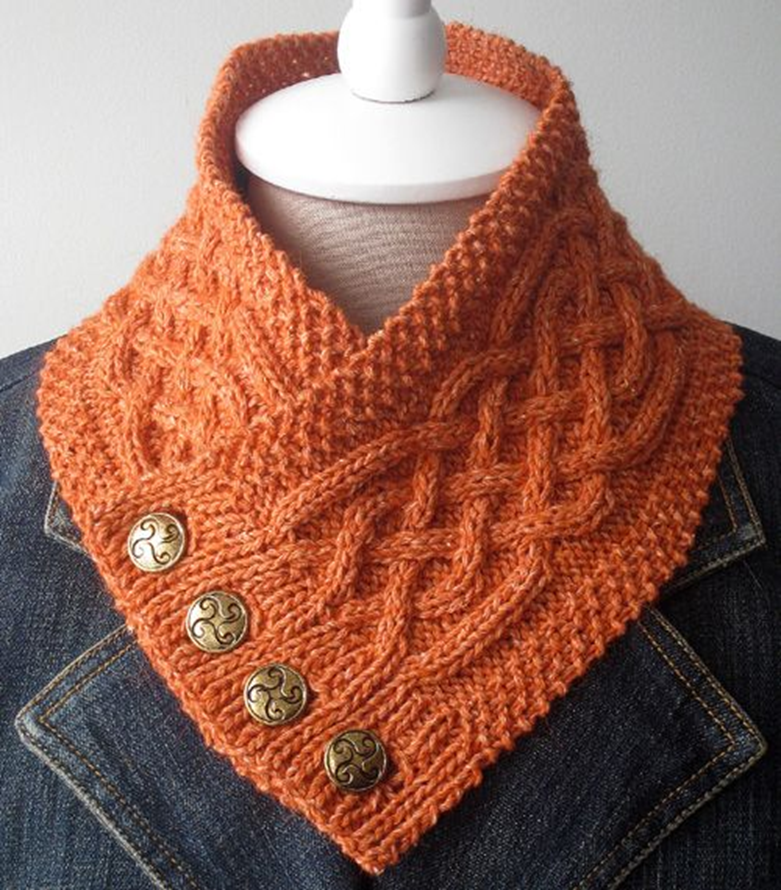
Crocheted cables can give a neck warmer a touch of elegance by matching knitted cables in design. Cable patterns of crochet neck warmers involve crossing stitches over each other to create intricate braided patterns.
5. Buttons, Toggles, and Closures
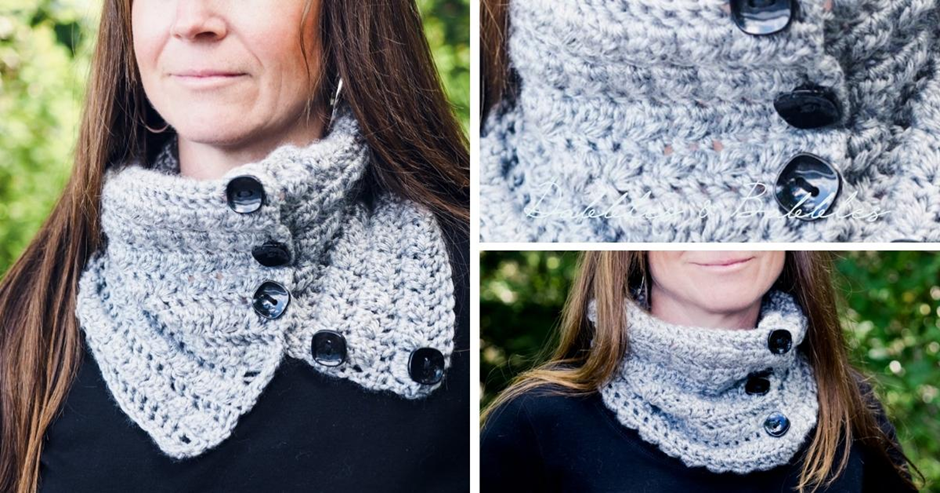
Crochet neck warmer can be decorated with buttons, toggles, and other closures. Adding good buttons that go with the color scheme of your yarn choice can elevate the look very beautifully. You can add embellished hooks as well with motifs.
For crafting the crochet neck warmer, it is good to research recent trends and patterns online. With fashion evolving so much, there’s a change in trend almost daily. Go for the patterns and designs that align with your individual taste and personality.
Conclusion
Being the most practical option, neck warmers are also a fashion accessory to glam up the look. Crafting this neck accessory meticulously with all the steps and materials given can result in an absolutely gorgeous masterpiece. With so many designs and patterns available, you can craft any alternative that fits your personality the most.
The yarns come in various colors to craft even single-toned or multicolored neck warmers. Both of them look good and can be worn as per occasion or dress color.
It is altogether a different feeling to craft something. So, enjoy the satisfaction of creating a cozy crochet neck warmer that is both useful and fashionable as you wrap yourself in your creation. Let us know your experience of crafting this winter essential accessory in the comments below!