Adding the perfect finishing border or edging can elevate a crocheted blanket From homemade to home-crafted. While the body of the crochet blanket showcases intricate stitches and captivating colors, the thoughtfully chosen border completes the overall look. The right edging adds polish and pulls the whole design together into a cohesive artistic statement.
In this post, we will explore 28 crochet edging options to inspire you to make your next blanket truly Shine. Whether you prefer classic sample border or elaborate showcasing trims, you will Discover edgings to match any blanket style and skill level. Check out quick beginner borders as well as fancier lace And textured borders. We will also Look At Smart edging techniques to finesse corners and edges for a professional finish.
By browsing this collection of charming crochet borders and edgings, you will gain the confidence to frame your next crossed blanket in a perfect handmade accent. So read on for sample tips, step-by-step tutorials, and endless inspiration to put the ideal Crowning touch on your labor of love.
Let’s explore the wonderful world of crochet blanket borders!
1. Simple Crochet Blanket Borders
When choosing a crochet blanket border, sometimes simple is best. Basic edgings allow more intricate blanket patterns to take center stage. If you want a quick, uncomplicated finish, try one of the Classic, easy crochet borders. Made using elementary status like single crochet and double crochet, these shuttle edging work fast. They neatly finish the edge without shadowing other design elements. Beginners can master these borders quickly. Their repetition and simplicity result in a tidy, uniform look. For a polished but stable finish, turn to these simple crochet blanket borders.
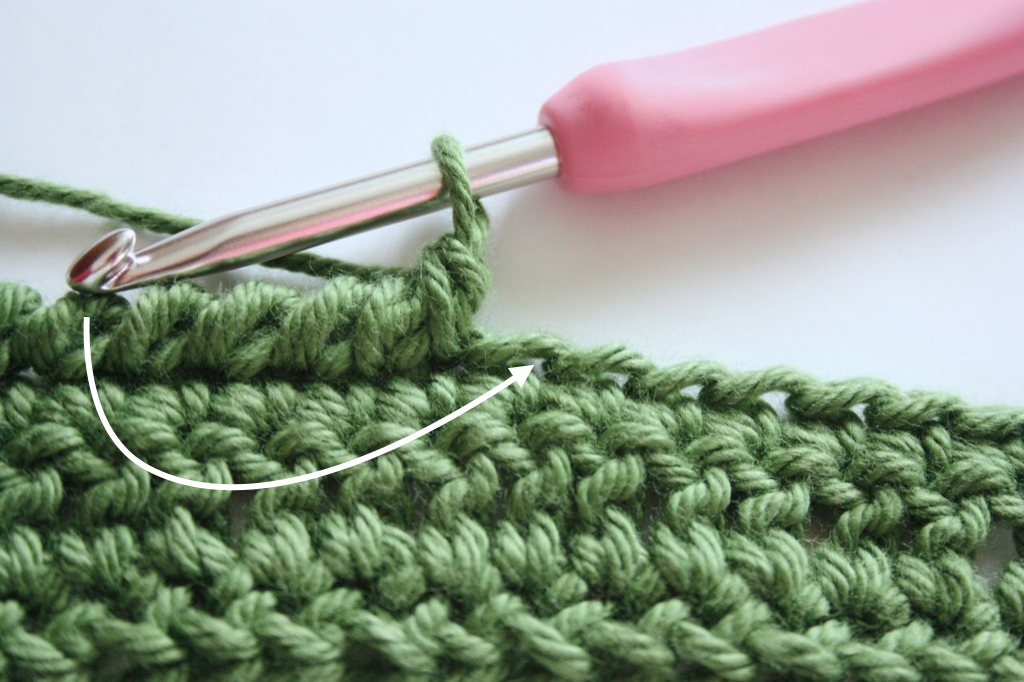
2. Single Crochet Edging
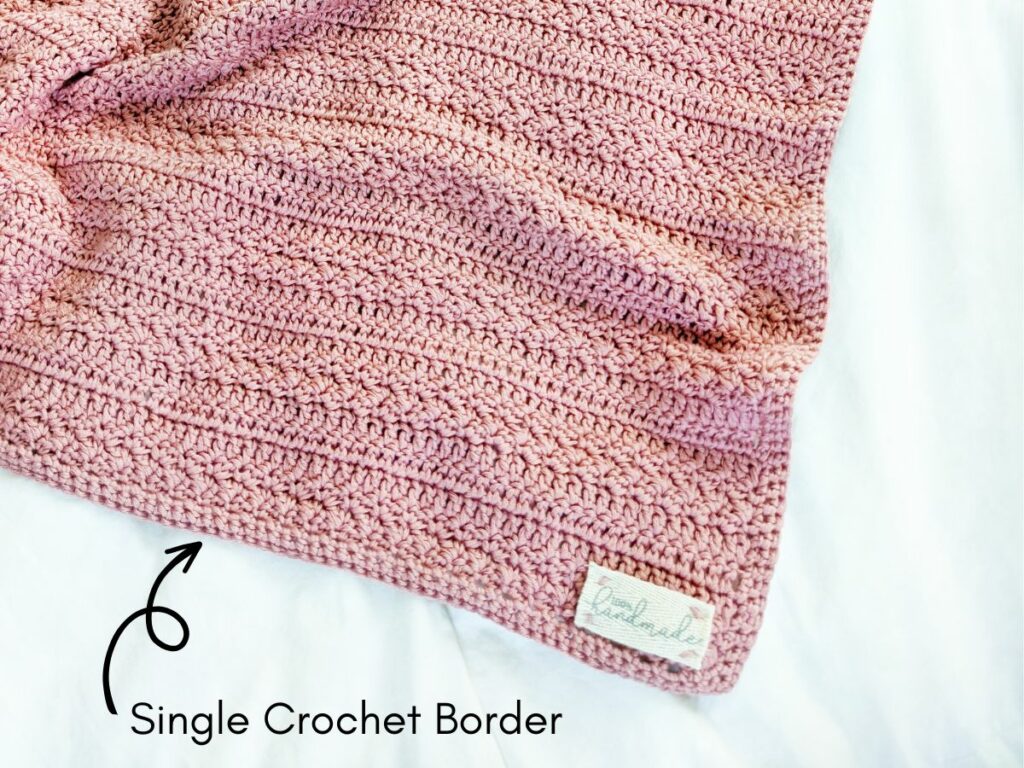
Of all the basic crochet edgings, single crochet is his most straightforward. This elementary stage creates the Classic border with its simple density and regularity. Working consecutive Single crochet Stitches evenly around the blanket edge produces a neat finish. The compact stitches contain the edge and prevent stretching or curling. Their tight, uniform appearance almost mimics upbraid. Single crochet adds only minimal texture, allowing other stitches to stand out. For an unfuzzy edging That discreetly stabilizes, a single crochet is a go-to choice.
3. Crab Stitch Edging
Also known as Reverse single crochet, the inventive crab stitch puts a novel spin on traditional single crochet edging. While regular single crochet progresses from right to left, crab stitch works the stitches In the opposite direction, from left to right. This unconventional approach results in a row that appears to twist, braid, and interloop.
Unlike a standard single crochet’s uniform, straight lines, the crab stitch takes on an organic covered shape with added texture and dimension. The rope-like woven pattern it creates Along an edge offers understated Visual interest without complicating the basic single crochet stitch. Crab stage beginners have a chance to familiarise themselves with single crochet while exploring creative variations. Its Simple innovation transforms an ordinary edging into a subtle statement.
4. Double Crochet Edging
For those seeking a faster, fuller edging than a single crochet alone, the double crochet edging is a great option. The double crochet stitch creates taller, Chunkier stitches that provide more coverage along the edge in a single row. Working consecutive double crochet stitches evenly spaced out gives the subtle ribbed texture. The orderly rows of dense block-like Stitches contain the edge securely.
Compared to single crochets of shorter height, double crochet edging has increased sturdiness and structure. Its Stability and quick construction make it ideal for beginners ready to move beyond single crochet. With its clean look, double crochet edging adds polish while allowing room for other stitches to dazzle.
5. Picot Edging
For an edging that adds a feminine charge, try a delicate pIcot stitch. Picots are created by chaining and then crocheting a single crochet stitch into the chain’s base. This forms an elegant looped knot along the edge. Working picots consecutively generate a beautiful, dainty scalloped Silhouette Resembling swirls and flounces.
The intricate loops provide eye-catching detail and interest without complicating the basics of the single crochet Foundation. Picot edging Is perfect for accentuating Projects meant for little girls, such as baby blankets, skirts, and sweaters. The notion and romance of picot scallops and flounces inject a playful energy. Picot edging can make any blankets or garment feel special and extra loved, elevating simple pieces into treasures.
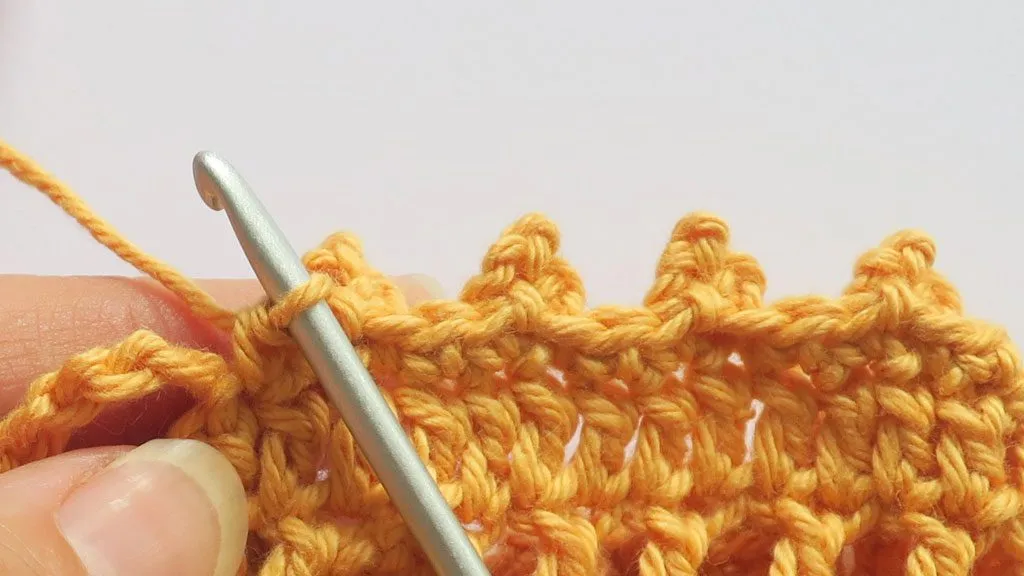
6. Reverse Shell Edging
The reverse shell edging creates visual intrigue through a series of overlapping crab stitch shells. This edging technique begins with a row of single crochet, forming the base for the shells. Next, work five double crochet into the next stitch to form the first shell. In the following stitch, work a crab stitch over the five double crochet to secure it. Repeat this sequence across the row, creating shells and Securing them with crab stitches. When finishing the shells, work two double crochet together to taper the end.
This edging has an organic wave shape from the overlapping shells. It works well for blankets with curved edges, adding Stability and structure. The dense scrab stitching keeps edges from curling. For best results, use a hook 1-2 sizes smaller than the project and maintain tight tension. The reverse shell edging Adds fascinating textural dimensional shells and crab stitch securing.
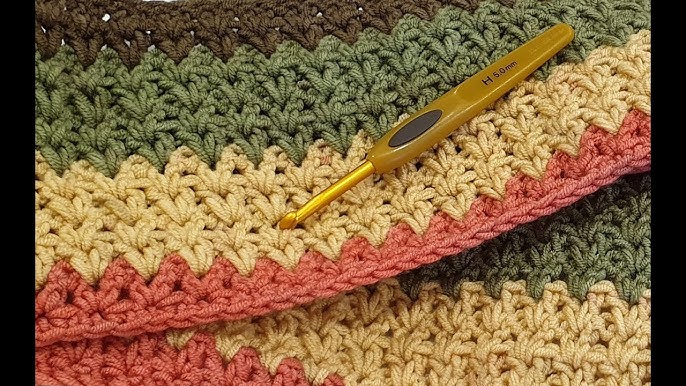
7. Wide Crochet Blanket Borders

Wide crochet borders open up design opportunities beyond basic edgings. Rather than a narrow row or two, extend your border to 4-6 inches wide or more. The ample blank canvas allows you to highlight more intricate stitch patterns as a decorative Focal Point.
For example, combine open work stitches like filet crochet with Tunisian crochet texture. Or alternate lacy patterns with bands of slip stitches for an ornate look. Wide borders also suit multicolor checkerboard designs. When planning a wide crochet Border, consider stage patterns that are danced to help balance highly stretching blanket fabrics. Maintaining a tight gauge will also prevent rippling. Allowing extra width allows you to get creative with crochet Textures and make your border a stylish statement.
8. V-Stitch Border
The v Stitch border works up quickly into beautiful, open work aging with lots of femininity and moment. To create this lacy effect, each v stitch is made by first Channing 3, then double Crocheting setting into the Next stitch. When walked across rows, these change stitches fan outwards, creating a delicate scalloped appearance along the blanket’s edge. The V’s open shape prevents stiffness.
For the best drape, Use a lightweight yarn like DK or fingering weight. Maintain a loose gauge and allow the V’s to fan properly. Varying yarn colors by row generates a striking striped effect. The V-stitch border’s beauty lies in its open, scalloped laciness.
9. Checkerboard Border
The checkerboard pattern border generates impressive visual impacts through bold blocks of color and texture. To create this graphic look, begin with a foundation row of single crochet. Then alternate blocks of contrasting yarn colors and stitches- chains for open blocks, single crochet for closed blocks. Varying the number and size of chain blocks allows you to customize the checkerboard proportions to your liking. For a 3D effect, switch between textured yarns like wool and cotton blends.
The chained spaces lend flexibility while the SC blocks anchor the fabric. Take care to maintain even tension and block sizes for best results. Get creative with multicolor checkerboard variations or oversized retro blocks. This high-contrast border lets you unleash fun color play and geometric style.
10. Basketweave Border
The basketweave crochet border authentically replicates the look of woven basketry through interlocking rows of front and back post stitches. Begin with a row of alternating front and back post stitches in One color. Then, work rows Of the opposite post stitches in contrasting shades. Linking the ridges forms The woven basketweave effect.
Using two colors is recommended to help distinguish between the sets of rows. Maintaining tight, Even tension preserves the woven look. Consider using textured wool yarn that mimics basket reed.
The basketweave pattern lies flat and is reversible, Making it an ideal edging for both sides, from single to triple crochet. The basketweave border brings a handcrafted woven aesthetic.
11. Herringbone Border
The herringbone double crochet stitch creates a distinctive zig-zag texture through intersecting front and back post stitches. To work this reversible edging, begin with a row of all front and back post stitches. To work this reversible edging, begin with a row of all front post double crochets.
The next row starts by double crocheting in the first stitch. Then, work front post stitches into the previous rows’ back posts and back post stitches into the front posts to form the crisscross pattern.
The zig-zag design lies flat and looks identical on both sides, making it ideal for stabilizing both edges of blankets. Its dense post stitches help prevent stretching and curling. For best results, maintain tight, even tension. Consider working with two colors to help differentiate between rows. The herringbone border’s crisscrossing ribs add a stylish finish with natural elasticity and structure.
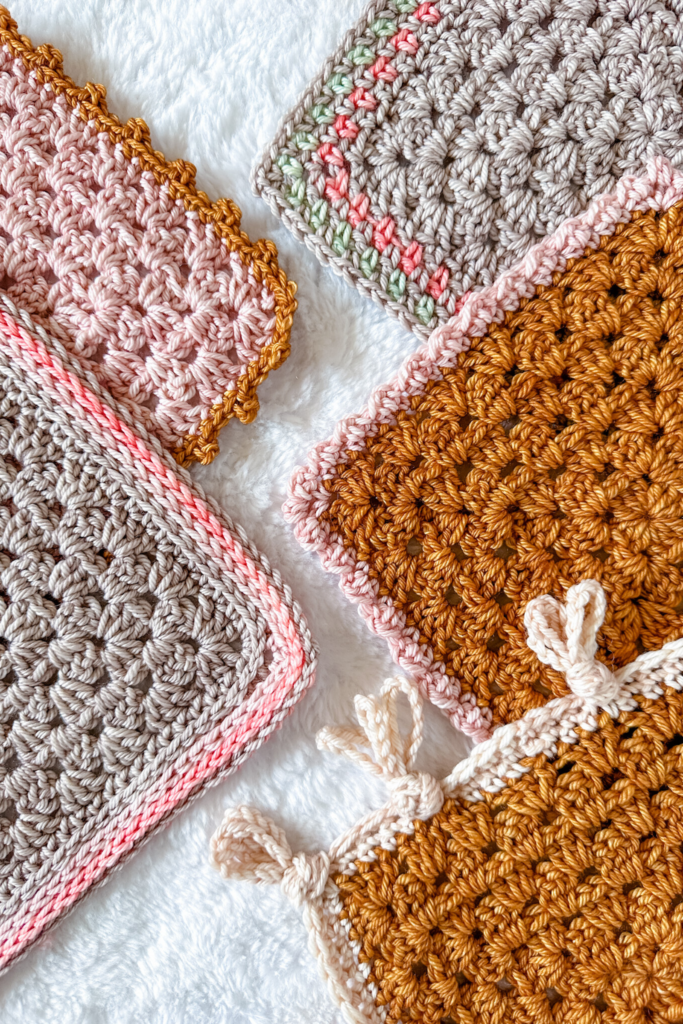
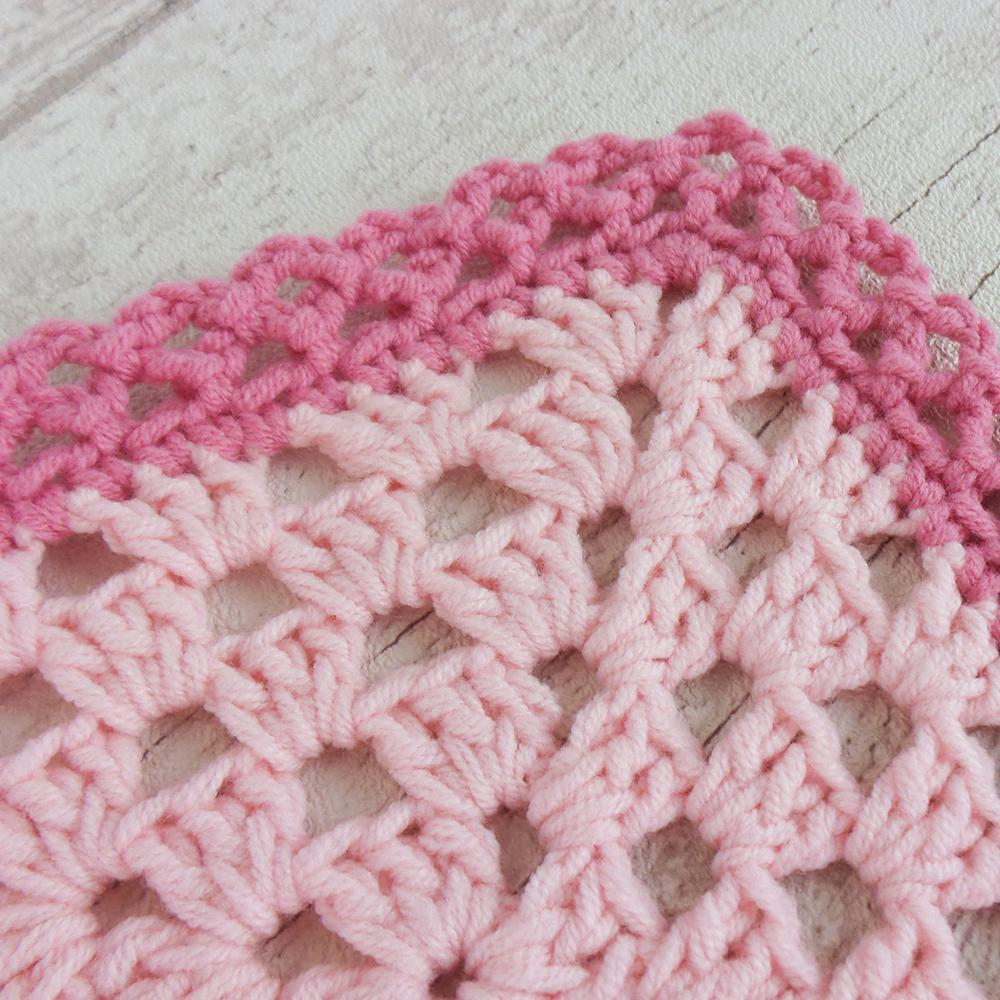
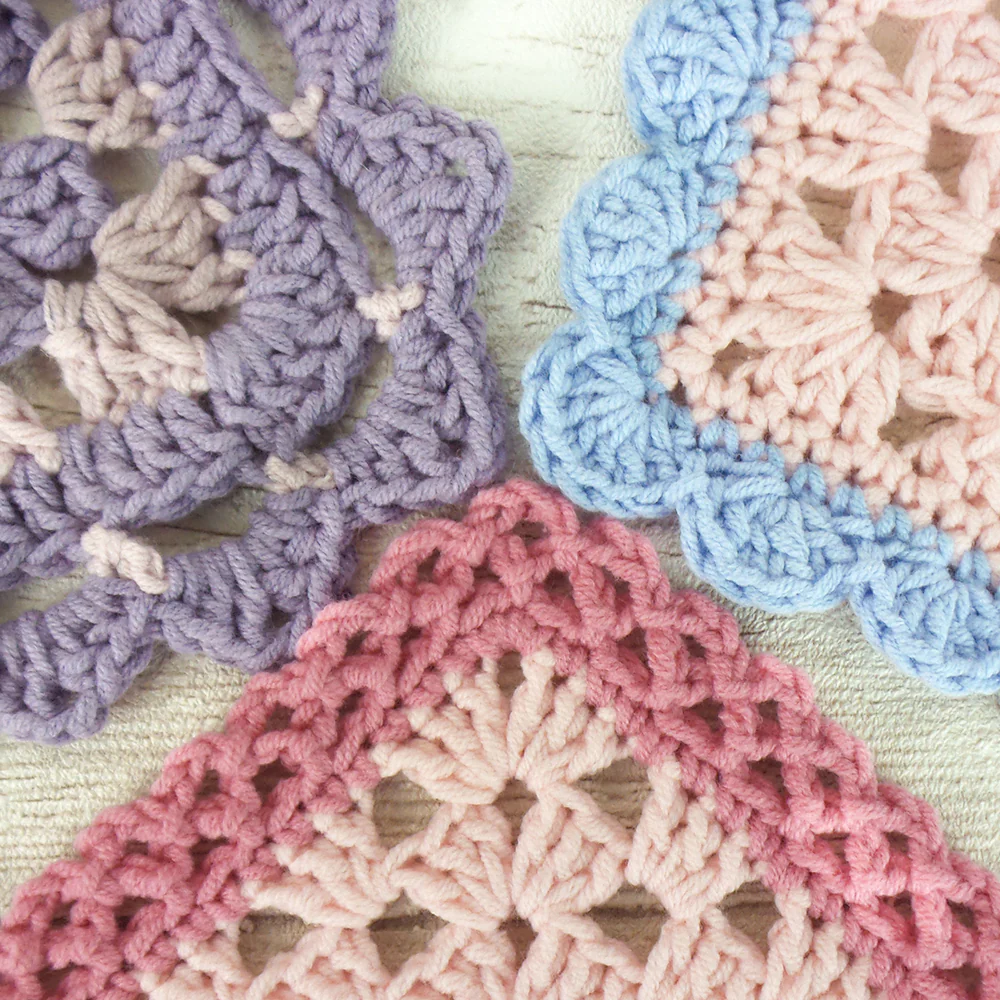
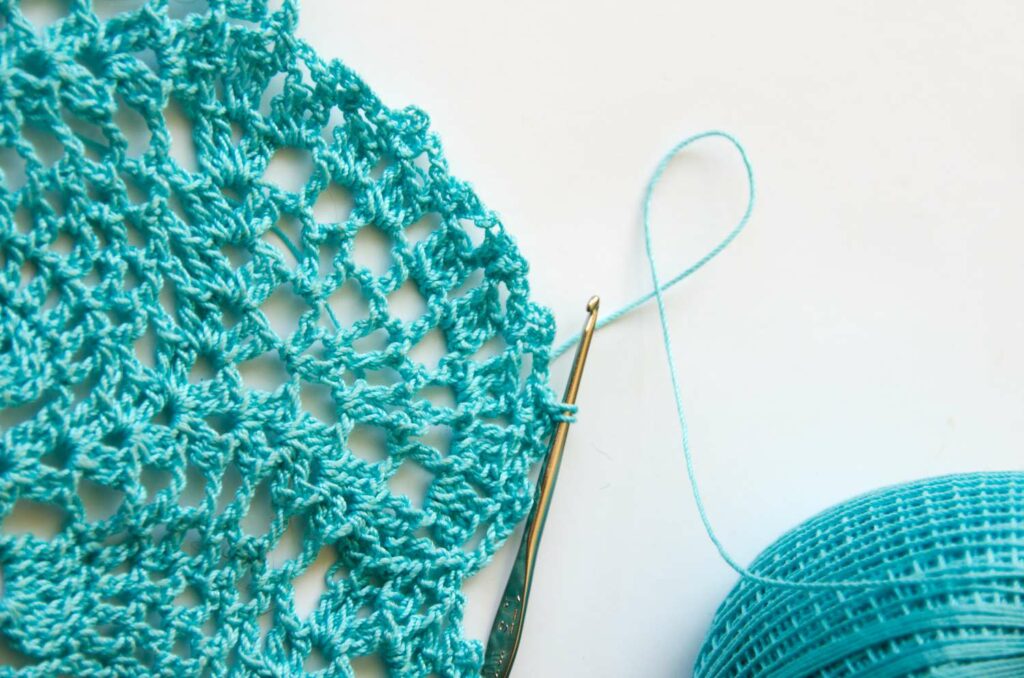
12. Crochet Lace Blanket Border
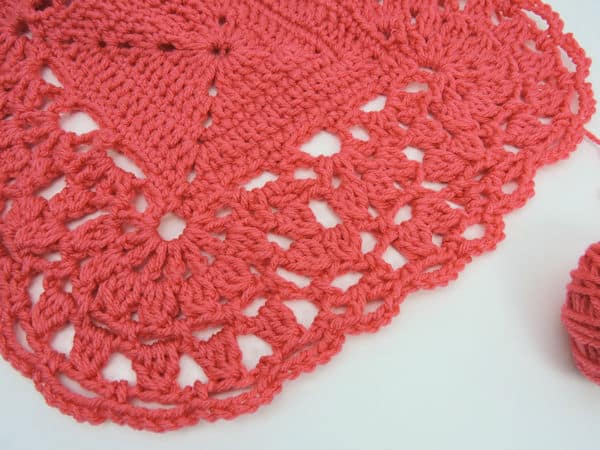
Delicate crochet lace edging infuses projects beauty and intricacy. They provide the perfect finishing touch for feminine blankets and wraps. Flora lace patterns like daisies, trefoils, and rosebud meshes add graceful beauty along the edges. For heirloom appeal, explore antique laces like Irish crochet and filet mesh patterns. Lightweight threads like crochet cotton help create an ethereal drape and intricate look. Crochet lace edgings require more time and skill but deliver stunning results. Each handmade stitch and artistic motif adds cherished charm and romance to your creation.
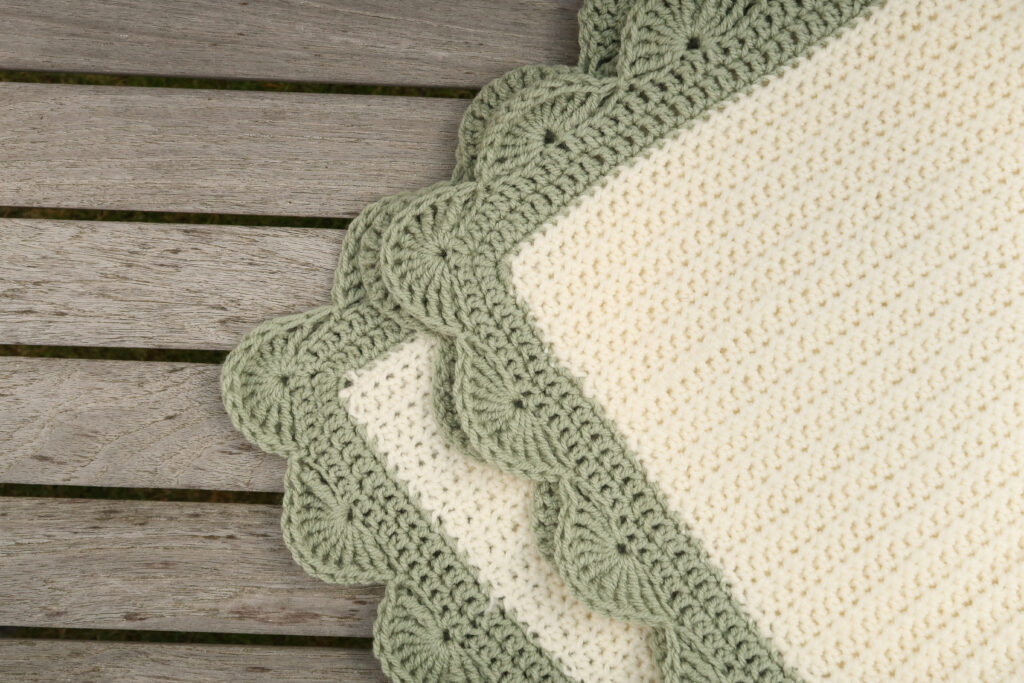
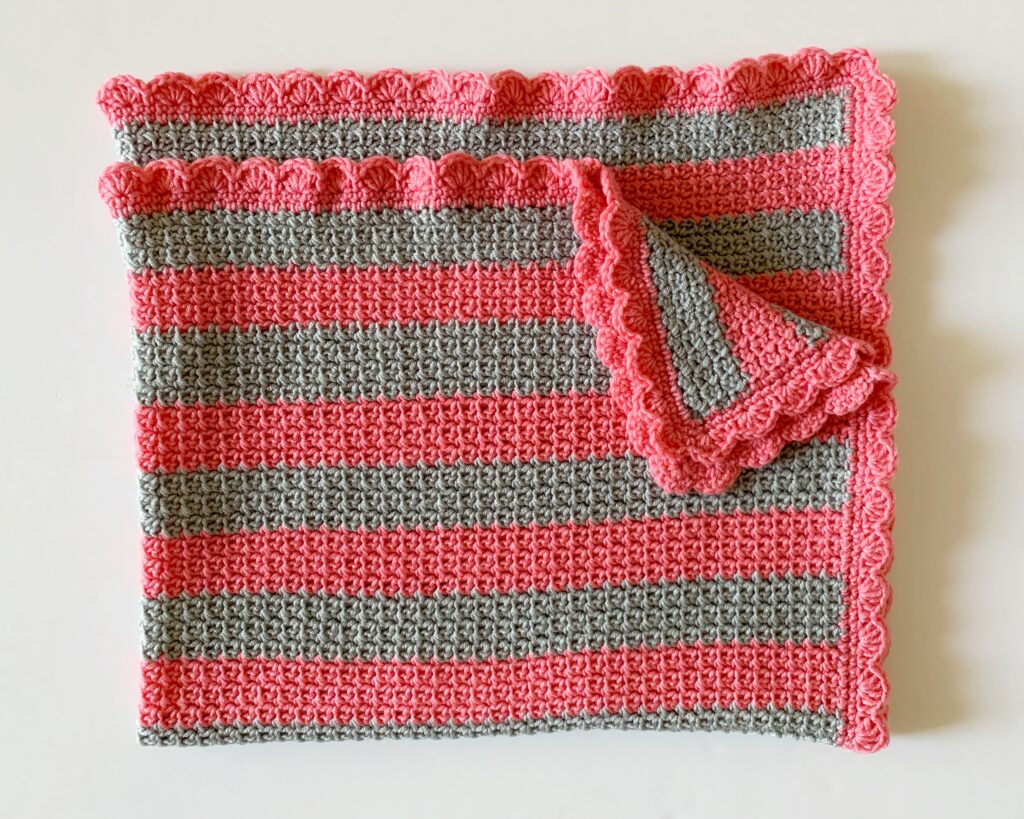
13. Scalloped Lace Edging
The scalloped lace edging brings ornate beauty to blanket borders with its delicate, flowing shape. This intricate edging begins with a foundation row of double crochet. Then, clusters are worked into chain loops to form the scallop bases. More chains connect each scallop, resulting in a wavy, vine-like appearance resembling blooming flowers. The layered cluster and loops help disguise unevenness along the blanket edge for a polished finish. Crocheted in fine cotton threads, the scalloped lace border has an heirloom look. Each detailed stitch results in an elegant and romantic vintage-inspired edging.
14. Flower Bud Border
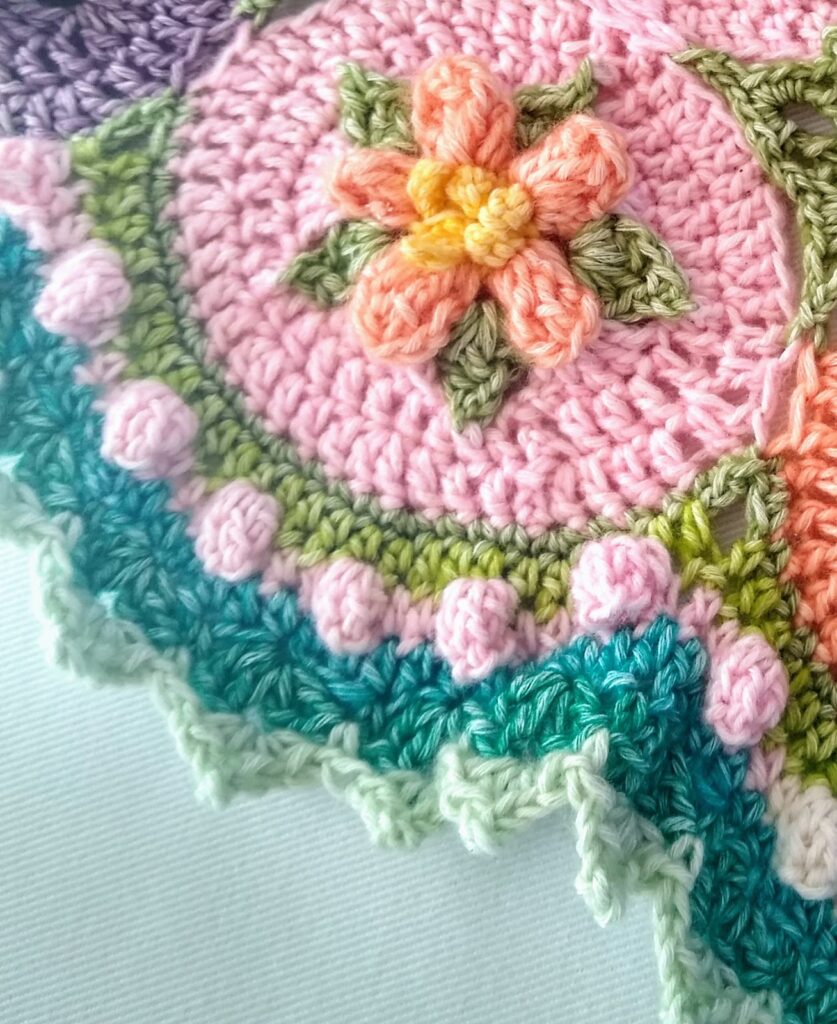
The flower bud border evokes images of nature with its delicate floral motifs. Each miniature bud is crafted from 5 chained petals secured together with a single crochet. Short post-stitch stems link each bud for an organic flow. Their petite size and spring-like colors perfectly capture the visual of flower buds sprouting up in sequence. Worked in fine threads, the flower buds have an ethereal, lifelike quality. Their dainty nature makes this border ideal for light, airy blankets. The flower bud edging brings sweet feminine charm through its nature-inspired blooms.
15. Rose Border
For timeless flower appeal, the rose border delivers with its intricate blooms. Each individual rose is sculpted through densely clustered stitches and wrapped petals. Trailing leaves, stems, and lazy daisy filler stitches complete the floral motifs. Worked in threads and softened pastels, the roses take on a romantic, faded beauty perfect for shabby chic style. The detailed stitchwork results in realistic dimensional roses. Few other floral borders capture old-fashioned romance as beautifully as the rose design. Its flowers are truly the start of the show.
16. Pineapple Border

The pineapple border brings tropical flair through cheerful repeats of the pineapple motif. To craft each lace pineapple, work chain loops into an oval shape reminiscent of pineapple segments. Flaking fan stitches mimic the spiky leaves. Decorative picots join each fruit for continuity. Keeping the pineapples open and airy maintains a lightweight, summery look. Crocheted in breezy cotton yarn, this border evokes sunshine and the tropics. The lacieness gives traditional pineapple motifs an updated, elegant spin. Fruity and feminine, this is a lively edging for accenting summer crochet projects.
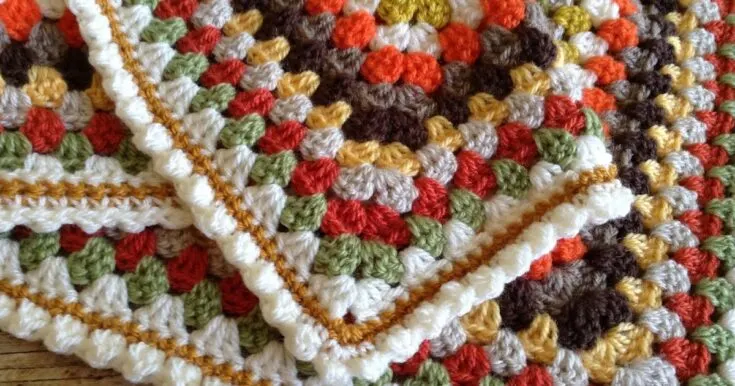
17. Fancy-Edged Granny Square Blankets
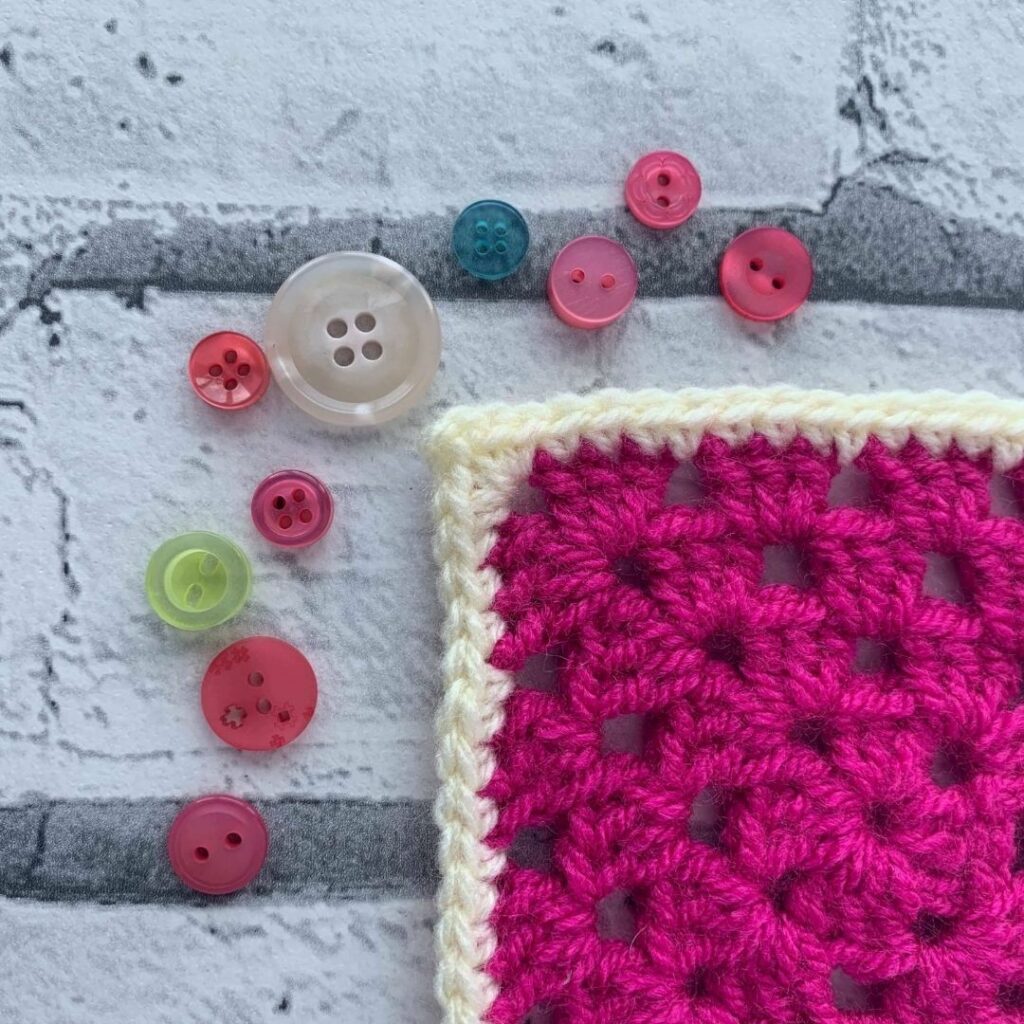
Granny square blankets offer the ideal canvas for showcasing decorative crochet borders. The eclectic mix of granny motifs pairs beautifully with elaborate edging like lace, shell, or post-stitch patterns. The border helps unify the square into a cohesive blanket while adding extra embellishment. Fancier edging also helps counterbalance the casual, patchwork squares with more refined details. Allowing a wide border provides ample room for intricate patterns to shine. Embellished granny square blankets let you highlight your most prized edging stitches in a fresh, modern way.
18. Scallop Border
Scallop crochet borders pair beautifully with granny square blankets, thanks to their playful shape and visual rhythm. Working repeated shell or V-stitch scallops in a contrasting color around the assembled squares provides definition. Each dip and swell of the scallops outline the motif while blinding them together. Leaving little chain spaces between the scallops maintains an open, lacy look. The scallops also counterbalance the straight edges of the squares with organic movements. Scallop edging on granny square blankets adds harmonious unity and carefree charm.
19. Clover Border
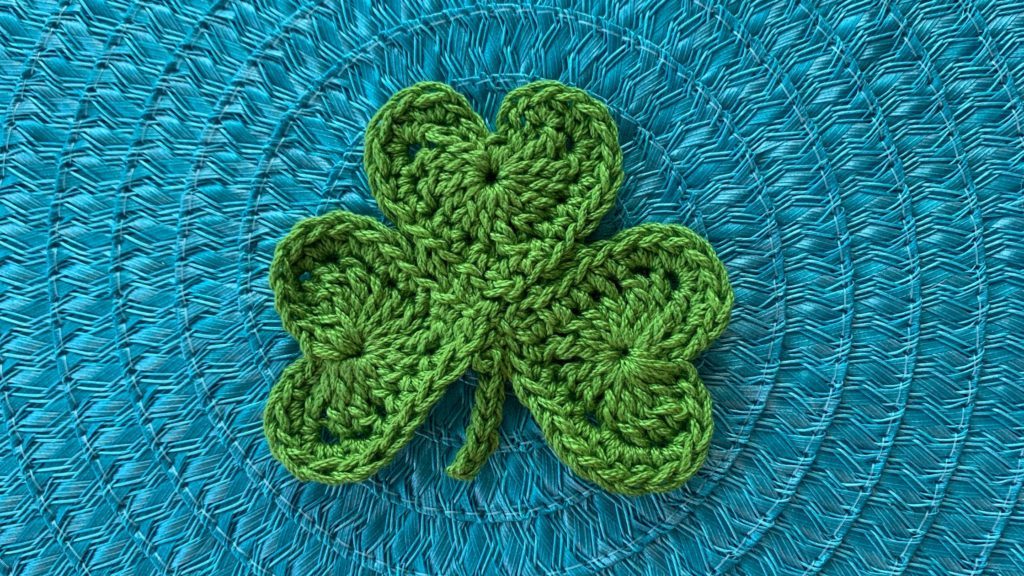
The whimsical clover borders put a playful spin on finishing granny square blankets. Each clover leaf contains a v-stitch worked in one color and a picot in another for contrast. Clustering groups of clovers together form the recognizable four-leaf shape associated with luck. Varying the clover colors adds to the cheerfulness and creates a confetti-like frame around the blanket. The clovers’ organic shape and rainbow colors compliment the mix-and-match granny squares for a lively patchwork look. A clover border promises happiness and harmony for crochet creation.
20. Star Border
For an old-fashioned flair, a star border is a perfect picnicking partner for granny square blankets. Crocheting five-point stars in red, white, and blue provides retro appeal. Clustering stars tightly creates a fun bunting effect around the squares. Or make mini stars and use them to accent square corners. The stars’ straight lines and geometric complement the granny blocks’ structure. A star edging gives granny square blankets nostalgic charm – ideal for kids’ blankets showcasing the night sky.
21. Zig-Zag Border
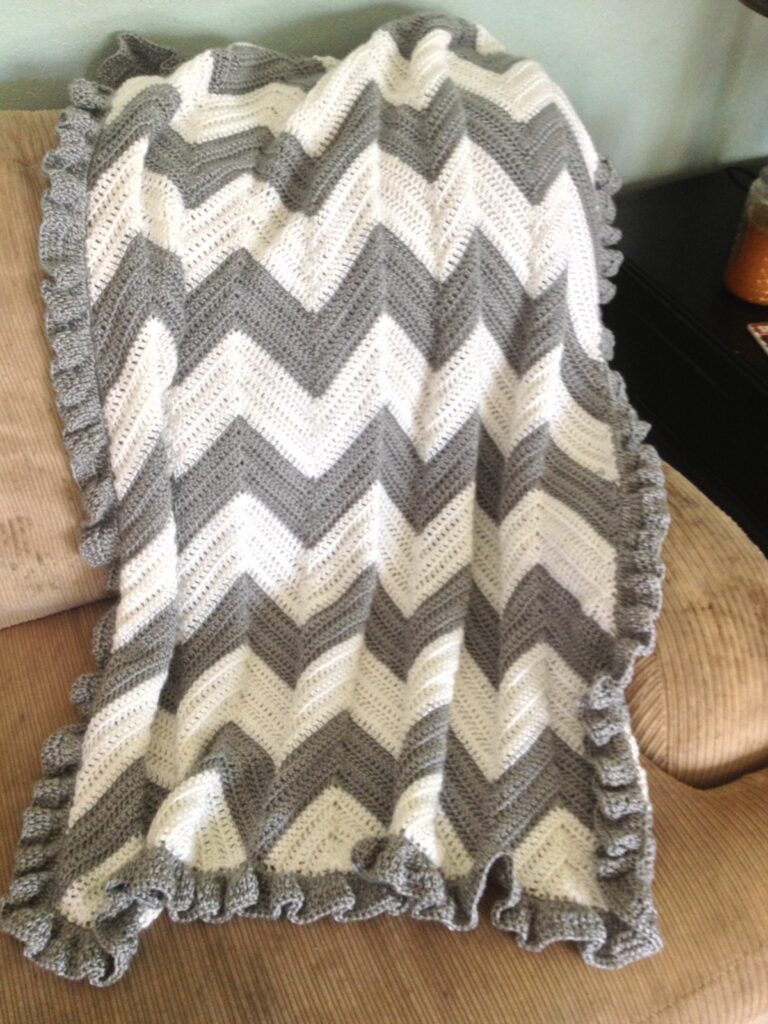
The zig-zag crochet border evokes groovy 1960s style with its energetic angles and vibrant colors. Formed by repeats of staggered mini chevrons, the zig-zag appears in motion, creating visual dynamism. Working the border in bold mod hues like magenta, dandelion, and teal enhances the psychedelic effect. The organic zig-zag shape injects lively spirit into granny square blankets. It modernizes its look with its graphic, angular pattern. A zig-zag edging imparts far-out flair, turning granny squares into funky works of retro art.
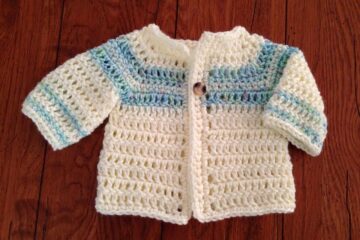
22. Crochet Baby Blanket Borders
Welcoming a new baby is the perfect occasion for crafting a treasured handmade blanket accentuated with a special crochet border. Whether it’s for bouncing baby boys, darling baby girls, or surprise arrivals, selecting a border pattern packed with meaning takes a blanket to the next level. From dainty floral edgings for girls to textured ribs for boys, crochet borders let you customize with colors, stitches, and themes meaningful for the baby. Read on for our top picks of beloved borders to make baby blankets truly heartfelt and unique.
23. Shell Border
The shell stitch border brings sweet femininity to baby girl blankets with its delicate, floral-inspired look. The rounded, overlapping shells resemble flowers, adding beauty and softness fit for a princess. Working extra-long shells creates an undulating, cloud-like shape, perfect for securely swaddling up baby girls.
Crocheting the shells in pastel hues like pink, lavender, and aqua enhances the romantic vibe. The shell edging’s edging flowers and fluidity infuse baby blankets with charm and nurturing care for new baby girls.
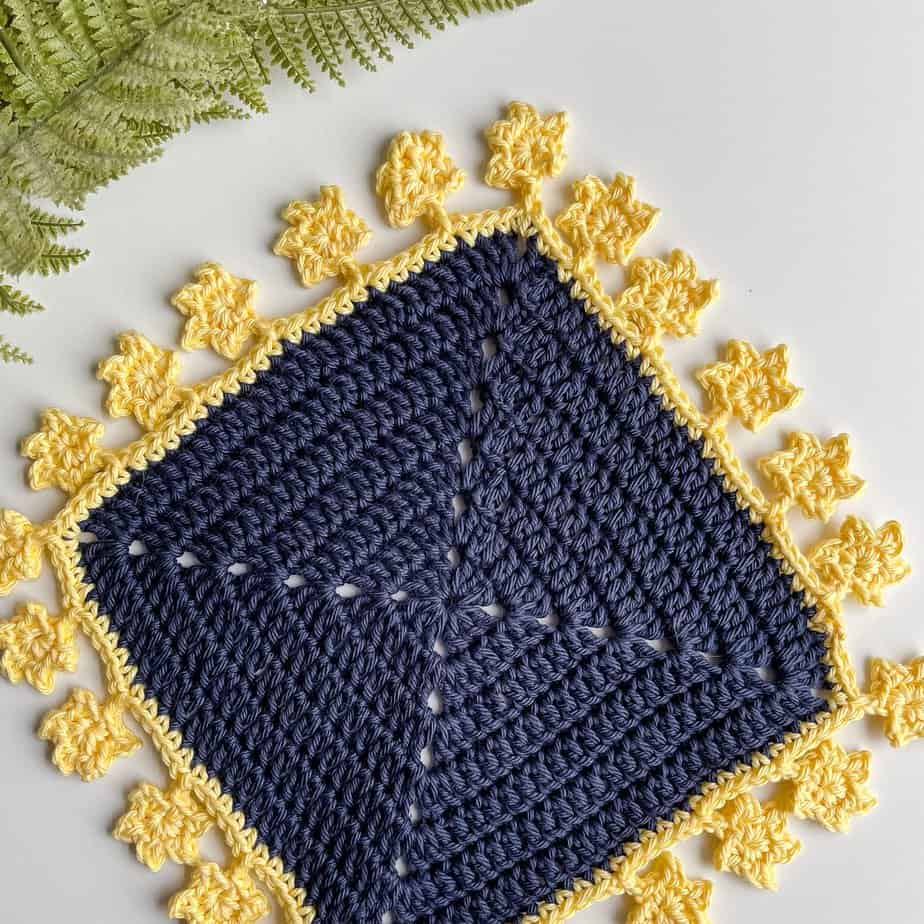
24. Star Border
Since star designs are so versatile, they make great unisex crochet borders for baby blankets. Work it in blue and white for boys or pink and white for girls. The textured look is also tactile for little hands. The star stitch mimics the look of woven baskets with its interlocking rows. This makes it the perfect textured edging for baby blankets. Worked up in the traditional pastel palette, a star border lends a sweet vintage vibe. But the reversible stitch pattern also shines in bold or neon hues for a modern color-blocked look. Extend the blanket’s main stitch pattern right up to the edge for a coordinating frame. Keeping the border narrow (just a few inches wide) prevents it from curling. The star’s interlocking rows are irresistibly touchable for the baby’s sensory development.
Tip: Always select a crochet hook at least one size smaller than suggested on the yarn label when making borders for babies. The tighter gauge creates a less holey, more secure edging.
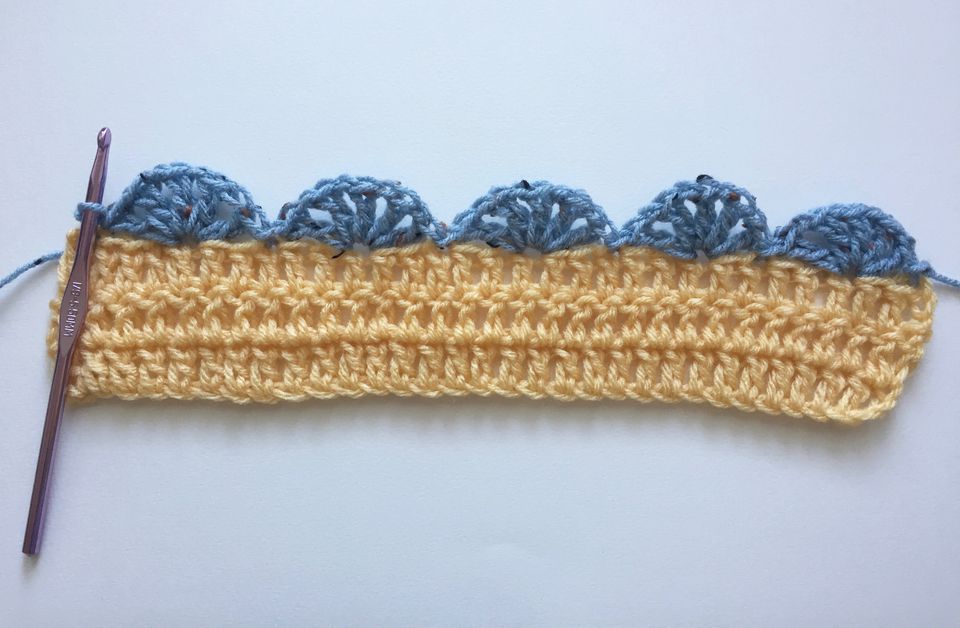
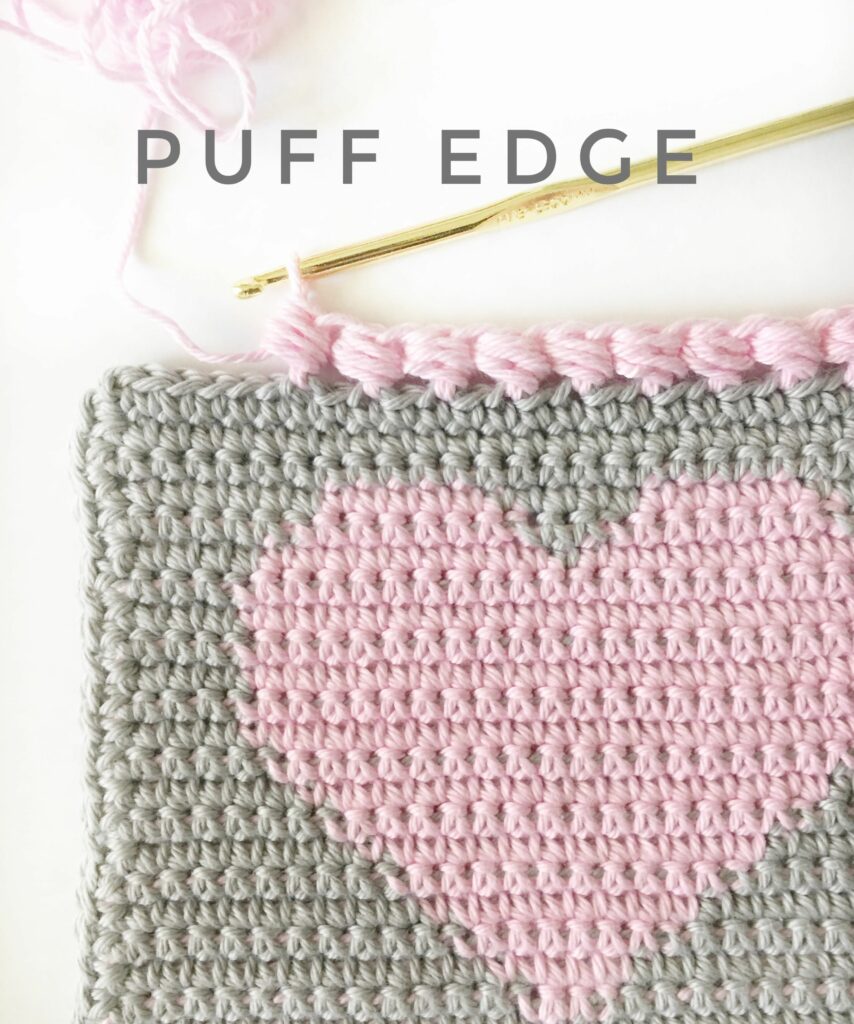
25. Bobble Wave Border
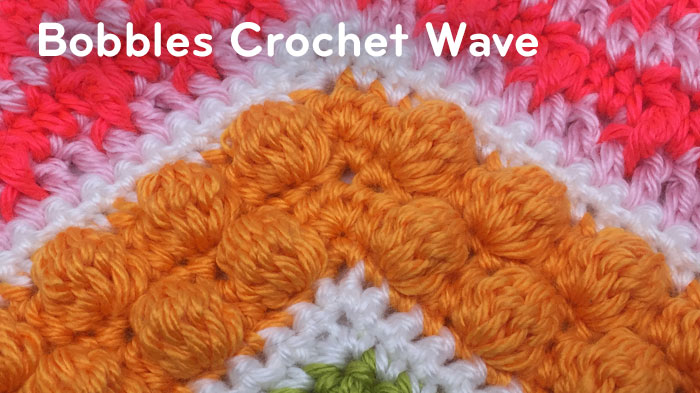
The bobble wave border captures the motion and rhythm of lapping ocean waves. To create the wave effect, the border is worked lengthwise in undulating rows that rise and fall. Alternating between two bobbles – the standard bobble and loop bobble – adds diversity in shape and texture. Choosing shades of blue and turquoise enhances the oceanic motif. The bobbling mimics sea foam topping the crests. Both playful and pacifying, this border is perfect for a baby’s aquatic adventures, real or dreamed! The bobble-wave border brings the serenity of the sea to the nursery.
26. Rolling Bobble Border
The rolling bobble border creates visual dynamism and texture through its overlapping, rolling bobbles. Rather than lining up in obvious rows, the bobbles are worked in a scattered sequence that flows organically. This makes the surface appear lively and mottled. Working in a solid color allows the dimensional bobbles to take center stage.
The active, rolling effect pairs nicely with calmer blanket patterns. The puffed texture adds cushioning for coziness. Energetic yet soothing, the rolling bobble border delivers animated softness to blanket edges.
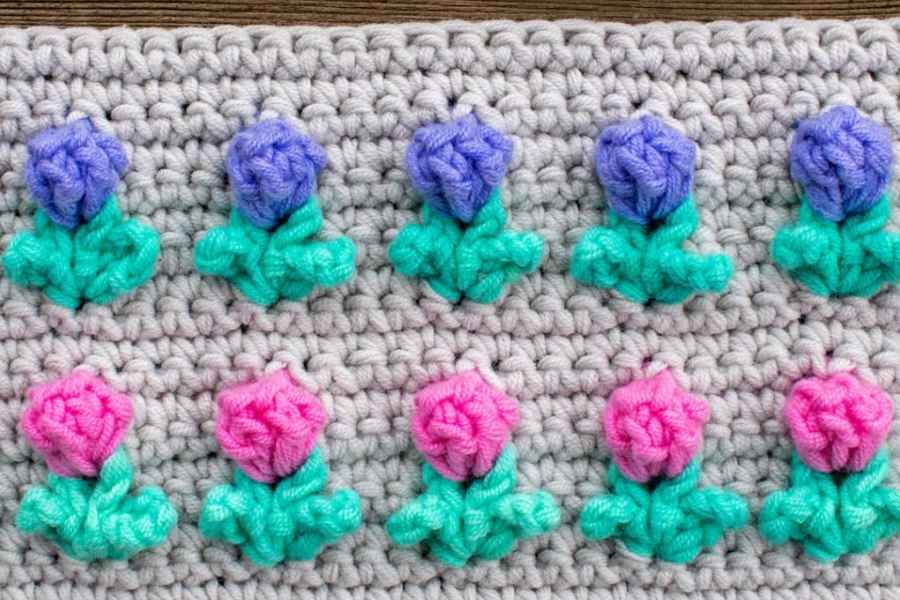
27. Bobble Flower Border
For a clustered bobble pattern, try this floral border. Each flower motif consists of 5 bobbles joined together to look like a daisy. Leaves and chains connect each bloom. It’s a fun-dimensional edging for kids and teens.
Fun, dimensional bobble flowers adorn this playful border. Each flower motif comprises 5 bobbles linked together to form a charming crochet daisy. Single crochet leaves filled with chains connect each 3D bloom. Worked up in bright, happy colors, this tactile edge is perfect for kids and teens. The clustered bobble flowers add loads of texture and visual interest along the sides of a blanket. Keep stitches loose to maximize the pom-pom-like effect of the raised bobbles. Varying the color placement in each flower prevents monotony and keeps this border exciting to work up. The whimsical blooms make a blanket extra fun to cuddle under and touch.
Tip: Bobbles have a tendency to draw in crochet fabric and cause waviness. Counteract this by working your bobble edging with the same size hook and yarn as the blanket body or going up a hook size.
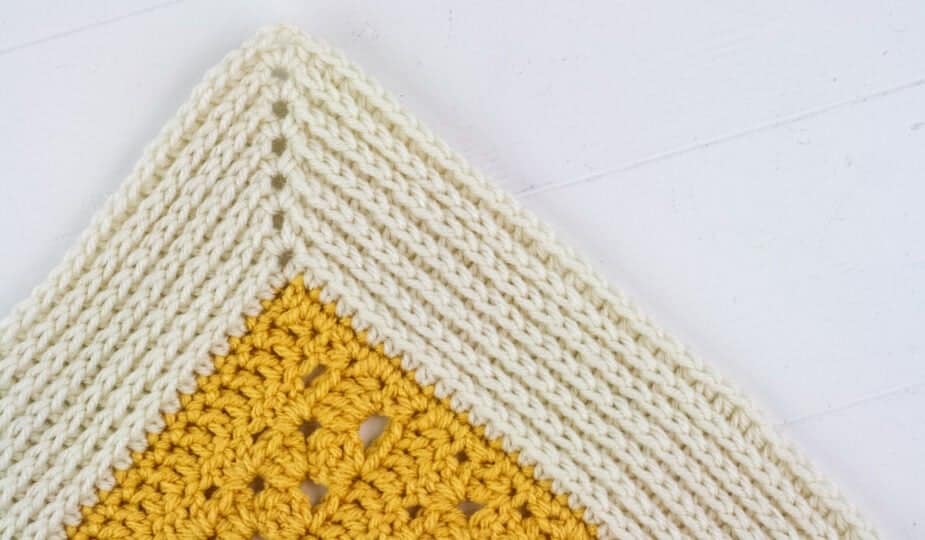
28. Clever Crochet Blanket Corner Borders
When planning a crochet blanket border, careful thought must be given to how the edging will gracefully turn the corners. The intersection of perpendicular borders requires angles and spacing tailored to the stitch pattern. Some clever crochet borders incorporate specific corner stitches to tie things together seamlessly. Using techniques like mitered corners, overlapping shells, or linked clusters, crocheters can finesse flawless blanket corners. Well-executed corners finish off your handcrafted blanket with professional polish. Read on for brilliant examples of ingenious crochet corner borders.
Conclusion
Adding a crochet border or edging is the perfect way to put the finishing touch on your blanket project. Whether you want a simple, clean finish or an elaborate decorative accent, there are so many options to choose from.
The borders showcased here, from delicate picot edging to textured bobble borders, prove that you can find an edge treatment to complement any blanket style.
When selecting a crochet blanket border, think about the overall look you want to achieve. A bold geometric pattern calls for a straightforward single or double crochet border, while a feminine baby blanket deserves an extra dose of whimsy with ruffles or flowers.
Consider width also; a wide border can become a statement piece, while a narrow edging subtly neatens edges. With the range of creative ideas here, you’ll discover the ideal border to complete your crocheted creation.
Your finished blanket will look polished, professional, and ready to love for years to come.