Are you currently working on a crochet project? Want a unique pattern to make the edges eye-catching? Then, a simple crochet shell border pattern can be a great option. Crochet shell borders are easy to create and look fabulous.
Also, it is suitable for beginners and intermediate levels. You can use shell borders on several crochet items to make them look more interesting.
Also, if you are into crocheting, you will understand the importance of a unique pattern at the edges of crochet works. Incorporating a suitable border will help your crochet items stand out. It can make a simple crochet item incredible.
Here, we will share all the essential details about the simple shell border, from what it is, how to do it, variations, and more. So, let us start exploring.
What is a Simple Shell Border?
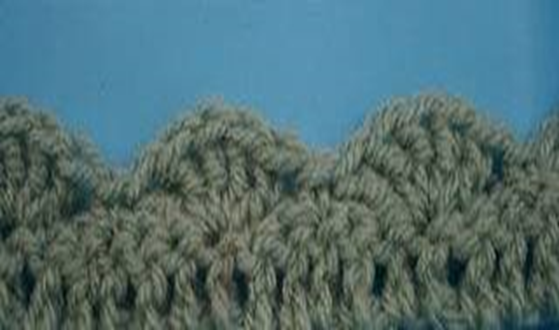
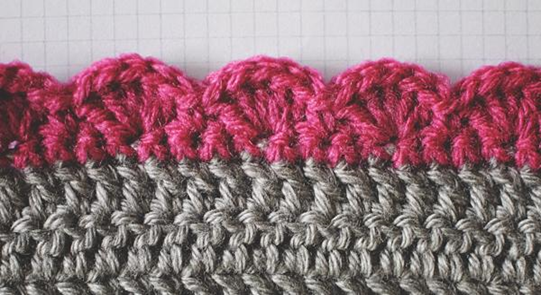
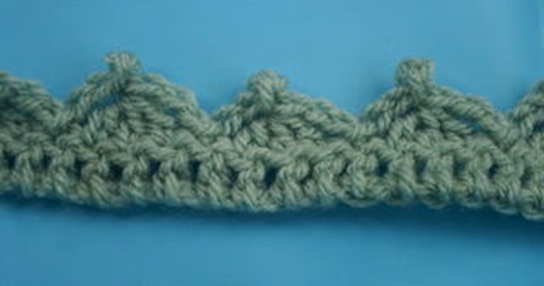
Before we learn how to crochet shell border patterns, we will discuss what a shell border is in crochet. Crochet shell borders are known as scalloped edges for their appearance. They look like the edges of sea shells or scallops.
The shell stitch is easy and gives your crocheted item a lovely finish. You can work a shell stitch with the same yarn you used for the project. Also, you can add to your existing colorwork by adding a new yarn. This simple yet elegant design never goes out of trend. Simple shell borders create a no-fuss and effective edge for your crochet project.
Abbreviations
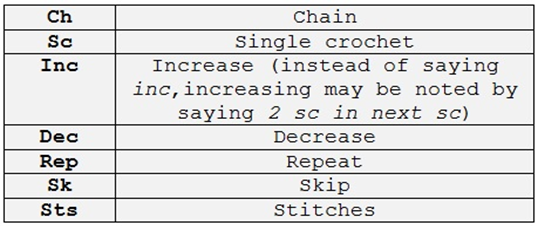
If you want to learn about the crochet shell border, then you need to follow the instructions properly. Here is a list of abbreviations to make it easier to follow the instructions for crocheting shell stitch-
- Ch- Chain
- St – Stitch
- Sts – Stitches
- SC – Single Crochet
- DC – Double Crochet
- TC – Triple Crochet/Treble Crochet
- Sl St – Slip Stitch
- Tog- Together
- BL – Back loop
- FL – Front Loop
- Sk – Skip
- rpt – Repeat
- MC – Main color
- CC – Contrasting color
Materials for Crocheting Shell Border
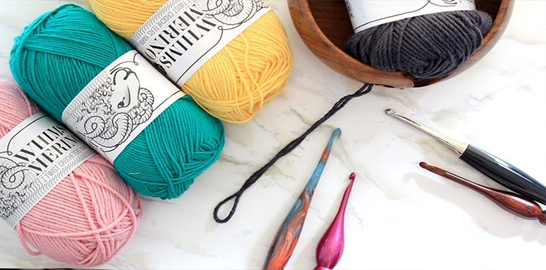
To get started with your crochet shell border stitches, you need to arrange all the materials needed for this crochet project. Having all the essential materials and tools right before you will make it easier to begin. Here is a list of tools and materials you need for crocheting shell borders –
Yarn: Yarn is a must for any crochet project. For shell stitch, you need premium quality yarn of one or two colors (if you want to make the border different from the base). You can take as much yarn as you need, depending on your project size. Remember, if you are crocheting an item for kids, choose soft and skin-friendly materials for the yarn, like cotton, bamboo, and grass. Try OCD Bargain Premium Acrylic Yarn for a high-quality finish.
Crochet hook: You will also need a crochet hook for the shell stitch patterns. You can choose any material and size for your crochet hook per your project needs. The standard hook required for this project is a 5.5 mm crochet hook. But you can also use a bigger hook to crochet a bigger shell border. You can also use the Woobles Crochet Kit for beginners for your crochet projects.
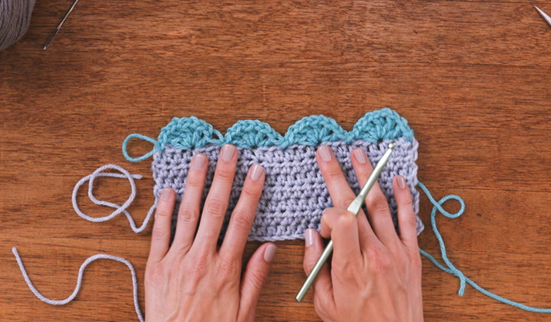
Essential Notes to Adhere While Crocheting Shell Border
Crocheting shells or scalloped borders are easy and ideal for beginners or advanced beginners. You can use them for various crochet items as they offer a delicate, clean design and are easy to create. You can try multiple shell stitches across the border to create beautiful edges for your crochet projects. Also, if you want, you can opt for single-row edging around the border.
This crochet stitch is designed for crochet projects with multiples of 6+1. For example, if you are working on 61 or 31 stitches across the row. Also, you can cheat the edging a little if you want to incorporate scalloped or shell stitches in any other crochet project.
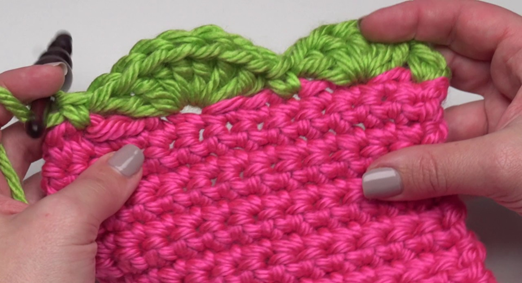
Detailed Guide to Simple Crochet Shell Borderwith Abbreviations
Shell stitch borders are easy to learn, and you can do it with minimal materials and a basic crocheting skill set. The simple crochet shell border uses single-crochet and double-crochet stitches to develop a beautiful shell pattern at the edges. Follow this shell stitch instruction to create interesting shell edges-
- Round One: Ch a 6+1 for the first chain. Sc in the 2nd ch from your hook. Sk 2 chs and then dc in the next 5 chs. Sk 2 chs and sc in the next chain. Again sk 2 chs and dc in the following 5 chs. Rpt to last 5 sts and sk 2 chs again. Sc in the last ch and turn. This method will help you create a crochet shell borderblanket.
- Round Two: Row two is similar to the first one, as you will still work on scs and shells. But in row two, you will begin with a half shell. Ch 3 (this count as a dc) and 2 dc in the beginning sc. Sc in the center dc st of the following shell. Work on 5 dc of the next sc. Rpt the process in the last sc. Now crochet 3 dc in the last sc of the earlier row and turn.
- Finish It: Finishing the stitch or row three is a repeat row like row two. Now, begin with ch 1 and sc in the first dc. Work on 5 dc in the following sc and sc in the center dc stitch of the next shell. Rpt this to finish the stitch by working on the last sc in the turning ch.
Crochet Simple Shell Border with Different Variations
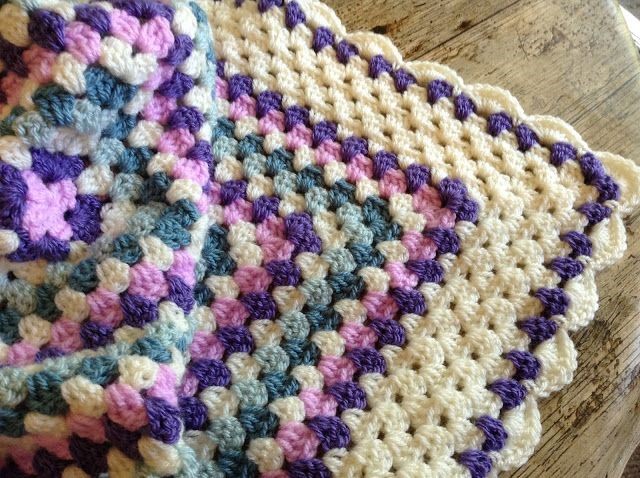
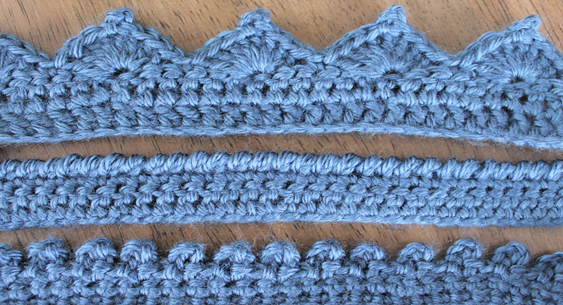
The crochet shell or scallop border is a classic design that can never get too old to use. There are many variations of crochet shell edging. Here, we will discuss three primary variations of this beautiful stitch- large, small, and triangle. You can use any of these scallop border variations to make the edges of your cardigan or blanket look neat and beautiful.
1. Large
For a large shell crochet border, create your base row, ch 1, and sc into the first st. Sk 3 chs, 7 treble into the next st, sk 3 and sc into the following st. Rpt the process.
2. Small
For a small crochet shell edging, prepare your base row and then make ch 1. Sc in the first st. Sk 2 sts and 5 dc in the next sts. Again sk 2 sts and sc in the next st. Rpt this process.
3. Triangular
First, prepare your base row and then work on it. For the triangular crochet shell border, sl st into the first st. Ch 2, dc 3 together into the following three sts, ch 2 sl st into first of the 2 chains. Again ch 2 and sl st into the following st. Rpt the process to finish the design.
The Usage of Simple Shell Crochet Border
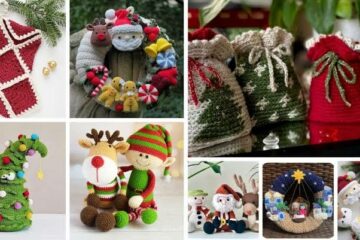
The shell stitch is quite popular in crocheting for creating beautiful borders. The scalloped edges look stunning and go well with various crochet items such as scarves, beanies, blankets, and more. Here, we will list some popular uses of simple crochet shell border design-
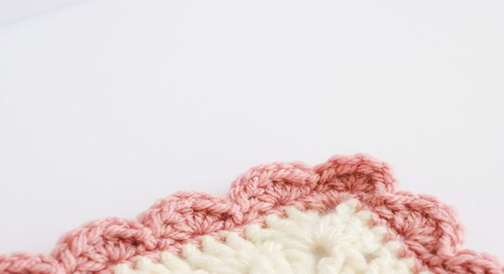
- Cardigan: We all love cardigans, whether they are knitted or crocheted. If you are also a cardigan lover, you will know how beautiful the scalloped edges can look on the cardigans. You can use scalloped edges for making specific edges of your cardigan, like collar or sleeves. Also, you can use scallops or shell stitch borders for the entire cardigan.
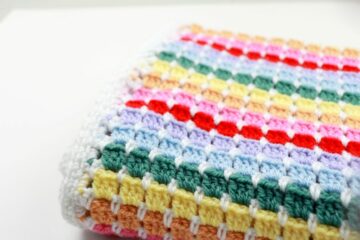
- Blankets: Crochet blankets are popular for their soft, comfortable, and homely touch. Adding a scalloped or shell border to your plain crochet blanket can make it more interesting and aesthetically pleasing. The shell pattern at the edges will make it more classy and beautiful. You can make shell border blankets as a fun project that would take one to two weeks, depending on the size.
- Scarves: Shell-edged crochet scarfs are pretty trendy. They look beautiful and eye-catching. Scalloped or shell-bordered scarfs are ideal options for gifting. You can gift them on Thanksgiving, birthdays, anniversaries, or family get-togethers. Also you can make one for yourself as well. Plus, you can try different variations of the shell stitch to make your crochet scarfs unique.
- Rug: Another popular use of simple crochet shell border patterns is on crocheted rugs. The small shell borders look great on almost every type of crochet rug. You can incorporate the shell stitch border in any type of crochet rug as they blend well with almost every pattern and design seamlessly. Shelled border rugs look beautiful, and you can place them in the study, living bedroom, or semi-outdoor spaces like a patio, outdoor kitchen, or living.
- Crochet Shirt/Frock Edge: Shell stitch borders are also a good option for crochet shirts and dresses. Not only that, crochet little girl dresses with shells or scalloped borders are very trendy these days. You can use scalloped edges for your crochet shirts or dresses to give them a dynamic look. Adding shell stitch borders at the edges can make your crochet frock and shirts more beautiful.
- Pillowcase: Crochet shell border patterns are simple yet elegant. They look great on almost everything, including pillowcases. Also, if you are trying a simple shell stitch for the first time, then a pillowcase will be a good option. Crochet pillowcases with shell borders are perfect as they are small projects and simpler than a cardigan or dress.
- Placemat: Shell borders also look great on crochet placemats. Adding a scalloped edge to your placemat will help you give a beautiful finish to your crochet project. Also, if you are looking for a small project, then it is an ideal option to try. Shelled border placemat suits beginners, and you will make it within 2-3 days. If you want to take it to another level, you can use a new yarn for the border.
Other popular alternatives of shell border
The shell stitch is an amazing crochet border design. You can work a single or double-row stitch to develop this pattern. Also, several other alternatives of scalloped edge or border are easy to create and take only two-row stitch –
- Triangle border: The triangle border stitch looks similar to scalloped edges but is more geometric.
- Zig zag border: Another popular alternative to simple crochet shell borderpatterns is the zig zag border. It also uses single/double stitches and looks great.
- Picot border: Picot border is a popular alternative to shell stitch borders. It needs three chains (Ch), then one slip stitch (sl st) at the back loop (bl), and the border is ready.
Takeaway
A simple border stitch can make your crochet project fine to super interesting. A simple shell stitch is an ideal option to make your crochet projects more beautiful. It is a simple crochet border design that looks simple, elegant, and classy.
Also, the scalloped or shell edges are easy to create. You can work single or double crochet stitches to make the shell border patterns.
The shell stitch borders are popular with crochet items like pillowcases, blankets, cardigans, and crochet dresses/shirts. Here, we have discussed a comprehensive guide on crochet shell border patterns from what it is, the method of stitch, use, and popular alternatives. So, bring your crochet kit and try this beautiful shell pattern border for your crochet project.
Frequently Asked Questions
Is Crocheting Shell Border Difficult?
Beginners think that crocheting shell borders is difficult. But the crochet shell border is one of the easiest crochet borders. Once you check over the internet and search for different tutorials, you will find this is one of the simplest tasks you can complete easily. All you need to do is follow the steps, and voila!
Should I Use a Different Color to Crochet a Shell Border?
There is no rule about using different colors for crocheting shell borders. You can use one color to crochet shell edging. But a different color for the shell border can make your project vibrant. Any different pattern different from the regular one can create an enhanced visual effect. This contrasted color looks beautiful in the base row and over the shells.
How Do You Crochet a Half-Shell Stitch?
You might need a half-shell stitch to start the corner of a blanket (with shell edging). To crochet a half-shell stitch, ch 3 and dc into the same stitch or space. In the border section, you have to end the round area with the same 2 double crochet. Make sure it should be in the same stitch or space.