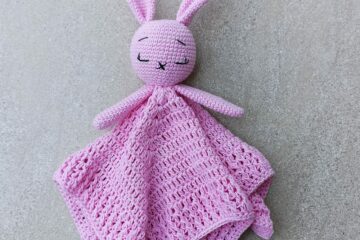
A craft that stands out for its enduring beauty. A unique charm in a world full of mass-produced goods. Crocheting is a technique that spans decades, weaving a thread of creativity and tradition through history. It can be used to make everything from delicate doilies to warm blankets. A piece of yarn becomes more than just fabric with each meticulously placed stitch; it becomes a symbol of the perseverance, talent, and strength of human hands.
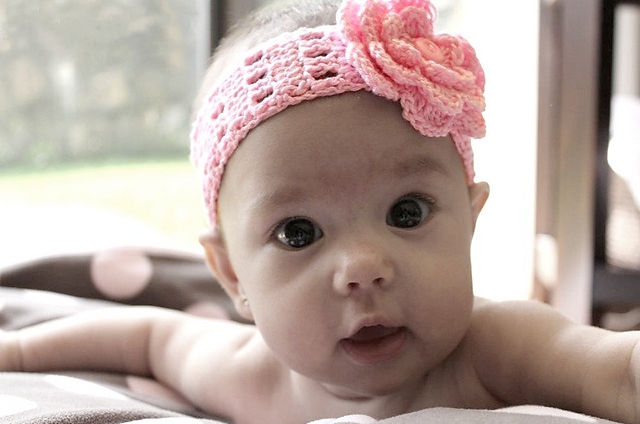
Now, you can turn that piece of yarn into adorable baby clothes and accessories using the traditional and adaptable technique of crocheting. A crochet fringe baby headband is the ideal craft if you are looking for something fun to make. It not only displays your crocheting and creativity powers but also produces a lovely baby accessory. If you are pregnant and you are looking for some fun things while waiting for your baby, then this article is for you!
Why Crochet Baby Headband?
Crocheting a baby headband is one of the cutest things you can create for your newborn. They can also serve as cute gifts if you go to someone’s baby shower because, let’s acknowledge that everyone loves a handmade gift!
And of course, if you are a new mother, you can surely use your spare time doing this fun task. Crochet Baby headbands are the new and hit baby accessories in the market mostly because you don’t need to throw a pile of cash on them. Just some crochet DIY materials, and boom! They enhance the cuteness of your baby and add the oomph elements to all the photoshoots you are looking forward to for your baby.
Plus, they help to keep your baby warm during the winter. Once your infant turns into a toddler, it will help to keep all the hair away from their face. So, don’t think this crochet baby headband is only a one-time affair. Your handwoven love is here to STAY!
You can discover how to make a stunning fringe baby headband by following the detailed instructions in this article. This tutorial promises creativity and fulfillment regardless of whether you are an expert crocheter or a beginner eager to pick up a new craft.
Quick Tips for Beginners Working on Baby Headband
The following are some pointers for crocheting a cute fringe baby headband:
- To make your baby’s headband comfy, use a soft, lightweight yarn.
- Pick a color that goes well with the clothes your kid is wearing.
- Stitching the headband for a small baby may require it to be a little larger to suit them as they grow.
- Instead of tying the baby headband at the back, you might use an elastic band to make it self-adjustable.
- Use a stitch marker to indicate the start of each row if you are a beginner. You can also keep track of your stitches and prevent errors by doing this.
- Make sure to tightly weave the ends so they don’t unravel after the finished work.
- For this project, you can use any color or kind of yarn. The number of chains you produce initially may need to be adjusted if you are using thicker yarn.
- The baby headband can be enhanced by adding a bow or another decorative element.
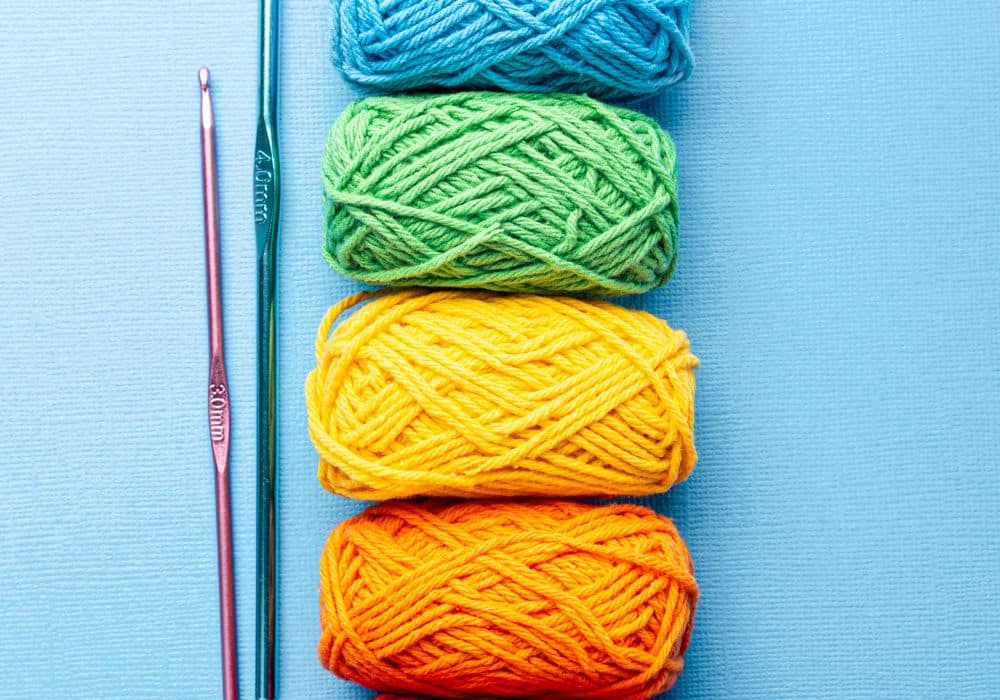
Materials Required for Baby Headband
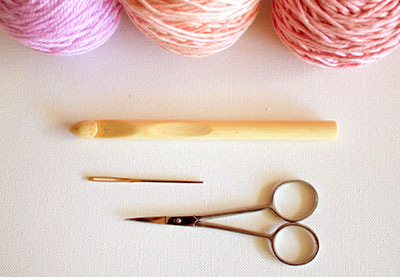
The following materials are required before you start this crocheting adventure:
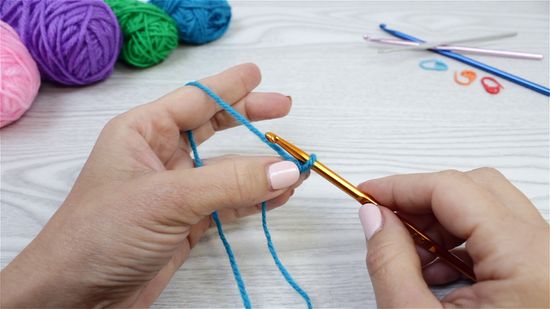
- Crochet Hook: To guarantee the proper tension balance, choose a Size G/6 (4.0 mm) crochet hook.
- Yarn: To match your preferences, use a soft, baby-friendly yarn like cotton or acrylic, both of which come in a wide range of colors.
- Scissors: Dependable scissors for making precise cuts.
- Tapestry needle:Tapestry needle is an essential tool for elegantly tucking in stray ends.
You can easily find all the crochet materials needed at Magic Needle and KnotsandKrafts. Apart from the above-mentioned online platforms, you can also buy the raw materials at your nearby stationery shops!
Step-By-Step Guide to Working on Baby Headband
Your lovely baby headband’s base is the key element. To build a sturdy base, adhere to these steps:
Step 1: Making the Foundation Chain and Slip the Knot
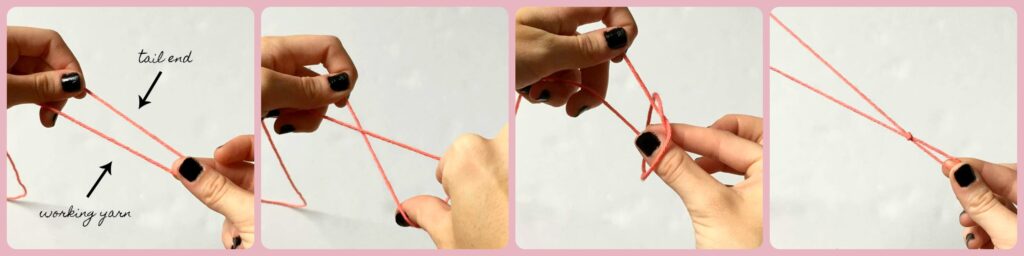
- Put a knot in the yarn’s end.
- Crochet a row of loops with a goal of 60 loops. We refer to this as a “chain.” It resembles the headband’s size.
- Make sure the chain is not twisted before creating a circle by joining the last and first loops.
Step 2: Crocheting the Baby Headband
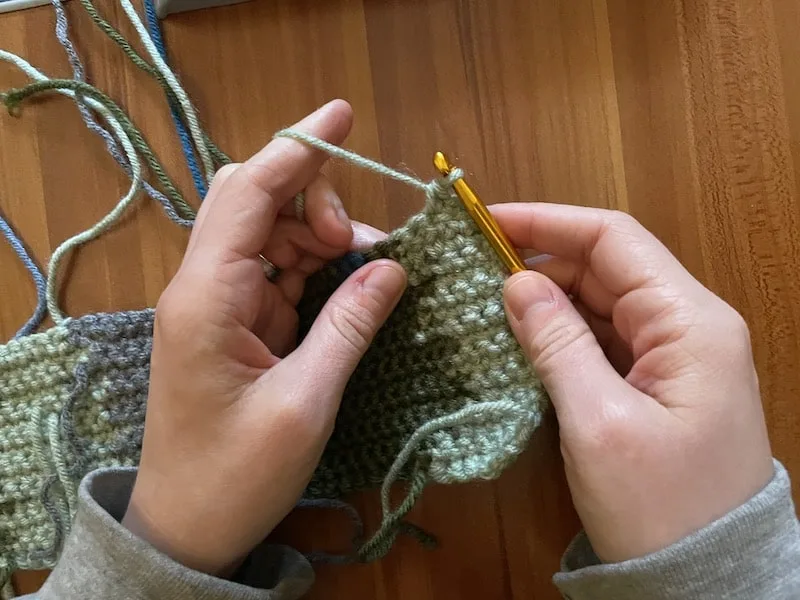
- Start by creating a small loop, similar to the top of a stitch.
- Stitch into each of the loops that make up the circle.
- Like you did at the beginning, close the round with a tiny loop.
Step 3: Start Creating the Base for the Fringes
- Make a little loop, then a quick stitch within it.
- Make five tall stitches in the following loop after skipping the following one.
- Make a quick stitch in the following loop after skipping one more loop.
- Until you have completed going around the circle, continue skipping, making five tall stitches, then skipping again.
- Make a little loop to join the circular.
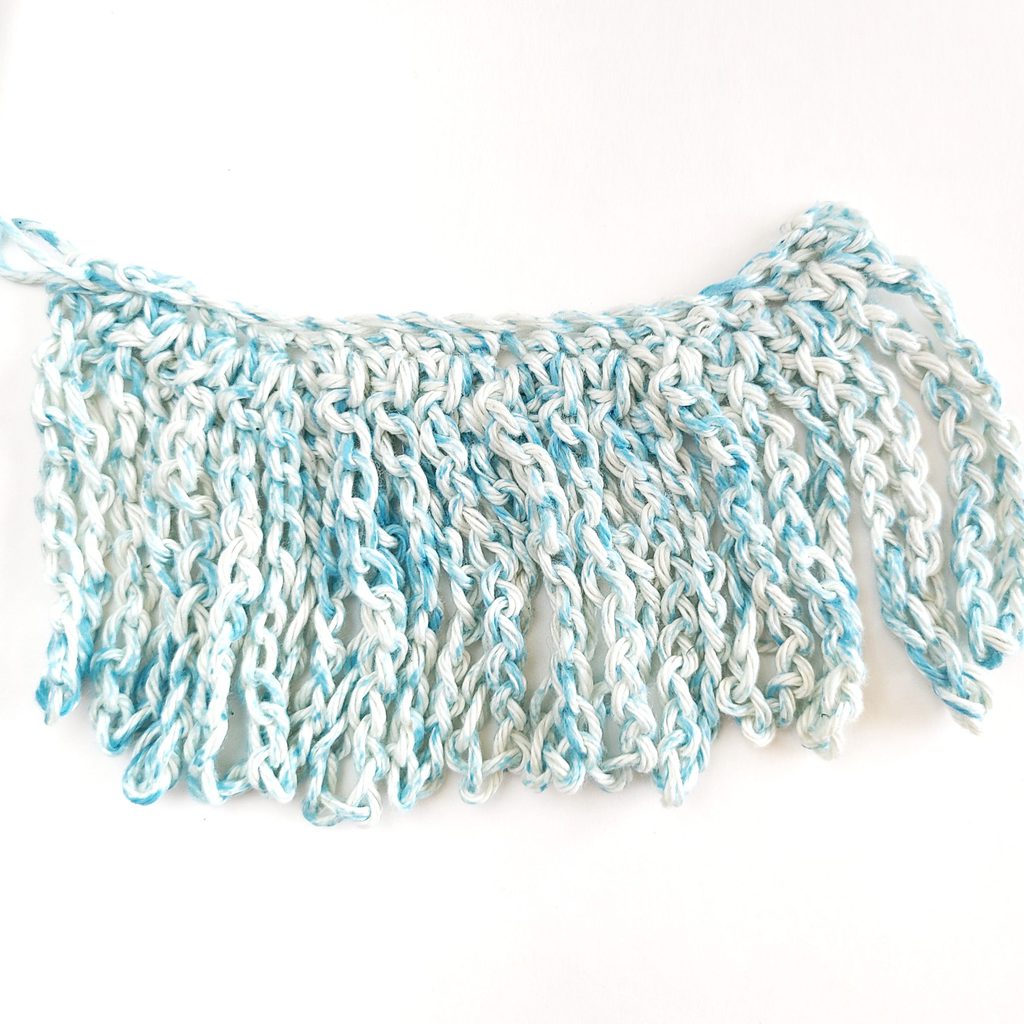
Step 4: Adding Cuteness to the Baby Headband – Fringes!
- Choose the Yarn for the Fringes: For the Fringes, pick a different color of yarn. The exciting part is now! Are you ready for it?
- Slice the yarn: Cut the yarn into pieces if you want the fringes to be. Keep in mind that they need to be folded in half.
- Fuse the fringes: A yarn piece should be folded in half to form a loop. On the base, pass your crochet hook through a skipped loop going from the rear to the front.
- Managing the Fringes: Making a tiny knot, pull the loop through the base. To keep the fringe in place, thread the yarn’s ends through this loop and pull carefully.
- For Every Fringe, repeat: To evenly space the fringes around the headband, repeat this procedure for each skipped loop.
Finishing the Baby Headband
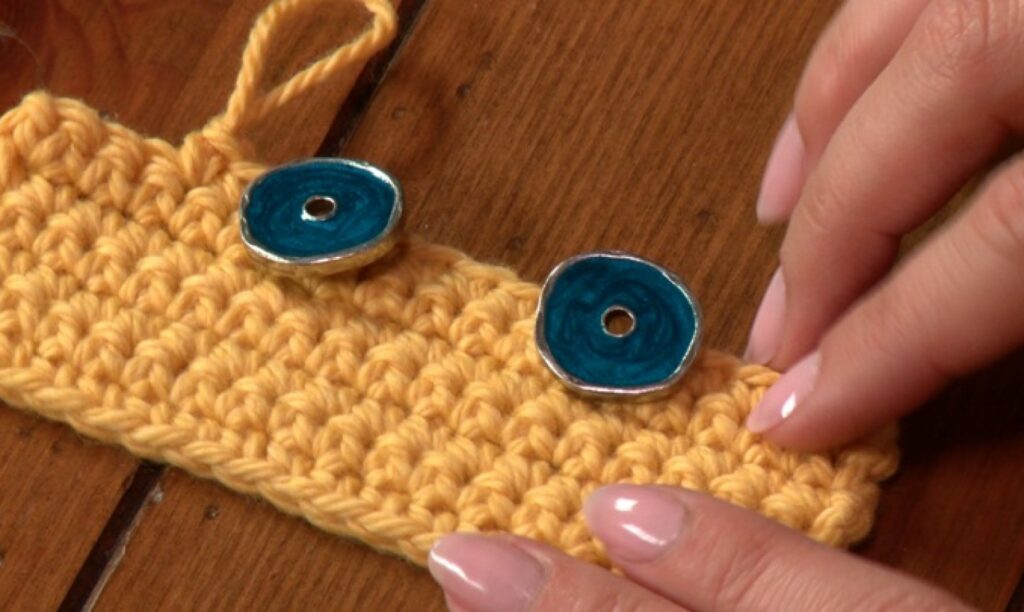
- Include a button closure: By chaining a few stitches (the number of chains should be determined by the button size), make a button loop and sew it to the headband’s other side. To create a reliable closure mechanism, sew the button to the baby headband while ensuring the button loop is in line.
- Tie up any loose ends: Use the tapestry needle to deftly weave any loose yarn ends from the crocheting and fringe attachment into the fabric. A flawless appearance is ensured by this precise procedure.
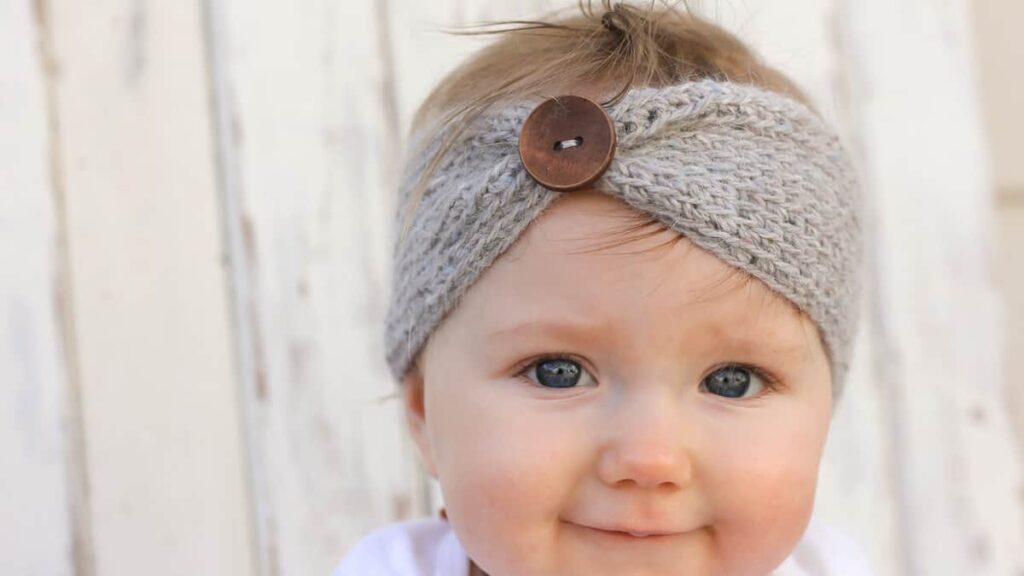
- The crown (baby headband) is ready: Ensure a snug fit by carefully sliding the headband onto the infant’s head. If needed, tuck the button closing in. Your baby is surely going to look like a prince or a princess!
These fringed crochet baby headbands become a part of priceless memories when they are placed on little foreheads. They tell tales of love and skill each time a button is buttoned or a fringe sways. They serve as a reminder that even the most basic materials may be woven into an elaborate tapestry of feeling and creativity.
But we understand that not everybody wants a crochet headband with fringes and may have a different taste, so let us look at a tutorial with no fringes but other unique elements. You need the same materials as mentioned for the first tutorial.
No Fringe Baby Headband Tutorial
- Choosing a Yarn and A Hook: For this headband, pick two soft sport-weight yarns in contrasting hues. For a visually arresting effect, the colors should work well together. Choose a crochet hook size that matches the thickness of your yarn.
- Foundation Chain: Starting with the first color, start a foundation chain. To guarantee a tight fit, the chain’s length should be slightly less than the baby’s head circumference.
- Creating Textured Rows: Using the first color, create rows of extended single crochet stitches. A yarn over is added before the hook is inserted in an extended single crochet, making it similar to a conventional single crochet. Your headband will have a little extended stitch that adds texture.
- Adding the Second Colour: Introduce the second color after a few rows of the textured stitch. For each row, alternate the two colors to produce an eye-catching effect. To avoid cutting and weaving in excessive numbers of ends, carry the unused color up the side of the headband.
- Unique touch of the shell stitch: Use a shell stitch design to give class and depth. Work a shell stitch over the rows where you are using the second color. A shell stitch is created by working several double crochets (often 3-5) into one stitch or opening. Over the row, space the shell stitches equally.
- Transition and Finishing: Return to the first color and alternate the two colors in textured rows after a few rows of the shell stitch pattern. Till the headband has the right width, keep on repeating this color pattern.
- Joining the Ends: When the headband reaches the right width, join the ends together to form a circle. Connect the ends with a slip stitch or a seamless join method to make sure the infant will fit snugly.
- Finishing Touches: Cut off any extra yarn and weave it back in with a yarn needle.
Last-Minute Tips for Crochet Baby Headband
You may quickly learn to crochet adorable fringe baby headbands with little practice and much love. Now that you have understood how to make 2 different types of baby headbands, here are a few last-minute tips for you:
- Use a stitch marker to indicate the start of each row if you are a beginner. You can keep track of your stitches and prevent errors by doing this.
- Make sure to tightly weave the ends in so that they do not unravel when you are finished.
- The amount of chains you produce initially may need to be adjusted if you’re using thicker yarn.
- The headband can be enhanced by adding a bow or another decorative element.
Wrapping Up
We have looked at several different methods for creating these adorable baby headbands through these tutorials. You’re sure to discover a technique that works for you, regardless of whether you’re an expert crocheter or a beginner just starting with yarn. These headbands are the ideal medium for expressing the indescribable satisfaction of making something lovely by hand.
Remember that you are weaving memories rather than merely yarn with each loop. These headbands reveal stories that go beyond threads and stitching, whether they are given as gifts to loved ones or worn by adorable tiny ones. They are an inanimate representation of your skill, excitement, and dedication to creating something exceptional.
Share your views on the guide and let us know your experience of crocheting the art of love.