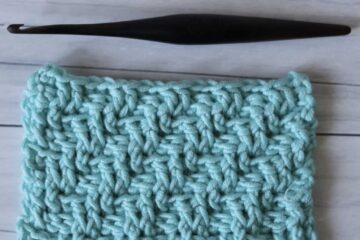
Tired of looking for an easy way to make a herringbone double crochet? Then worry no more; we have got your back. Your quest for designing super cool crochet ends here with our step-by-step guide to craft a herringbone double crochet stitch (HDC). It is a fantastic choice for beginners, too, and can help them while making stuff like scarves, blankets, and more. The HDC stitch will surely steal your heart when paired with other stitches in work.
The steps framed below involve everything from making a foundation chain to crafting a herringbone pattern with different stitches to provide a beat finish to your work. Further, our herringbone double crochetstitch tutorial is straightforward, which helps you craft the HDC stitch quickly. And do you know what’s the best part… You don’t need to know about other stitches; you can start from scratch.
Read on till the end to quickly make a herringbone double crochet.
Essential Materials for Herringbone Double Crochet Stitch
You wouldn’t want any interruption while crocheting, right? As it may result in inconsistent tension or may ruin your whole pattern. Therefore, knowing and gathering the must-have materials is better before starting the process.
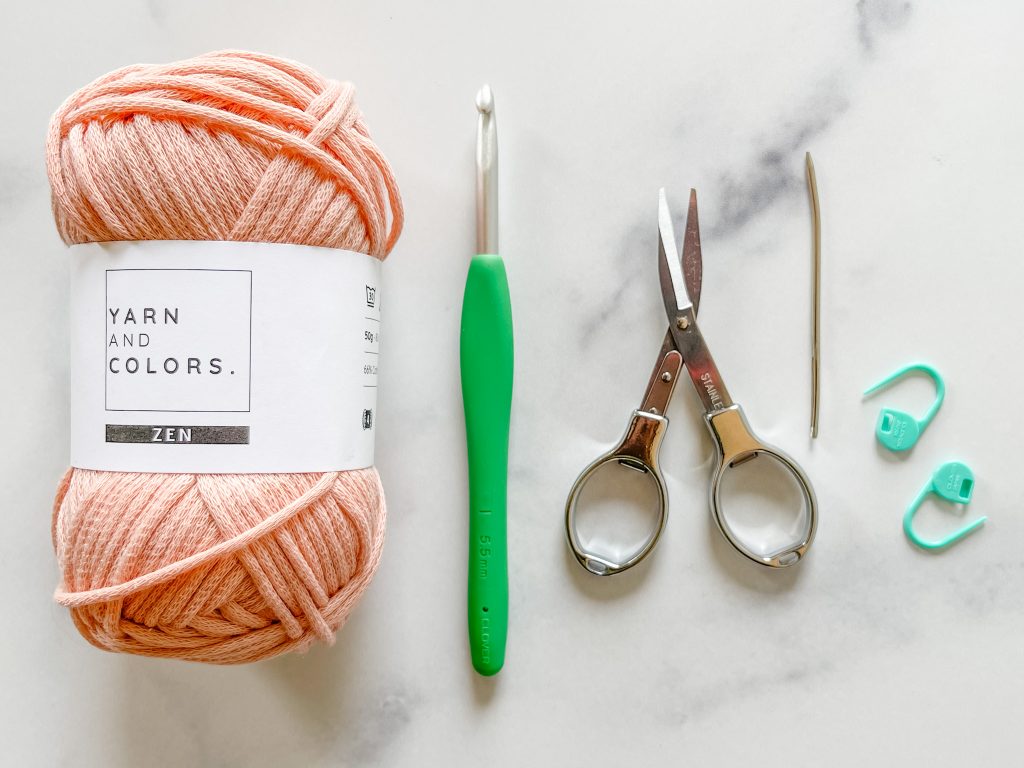
- Yarn: This decides your yarn’s overall look and texture; therefore, selecting it wisely is a must. Choose a worsted weighted yarn of color that suits your taste. Standard or most frequently utilized yarns are acrylic yarns, as they are smooth and easy to work with, allowing you to see the stitches clearly. Do read the washing and care instructions.
- Crochet Hook: Choosing the right crochet hook is essential as it lays down the base for consistent tension and stitch size. While choosing the hook, remember to align the hook size to the selected yarn’s weight. For herringbone double crochet stitch, we suggest a hook size of H-8, i.e., 5 mm when paired with worsted weighted yarn.
- Yarn Needle: Choose one with a blunt tip and a large eye. This will help avoid splitting yarn fibers and weaving loose ends, providing a neat finish and polished look.
- Measuring Tape: Select a measuring tape that accurately measures straight and curved edges. This will ensure that the project you’re working on achieves the intended dimensions.
- Scissors: Use sharp scissors that easily cut or trim the yarn without fraying or damaging it.
- Stitch Markers: Mostly recommended for newbies that can help them to keep track of specific stitches or rounds while working on herringbone double crochet stitch.
How to Craft a Herringbone Double Crochet Stitch?
Once you have gathered all the materials, crafting a herringbone double crochet stitch is easy. But remember not to rush through the process without tension control. Follow the steps below to explore how to make an HDC stitch.
Step 1: Preparation

Knowing about the fundamentals is a must-have in the weaving process. Therefore, before we head on with crocheting the herringbone double crochet stitch, let’s quickly dive and explore what all things lay down as a base and how to craft the same.
- Collecting Materials: Before starting with the stitches, gather all the essential materials at your end. This includes your chosen yarn, crochet hook, tapestry needle, scissors, measuring tape, etc.
- Creating a Slip Knot: A fundamental step that serves as a basis for the crocheting process, as it forms the connection between your yarn and hook, a gateway to craft herringbone double crochet stitches. Start creating a slip knot by gently forming a loop with the yarn. Now, hold the yarn tail and insert it through the loop you have created. Gently pull the tail to tighten the knot, but ensure it’s neither too loose nor too tight.
- Crafting a Foundation Chain: Now that your slip knot is ready, begin crafting a foundation chain, the backbone of the crocheting process. Work with the chosen crochet hook to chain the required number of stitches for a herringbone double crochet stitch. This chain works as a base for the upcoming stitches and rows. To ensure your measurements are accurate, consider using measuring tape to check whether or not the foundation chain length aligns with the desired dimensions.
Step 2: Making Herringbone Double Crochet Stitch (HDC)
Crafting a herringbone double crochet involves a series of steps and requires careful attention to minor details. The mentioned steps will help you achieve the same; just be extra careful with tension as you weave through.
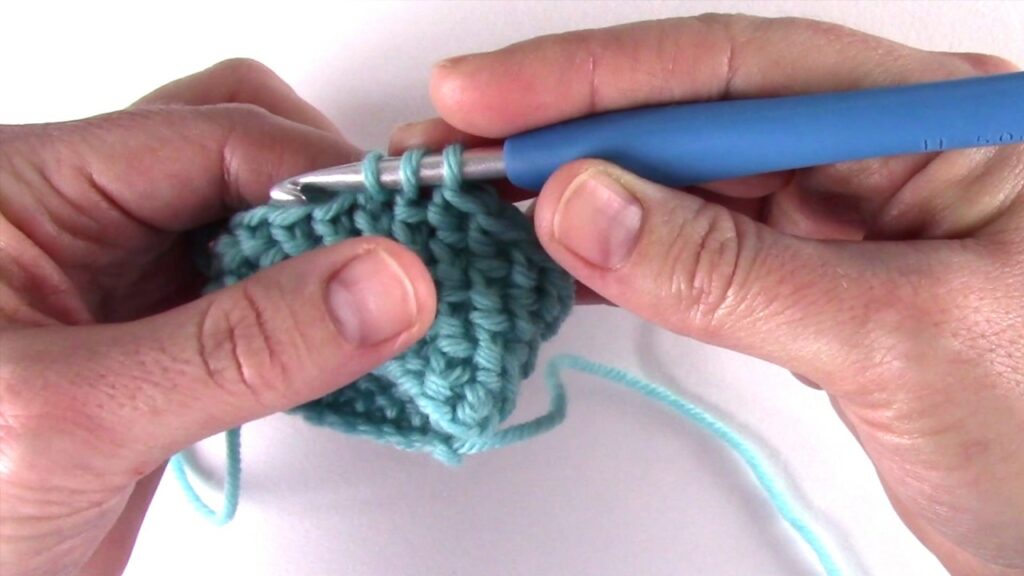
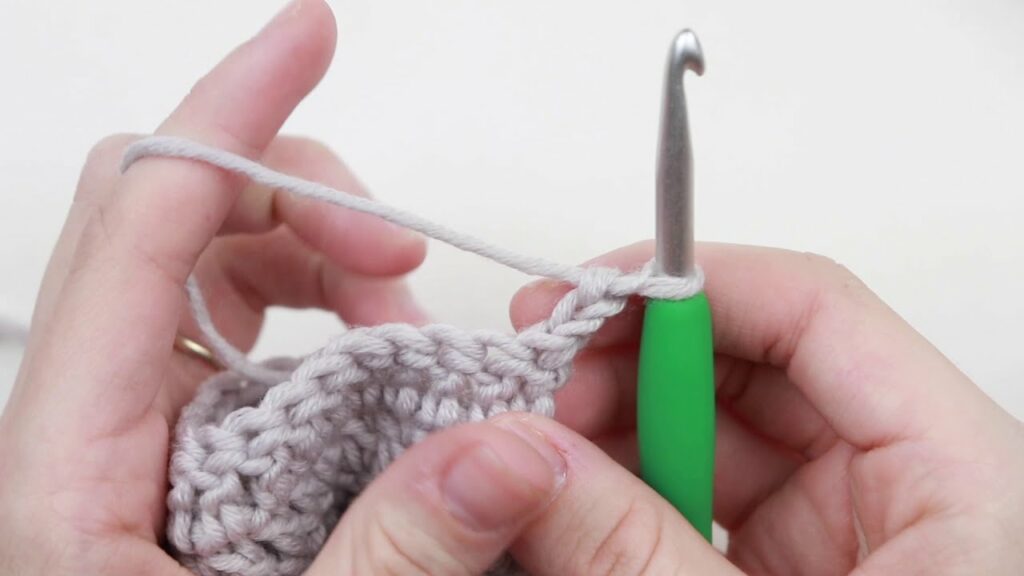
- Starting With Herringbone Double Crochet: Start creating a herringbone double crochet stitch by wrapping your yarn around the hook and inserting it into the third chain from the hook. Again, wrap the yarn around the hook (yarn over) and pull it through both the chain and the very first loop on the hook. Now, you’ll have two loops positioned on your crochet hook.
- Completing Herringbone Double Crochet Stitch: To complete the herringbone, double crochet yarn over and pull it through the first loop on the hook. This will leave you with two loops on your hook. Now yarn over again, and then gently pull the yarn through both the loops on the hook.
- Working to Make Next HDC Stitch: As you proceed to make the subsequent herringbone double crochet, repeat the process. Start with a yarn over, then position your hook for the next stitch. Perform another yarn over and pull it through the stitch and first loop on the hook. This is where an additional step comes to play: yarn over again and pull through the first loop, just like a slip stitch. To conclude, do a yarn over again and slowly pull it through both the loops on the hook.
- Maintaining Consistency: To ensure that HDC stitches are at regular intervals, utilize stitch markers. This will highlight the rows, which in turn serve as a guide throughout the crocheting process. Further, to maintain accuracy, count stitches regularly as you wave through.
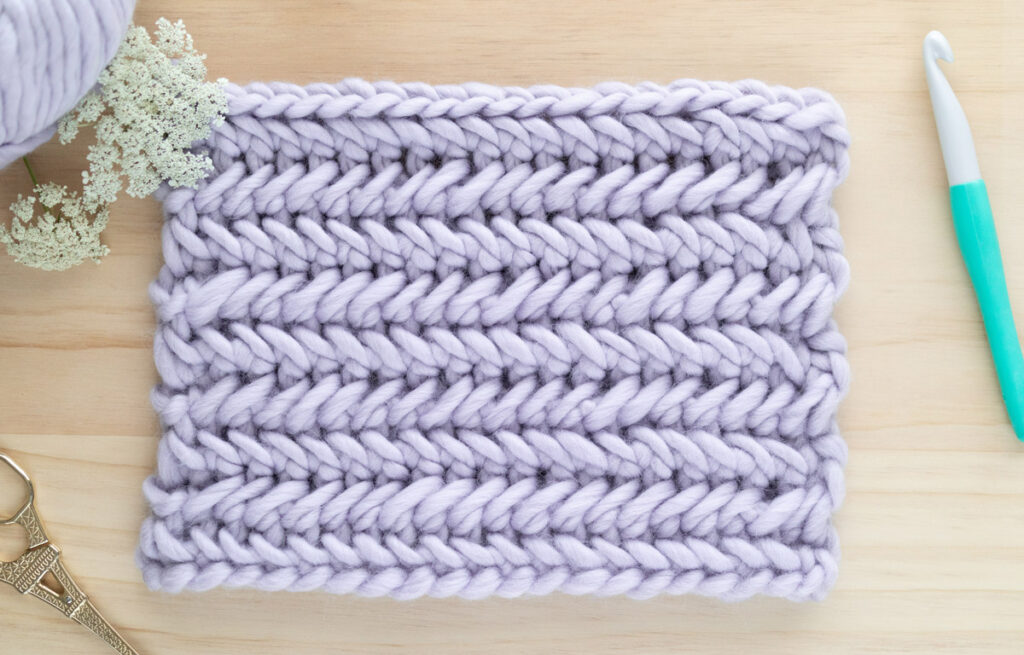
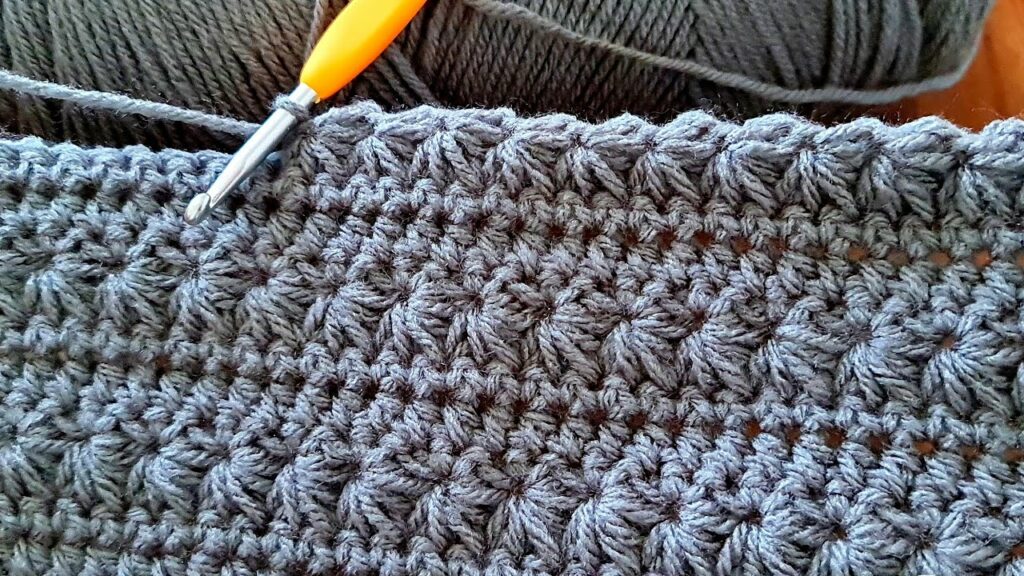
- Forming a Herringbone Pattern: As you weave, repeating these steps, you’ll notice a herringbone pattern coming to light. With each stitch, a slant will appear that will together create the pattern.
Step 3: Final Touch
Once you’re towards the end of the herringbone double crochet pattern, there are a few crucial steps that you must consider to provide a polished look to your work. Let’s quickly explore the detailed instructions that will help you achieve the same.
- Finishing Rows: To finish your project, continue working with the herringbone double crochet stitch throughout the rows until you reach the desired length. Remember to craft the necessary chain and turn at the row’s end when working with each row. This will help maintain the consistency and, hence a gradual development of the herringbone pattern.
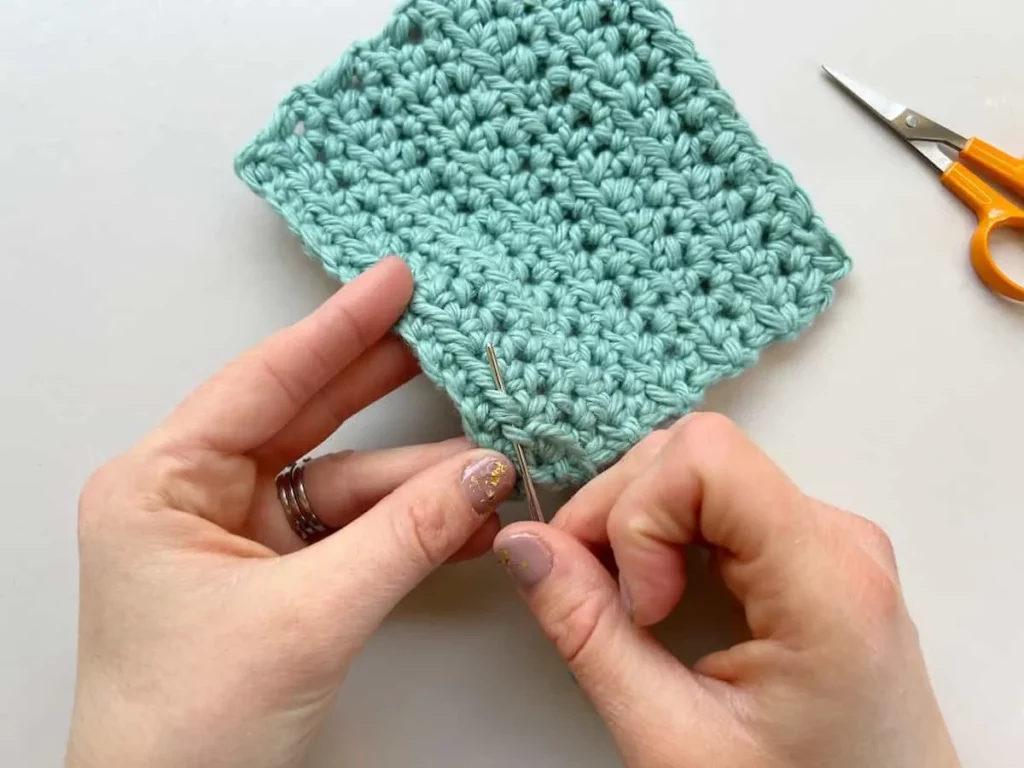
- Giving a Polished and Professional Finish: Once you have crafted the desired length and finalized the last stitch of the herringbone double crochet stitch, it’s time to pay attention to providing a clean and professional finish. Take a yarn or tapestry needle and precisely utilize it to cut loose ends throughout your work. Now, pass the yarn tail through the needle and stitch along the edges. These steps will help secure the loose ends while adding to the overall look.
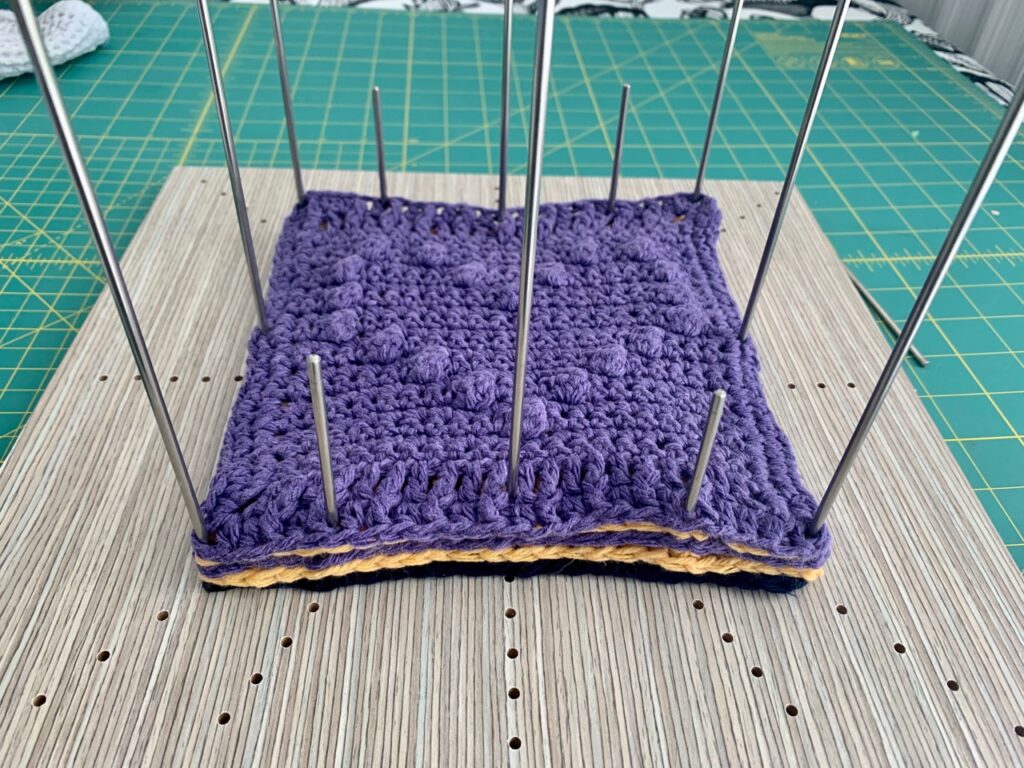
Why Blocking Process is Essential?
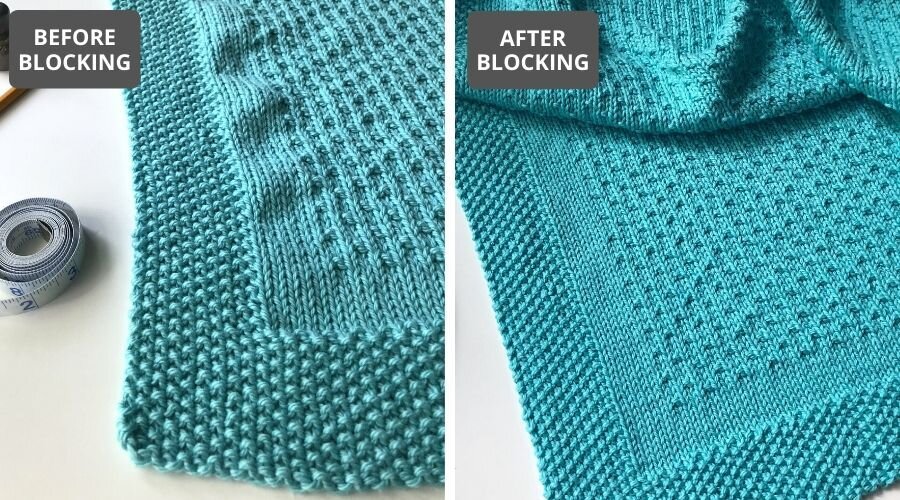
Blocking helps add refinement to your work for any inconsistent or tangled appearance. Soak your finished piece of work in the water, and wait for a bit till fibers absorb the moisture. Once soaked, squeeze it out; remember, no excess water should be left. Now place it flat on the blocking mat and secure it with the help of blocking pins. Allow to air dry completely. This will help provide a smooth appearance to your work, alongside tightening stitches and maintaining a consistent tension throughout.
Things You Can Make with HDC Stitch
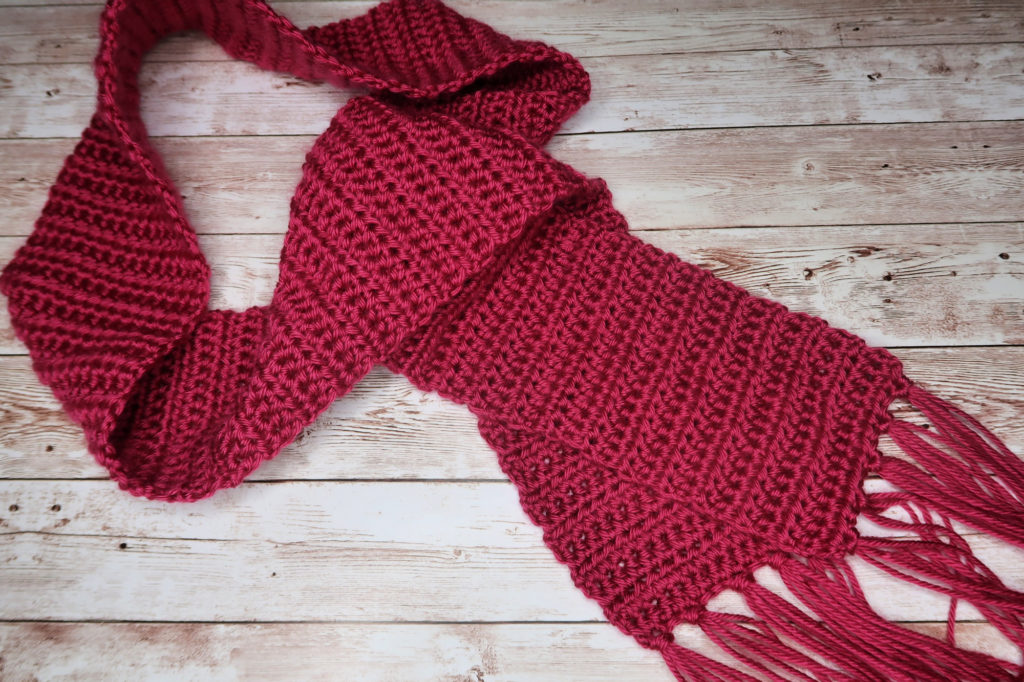
Herringbone, double crochet stitch, is a popular technique in crocheting owing to its deep and polished finish. While it may not be too versatile like double crochet stitch for making a variety of things, but definitely a loveable choice when it comes to the listed items:
Well, if you’re looking to make a blanket with HDC stitch, you don’t have to make an effort. You can follow a few more steps after the one mentioned above to create a herringbone double crochet stitch blanket.
Step-By-Step Guide to Make an HDC Stitch Crochet Blanket
Step 1: Extending the Stitch to Blanket
Before this, refer to step 1 and step 2 mentioned above. We assume you would have gone through and worked on the same. If yes, congratulation on completing the first row of your HDC blanket.
Step 4: Turning Chains and Subsequent Rows
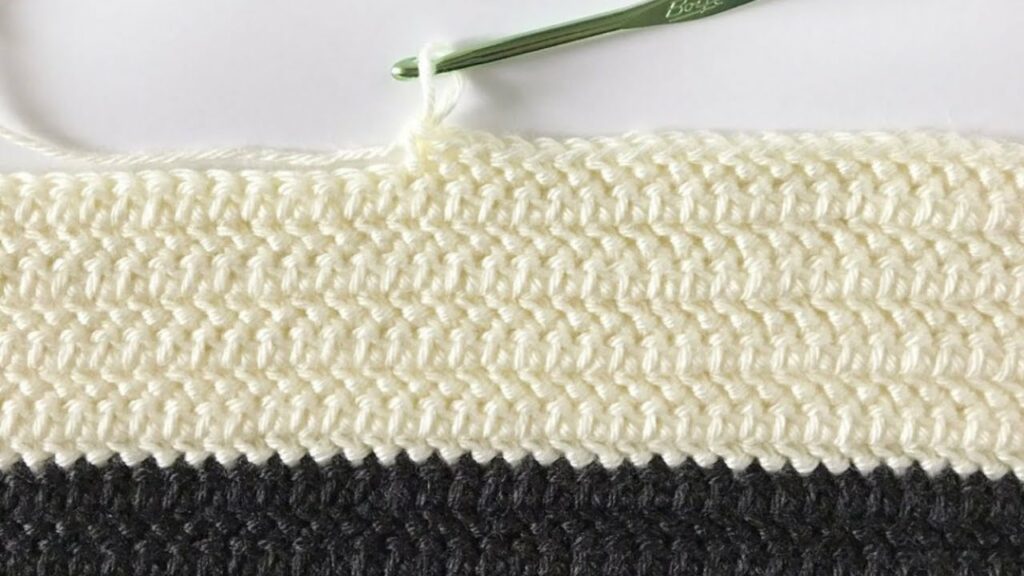
Once you’re finished with the first row, chain a single stitch that serves as a turning chain for the next row, turn your work, and begin with the new row. Again, work HDC stitches across and chain a single stitch at the end of rows before turning your work. Repeat this till you achieve the desired length, ensuring you are consistent with pattern, tension, and stitch count.
Step 5: Altering Colors
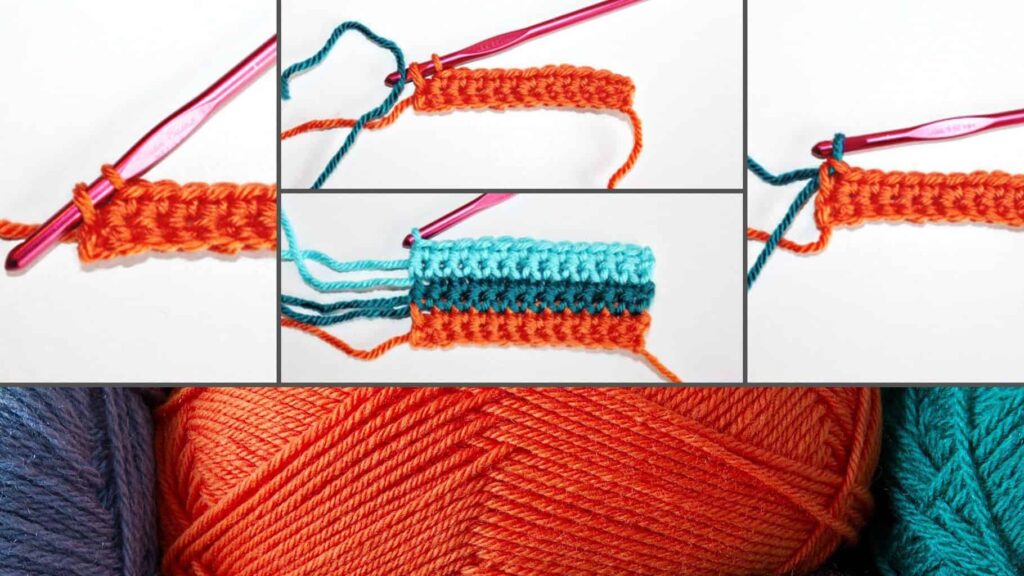
Whenever you want to change colors to your herringbone, double crochet the stitch switch at the beginning of the row by joining a new color of yarn. For this, simply secure the old yarn end and carry it along the edge while crocheting over it.
Step 6: Final Rows and Edging
Once you reach the desired blanket size, consider adding a few extra rows this will help make a balanced edge. Now, create a border by working single crochet stitch or any other of your choice.
Step 7: Final Touch and Blocking
After finishing the last stitch of the border, fasten off the yarn with sharp scissors, leaving a tail 4-6 inches long. Use a yarn needle to weave in the loose ends. If your blanket seems uneven or tangles at some point, consider it passing through the blocking process. For blocking, follow the steps below:
- Dampen it in water until it absorbs moisture.
- Squeeze out any excess water.
- Place it on a blocking mat and secure it using a locking pin.
- Let it air dry completely.
Conclusion
HDC stitch pairs well with a lot of basic stitches like single crochet and half double crochet, creating stunning patterns that go well with stuff like hats, scarves, and even home decor items.
Making a herringbone double crochet stitch isn’t a tedious task anymore with our easy-to-understand tutorial. All you need is proper materials, following the steps thoroughly, and being extra careful when it comes to tensions.
What to wait any longer? Grab your yarn, hold your needle, and start crocheting. Be a little more cautious about following our guide to executing the ideas, and don’t forget to share in the comments what you created with herringbone double crochet stitch. Do let us know as well how easy it was to proceed with our comprehensive guide.
Frequently Asked Questions
How to Maintain the Herringbone Pattern While Turning?
To maintain the herringbone pattern while turning, complete the last stitch of the row, chain one stitch, and turn your work. Work the next row by inserting your hook into the second chain from the hook. Remember to keep the distinct diagonal texture consistent throughout the HDC stitch.
How to Fix an Improper Slant in an HDC Stitch?
If your herringbone double crochet stitches aren’t slanting correctly, consider the angle at which you insert the crochet hook. For desired results, ensure your hook is inclined slightly to the left if you’re right-handed and vice versa. Apart from this, maintaining consistent tension is necessary for maintaining the slant.
How to Customize Stitches in Herringbone Double Crochet Stitch?
To increase the stitch, add two herringbone double crochet within the same stitch. This will add to the density while maintaining the slant of the pattern. In contrast, when you want to decrease stitches, skip a stitch within the sequence and then add a herringbone double crochet.