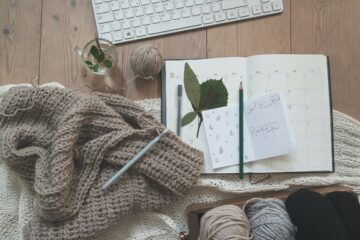
Crochet artistry is a true example of how modern techniques and classic design can be blended seamlessly. With the right amount of yarn selection, stitchwork, color placement, and personal touches, you can create a timeless fabric that showcases beauty and warmth simultaneously.
With the help of our comprehensive guide, we are sure that you will be able to stitch your gingham blanket with finesses and discover unique intarsia colorwork that would help you create a masterpiece.
With every color change and yarn selection, you will discover passion and creativity within yourself and enjoy the process of crochet making. Together, let’s embark on a journey where each stitch has the power to convert a simple yarn ball into a piece of art.
Important Points to Consider Before Starting a Gingham Project
There are some crucial pointers that you need to know before beginning your gingham blanket project. Knowing these things will help you create a blanket that has no room for errors and would be a symbol of art and perfection. As a beginner or an experienced crocheter, knowing the things to avoid while making the blanket would save you a lot of time and Energy
1. Selecting the Yarn

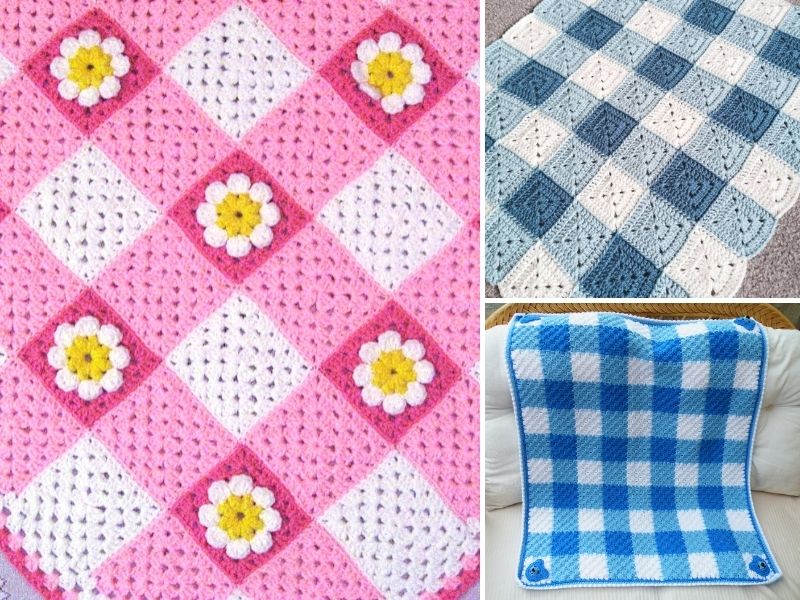
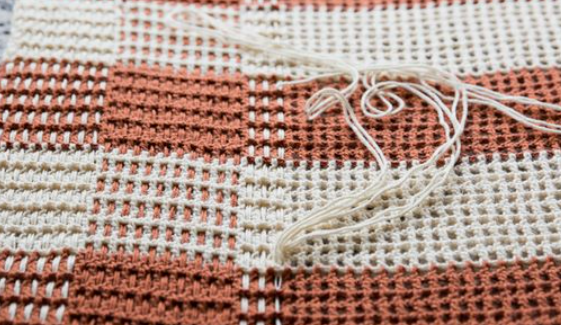
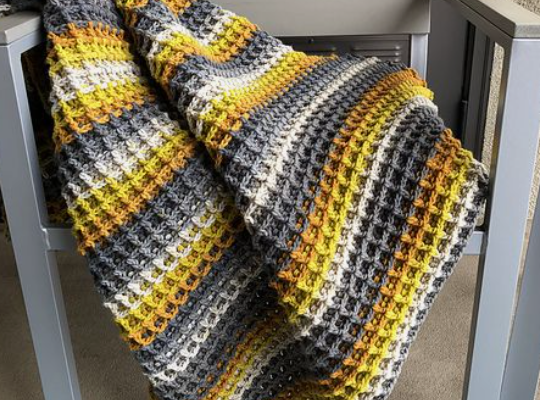
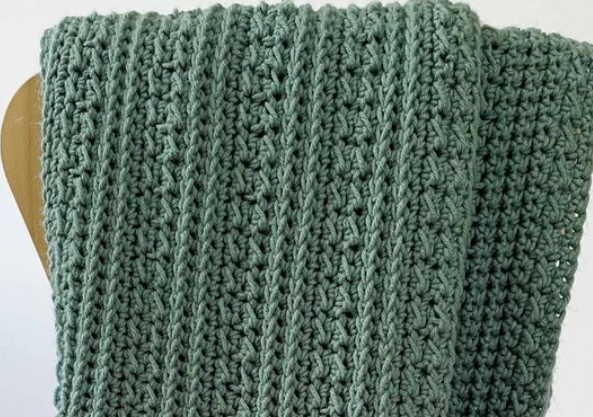
Ask any experienced crochet creator, and they will tell you that selecting the yarn is the hardest part. So if you are unsure which yarn to select, we suggest using a dark, light, and medium color. For the Gingham blanket to appear beautiful and aesthetic, you can use white, light pink, and deep pink. Take a look at the picture below so that you understand what we mean by our statement.
Now, there would be times when you can’t find the appropriate shade of the same color. What do then? Relax, we have got you covered. During these times, make sure you use the combining skeins technique.
So, for instance, if you are creating a red or a blue gingham blanket, you need to combine two whites and two reds or use the white and red combination to make it appear stripped.
2. Don’t Create a Checkerboard While Making a Gingham Blanket
We love checkerboard blankets, but we are here to teach you about making a Gingham blanket. A lot of people accidentally make a checkerboard blanket instead of a Gingham blanket, and we don’t want that disappointment to happen to you. Hence, to avoid such a scenario, make sure that the medium color is present in every row.
Now, once the medium color takes its rightful place, make sure that for every block of the blanket, the medium color gets combined with a dark color, and in the next block, the medium color should be combined with a light color. If this pattern is not followed, you will get a checkerboard blanket.
So make sure you pay attention to the details.
3. Avoid Twisting the Yarn
Most crocheters have a lot of problems twisting the yarn while making the blanket. They leave the process halfway because it is long, tiring, and tedious. Don’t worry, as we have a hack for you. To avoid getting your yarn twisted for completing each row of the blanket, keep one strand at the front position while the other at the back.
How to Create a Gingham Blanket: Step-By-Step Instructions
When you create a gingham blanket, then you create an art that combines elegance and sophistication. It symbolizes handmade craftsmanship that requires your dedication and attention. When you level up your crocheting skills, it shows that you are serious about your craft and want to inspire your fellow crocheters. Here are some step-by-step instructions :
Essential Materials Required
In order to create a gingham blanket, you need to assemble all your supplies so that you don’t get distracted during your building session. Here is a list of things that you would need while preparing a gingham blanket :
Instructions
Step 1: Choose for Two Colors
While creating a gingham blanket, make sure that there are two contrasting colors. One should be light, and one should be dark. If you are not a fan of two contrasting colors, then you can experiment with different colored patterns.
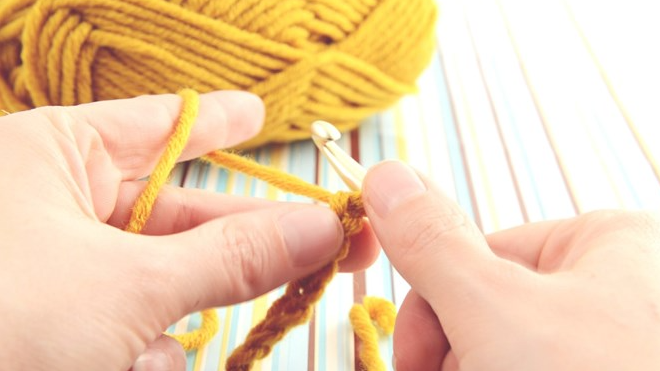
Step 2: Building the Foundation
Once the yarn selection is done, you need to build a stitch foundation. Picture the purpose of why you created this blanket so that you can determine the length and width of the blanket. The stitch foundation should come in chains of 2 and 4.
Step 3: Stick to a Specific Style
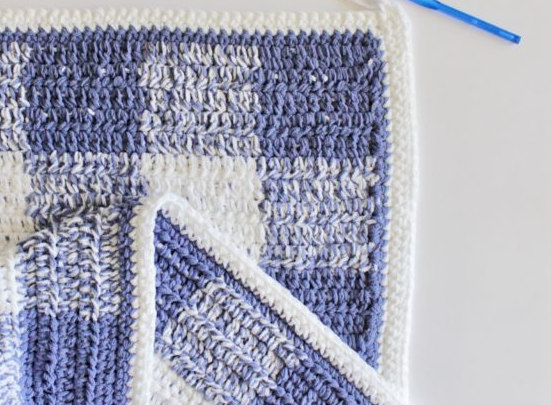
In order to create a neat row, we would recommend that you stick to one stitch style, which is double crochet style or single crochet style. Once selected, work on that for the entire stretch to create a neat edge. Now, you have successfully created the base row.
Step 4: Clearly Plan the Last Row
>Once a neat row is created, we would advise you to maintain the last row with a single color. Now, choose the second color and then create another chain. Go back to the first color and then complete the row. In this way, appropriate chains are created.
Step 5: Carefully Plan for the Rows
Now you have successfully created the first row with a single color; now it’s time to time to jump to the second row. The second row should start with the new color while making sure that the yarn doesn’t cause a long float on the backside of the blanket.
Step 6: Work with Alternating Colors

Your pattern is now established. Now, work together with two colors alternatively to create the perfect gingham blanket according to your style and preference. Make sure that every two rows have an alternative color.
Step 7: Maintain the Proper Tension
This is where most of the crocheters fail. This step is extremely crucial as it helps you create a gingham blanket with even tension. Make sure that your stitches are not too loose or tight, and this can be achieved with a steady rhythm maintained.
Step 8: Mind the Edges

Carry the yarn at the end of the pattern while making sure that it doesn’t touch the edges. As you see the yarn reach the edge, cut it off and then modify it with the stitches. This would ensure that every yarn has met with a change in color.
Step 9: End the Border with a Specific Color
Once you have established your desired length, it’s time that you end the blanket with the first color. This would ensure that a neat border is established and your gingham blanket is perfected.
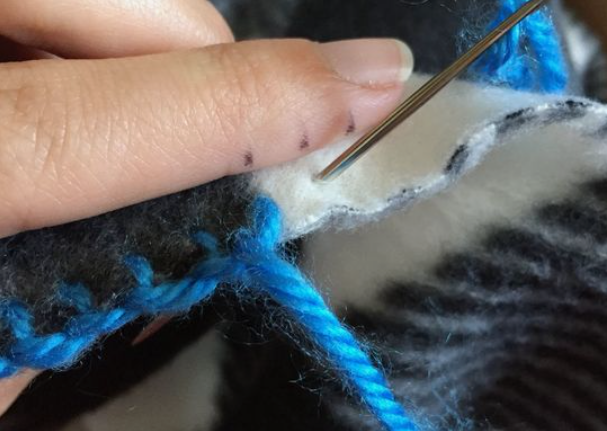
Step 10: Adjusting the Loose Ends
All the rows are now complete, and the only thing that is required is adjusting the ends of the needle. Eliminate all loose ends with the help of the yarn needle, and you will be surprised by the perfect finish you will achieve.
Key Techniques that Make Gingham Blanket a Work of Art
In order to create an astounding blanket, you would need to level up your crocheting skills, and hence, we have brought you some advanced techniques that will help you create an unparalleled piece of art.
1. Play With The Yarn
Remember, the goal is to enjoy the process as you start creating your Gigham blanket and not be unbothered about the result. Yes, it may take a few times to perfect your crocheting skills, but that’s okay as long as you play with textured yarns and have a satisfying experience with yourself; it’s recommended that you put tactical contrast between the squares.
2. Intarsia Crochet
The beauty of this technique lies in the simple fact that it allows you to perform clean color modifications without going across the blanket. This means changes in color can be made without taking the yarn at the end of the blanket. The result is spectacular, and people are amazed by the creativity. Its recommended that you practice this technique on the draft project before making the final call on the main project.
3. Colouring
People generally use two colors while making a gingham blanket to keep it safe. They are fearful that if more than two colors are used, then that would make the blanket not pleasing to the eyes. Advanced crocheters go beyond the norm of using two colors. Theft uses multi-color coloring on their project to achieve the gradient effect rather than sticking with a cohesive look.
4. Stitch Complexity
Simple stitches make the gingham blanket look simple, but this section talks about leveling up your crocheting skills, right? Hence, we would advise you to research various stitch complexity patterns like popcorn stitches, cable stitches, and double crochet stitches. Once you master them, the result will be extraordinary.
5. Diagonal Gingham
This technique will make you the master in crafting gingham blankets if you can master this technique properly. We would suggest that you practice it before you apply it to your final project. This technique involves working with the gingham blanket at around 45 degrees, resulting in a truly captivating design.
6. Border Incorporation
Now, most people go loose on the border incorporation as they mainly focus on yarn selection and stitches. In order to create a true masterpiece, every minute detail needs to be perfected, and that involves the right border selection, too. Use the technique of shell border, picot edging, and reverse single crochet to perfect your finishing touches.
7. Motifs Selection
This technique will surely take your gingham blanket to the next level as this technique will make you do extraordinary. With the help of this technique, you will have to create gingham-themed motifs separately and then install them on your main gingham blanket. This would require your heavy focus and attention.
8. Sizing
Creating a gingham blanket that has specific sizing is a true work of art. You need first visualize what you are creating the blanket for! Is it for the bedspread or the baby’s needs, or is it for someone dear to you? Hence, adjusting the blanket according to the need of your purpose would require sizing skills.
9. Method Joining
Single squares are extremely normal for gingham blankets. The real challenge comes when squares are joined with the help of the joining method. For this, you need to research various joining methods techniques like single crochet join, stitch join, and slip stitch join. Once you master these, the end product will be unique and beautiful.
10. Record Yourself
Celebrating the process of creating a gingham blanket is crucial. For this, you could take photos of each square or stitch you complete within the blanket. If you are not a fan of clicking pictures, then we would suggest writing a gingham journal where you write every step that was incorporated while creating the blanket. This would help you record your progress.
11. Share Your Learning
Now, there are a lot of beginners who struggle while making a gingham blanket. When they are unable to create one, they lose all hope and put down their stitches and yarn. Once you master making the blanket, you will serve as hope and inspiration for your fellow crocheters. Share your work through social media or blog to restrict them from quitting.
Always remember that making a gingham blanket is all about enjoying the journey and not being afraid to go beyond the normal. Once you push your boundaries, only then can you achieve crocheting mastery. With the right of passion and dedication, we are sure that you will be able to create a blanket that reflects your uniqueness and style.
Additional Points While Making Crochets

- Mixed Media: When you mix crochet blankets with other forms of embroidery, then you make the blanket more visually appealing. This adds layers of beautification to your project, and the result is gorgeous.
- Crochet Software Tools: There are various computer applications that you use to design your project. A visualization through software tools would help you create a blanket according to your choice of color and preference.
- Reverse Gingham: To increase the level of crochet making, using the reverse gingham technique would be a good choice. One color should be selected for making the blanket background, and the other color should be used for making the squares.
Takeaway
A gingham blanket is not just a piece of fabric, but it’s a piece of art. Art can only be perfected with experiment and practice. Hence, it’s important that you enjoy the process without being too mindful of the desired outcome. Once you perfect with repeated failures, the result will be extraordinary. When you use different yarns and variations of stitches in your gingham blanket, it symbolizes your emotion, self-expression, and inspiration.
Once your crochet is made, the amount of joy you feel in your heart is truly unmeasurable. So what are you waiting for? Craft your unique story that showcases your passion and craftsmanship for crochet creation.
Frequently Asked Questions
Is Yarn Selection Necessary for a Gingham Blanket?
Yes, yarn selection forms the foundation of gingham blankets. Yarn selection can be based on your preferences, but it’s recommended that you select a yarn that is lightweight to maintain tension throughout the blanket. A decorative blanket may have durable yarn, but a standardized blanket should always have cozy yarn.
My Gingham Blanket Has Uneven Edges, How Do I Prevent It?
When the stitches are not in order or uneven, such kinds of issues arise. This can be easily avoided while appropriately making the stitches in each row of the blanket. As a general rule, make sure that you count your stitches when each row is completed so that it will help you get a proper finish.
Can Different Stitch Patterns Be Used In Crochet Blankets?
The answer is yes. You need to choose the type of stitches that you put in the final project. It’s recommended that you use either a double stitch pattern or a single stitch pattern in a draft project before incorporating it into your gingham blanket. Too many stitch patterns might affect the quality of the blanket.