Crochet is fun, pleasing to the eyes, and an extremely relaxing thing to do. Many people have a hobby of making crochets. An even moss stitch crochet is the first preference most of the time when it comes to making crochets. Do you take an interest in this but don’t know where to start? Then, we will discuss how to crochet.
Here, we will cover everything you need to know to get started, from the basics, like holding the hook, to completing it successfully. We’ll even talk about what you must keep in mind when you are starting to make crochets.
Crochet-making is a skill that you have to learn by practicing. However, after checking the crochet details with the starter guide, you can create beautiful, wearable items like blankets, scarves, jackets, hats, etc.
If you have always wanted to learn this but didn’t know where to start, this guide is just for you! Learn the basics of crocheting and read the step-by-step instructions that are extremely easy to follow.
Moss Stitch: A Go-To Option in Multiple Projects
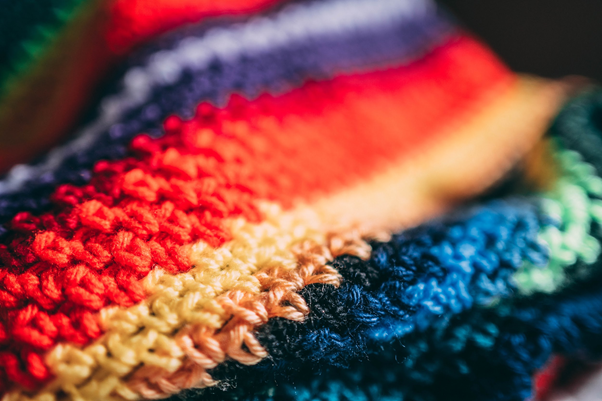
It is an undeniable fact that crochets are beautiful. When it comes to crochet projects, a huge number of people choose the crochet Moss stitch. Sometimes, this pattern is also known as the Granite or Linen stitch. Undoubtedly, it is a fantastic crochet stitch that both beginners and experienced crocheters can use.
In this stitch, you have to use basic or beginner stitch patterns that will help you to create a beautiful woven texture. But once you learn to make it properly, you can do the work faster and easily.
The even moss stitch crochet creates a woven texture because of the chain spaces. By working only into the chain spaces, you will see how the single crochets create a zig-zag pattern, and then the crochets get stacked on each other. This pattern creates a mesh and makes the stitch so stretchy. This stretch is present length-wise.
The Moss Stitch is a fantastic crochet stitch pattern that is used for all sorts of projects. From baby blankets and sweaters to bags, this crochet stitch is widely recognized as a great stitching option.
Points to Adhere Before Starting the Even Moss Stitch Crochet
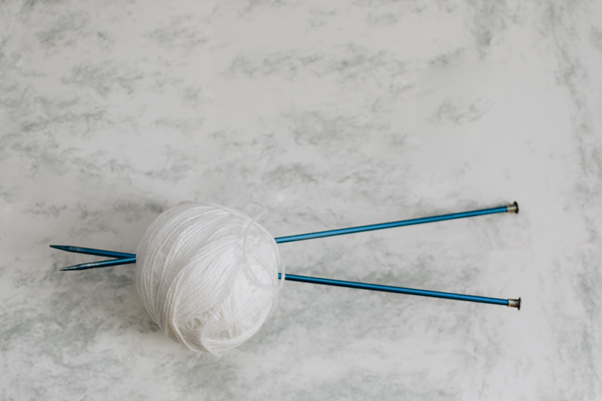
There are so many great things about crochet that you can not miss them. But remember that you need many tools to complete the stitching of the crochet properly. Two things are required mainly –
- A crochet hook: The crochet hook is the main thing of the yarn. You can try Coopay 5.5mm Crochet Hook Ergonomic Soft Grip for a smooth crocheting experience.
- Yarn: When choosing the yarn, ensure it has a smooth texture. This way, you can see your stitches properly and have a smooth finish. Inscraft 62 Acrylic Yarn Skeins kit is a great choice to begin your crochet project.
The yarns are available in many colors. Choose deep, light, and even contract colors that will make the crochet beautiful.
These things can make the learning process easier. You can have ultimate success when you choose the right hooks and yarns. These are even easy to work with. You can even check the internet for recommendations for the best crochet supplies.
When you start the stitching, it always requires an odd number stitch count. You should always start with the row stitching. First, do a slip stitch that is positioned in the first stitch and go to the slip stitch that is in the last.
Make sure to work in the top of the half double crochet, and remember not to pick up the 3rd loop. Below is a step-by-step guide for creating a beautifully textured, even moss stitch crochet.
Even Moss Stitch Crochet Tutorial: Step-by-Step Guide
This written tutorial helps you understand the stitch placements, and you can also get a clear visual of how the even moss stitch crochet will be made.
Step 1: Hold the Crochet Hook Properly
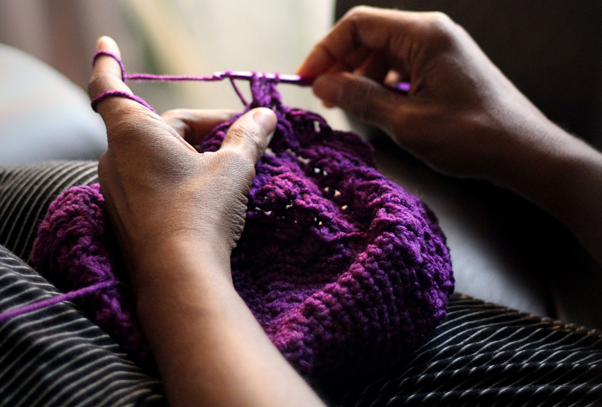
As you learn even moss stitch crochet, you must learn how to hold the yarn and the hook. Make sure both of them are comfortable for you. Most people hold the yarn in their non-dominant hand and the hook in their dominant hand.
The crochet hook can be held in two different ways: one is the pencil method, and the other is the knife method. Before heading more in detail into our topic, let us first discuss these two techniques first:
1. Pencil Grip: You must hold the crochet hook properly and use it like a pencil. Then, place them between your thumb and index finger. Then, use the third finger below for better control and balance.
2. Knife Grip: For proceeding with the knife grip, it is essential for you to adhere to a few points as listed below:
- Place your hand over the hook by palm facing down in the knife grip.
- Hold the hook between your thumb and index finger.
- Wrap your other three fingers around the shaft portion of the crochet hook, and you can expect greater control.
We highly recommend you try both of these options and try to adapt yourself to both of them. This will help you to figure out which works best for you.
How to Hold the Yarn for Crochet?
You must loop the yarn through the fingers of your non-dominant hand to hold the yarn. If you want to create more pressure on the yarn, you can opt for looping the yarn before passing it under the third, middle, and also over the index finger.
Maybe you will find it awkward initially, but after practicing a few times, you can learn your favorite way to hold the yarn. Left-handed people can follow the same process but with different hands.
Step 2: How to Tie a Slip Knot
Tie a slip knot, then attach the yarn to the crochet hook. If you want to make a slip knot, you can pull the length of yarn from the ball. Start working on the loop approximately 6 inches from the end of the yarn. Make sure it leaves a tail so you can weave it in later.
Then, you can place the ball at the end of the yarn in a clockwise circle. Then, you can lay it over the top portion of the tail end. Now, insert the crochet hook at the center of the loop and make sure it is from front to back. Then, you have to use the hook to grab the ball-end yarn. Now, pull it through the center of the loop.
Make sure that you pull both ends of the yarn, and you can easily tighten the loop around the hook. Make sure that you complete the slip knot properly to start crocheting well.
Step 3: How to Yarn Over

“Yarn over” is the prime foundational crochet technique. Using this, you can apply the basic crochet stitches. These yarn-overs are easy to make, and you can start the chain in the next step following these. Hence, you can even make single crochet stitches after that.
Now, you can loop the working yarn across the hook, but make sure to do it in a clockwise position that is from back to front.
Use your left index finger, and you can wrap the yarn all over the crochet hook. On the other hand, you can even use your right hand to pin the hook under the yarn. Both of these steps allow you to accomplish the same results. Now, it’s time to move on to the next part.
Detailed Guide on Making a Starting Chain?
Beginning with the Row 1
- Step 1: At first, start with an even number of chains. You should always stick to the odd number of stitches on the first row. In this way, you can even chain an even number.
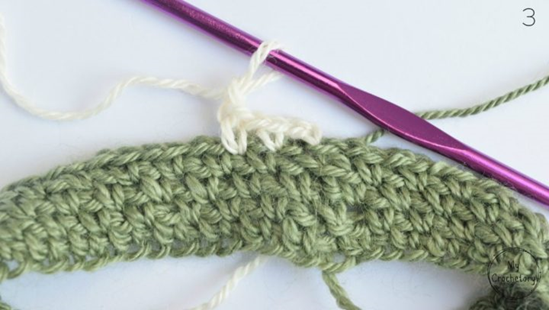
- Step 2: Then, make sure that you slip the stitch into the second chain positioned from the hook. You will now find a white arrow pointing to the first slip stitch in this row.
- Step 3: In the next step, you must place one and a half double crochets.
- Step 4: Across the row, start repeating, putting one slip stitch and then one half double crochet. This way, from where you left step 3, you can put a slip stitch in the next stitch. Now, the last stitch of the row will be a slip stitch.
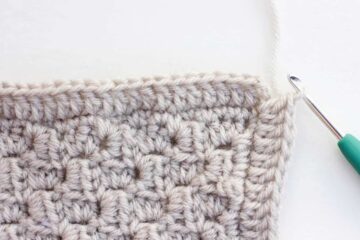
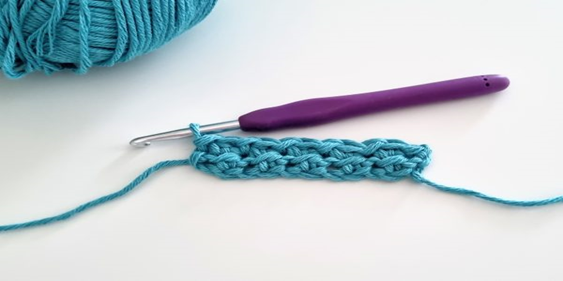
When you complete row 1 of the even moss stitch crochet, you might find it looking a little bit wonky, but there is nothing to worry about. When you turn the workaround, you will see the effect of the slip stitches. You will see there are half-double crochets positioned in between them.
Because the slip stitches are too short, they create issues in the half-double crochet and shrink it slightly. Now, you will find that the half-double crochets have a clear third loop.
Proceeding to Work on Row 2
Now, We are Moving To Row 2, and The Subsequent Rows Are the Same
- Step 1: Once you finish the first row of the even moss crochet stitch, you can turn chain 1 to find that the last slip stitch is placed well. Now, it’s time that the slip stitch gets inserted into it. Chaining one and slip stitching into the first slip is also better. You can even take it to some height and prevent the work from bowing a bit on both sides. The slip stitches are usually very short, so you can benefit from chaining one. It’s time to place the slip stitch on the sides to meet the rest of the row.
- Step 2: Place a half-double crochet on the top in this step. Make sure you don’t pick up the third loop.
- Step 3: Now, you can complete the row alternatively using a slip stitch and also using a half-double crochet. Ensure you always place the slip stitch in the right position by taking it from the previous row. Then, position your half-double crochet in the same position as the half-double crochet in the previous row.
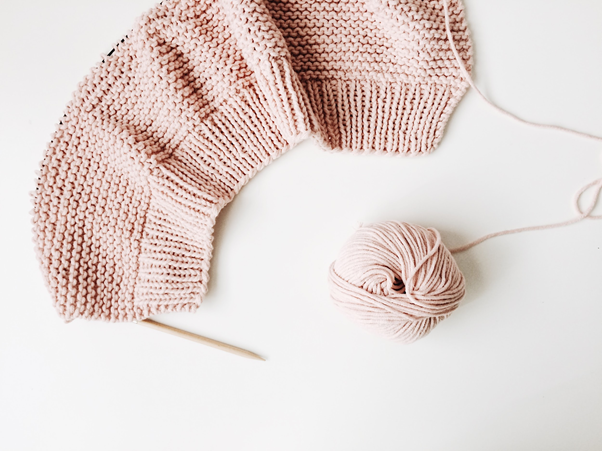
Now, you can see a wavy and looped texture between the two rows. When you turn your workaround, the texture of the even moss stitch crochet begins again with the row you have just completed.
These textured rows work alternately throughout the work and create a lovely pattern on both sides of the foundation. The even moss crochet stitch is easy to make and fun, too. Add a dense yet lightweight texture to your project, and you will love watching it.
Even Moss Stitch Crochet’s Takeaway
Crochet-making is an art that has been around for centuries. Fortunately, these crochets are still people’s favorite among today’s most popular yarn crafts. Even moss stitch crochet is an excellent method of creating a looped fabric that is soft, shiny, and elegant made of yarn and just using a crochet hook.
If you want to know how to make beautiful crochet but find the process a little tricky, those steps we mentioned can make it easy for you. Just like learning any other new skill, mastering crochet requires some practice. Additionally, having skills in this art will take a fair bit of time and patience.
To learn the crochet technique well, start with the fundamental steps and apply some basic stitches. Then, once you earn mastery in it, you can move on to the intermediate steps and advanced techniques. Let us know how you liked our comprehensive guide on crocheting and how you would wish to proceed with this further!
Frequently Asked Questions
What is the Best Yarn for Moss Stitch?
If you want to work on the even moss stitch crochet, you can use any type of or weighty yarn you prefer for the moss stitch creation. Depending on the pattern you want to create, you can choose a yarn that suits and fits.
How Many Chains Do You Need for A Moss Stitch?
If you want to create an even moss stitch crochet, using an even number of chains is advisable. You can even use multiple chains of 2 to create a beautifully designed, even moss-stitch pattern.
What is the Difference Between Moss Stitch and Mesh Stitch?
There is a basic difference between moss stitch and mesh stitch. The mesh stitch contains all the stitches and is part of the Moss stitch. But the moss stitch needs even number chains and looks slightly different than the mesh stitch sequence.
How Do You Count Stitches in Moss Stitch?
When working in a moss stitch, you must do an alternate count between the purl and knit stitches present in each row. In the case of the row stitches, count all the alternating bars and V’s. Remember not to slip from row to row.