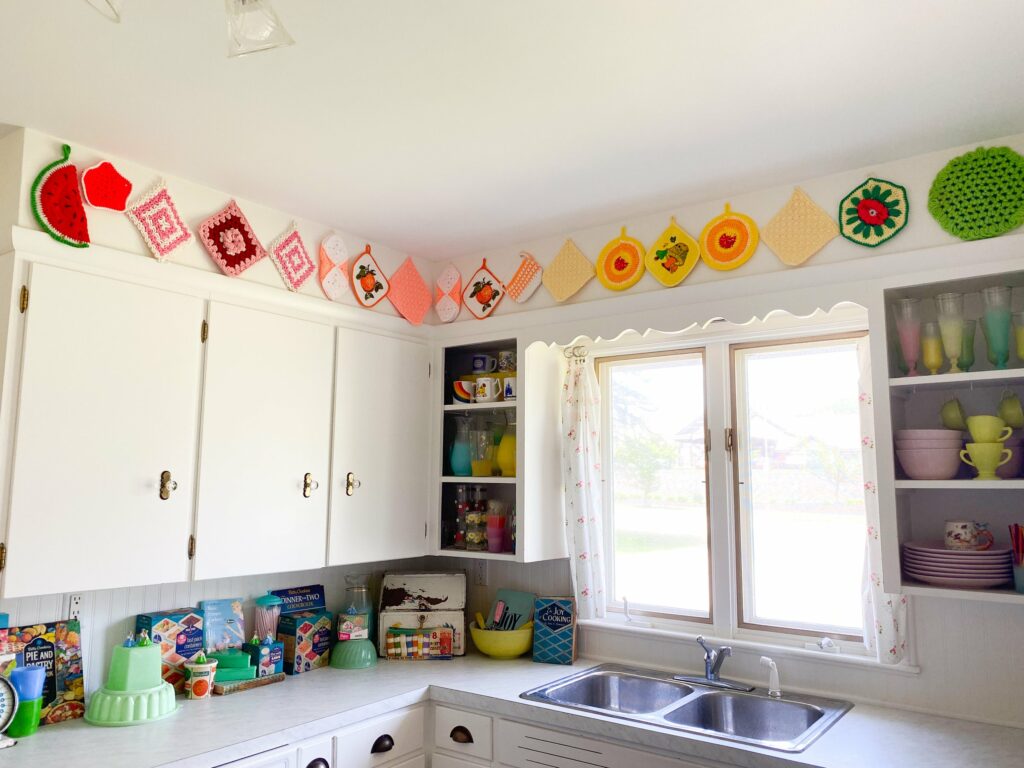
Did the nostalgia of the older, simpler times knock its way to your heart, or did you just remember your granny’s kitchen, where cute little pot holders enhanced the beauty and coziness? Well, you might not get similar times and situations back, but you can definitely use your creativity to prepare handmade projects that will have both your skill of today and the elegance of the previous times.
The crochet vintage pot holders go beyond being mere kitchen items. Their intricate patterns, gorgeous colors, and classic shapes take us back to the time when the art speaks for itself. In your journey to crochet 22 vintage pot holders, we will be helping you out with wonderful patterns. So whether you are a beginner who is ready to try your first weaving or an expert who wishes to explore some new ideas, the antique pot holder designs will get your attention.
Crafting the Crochet Vintage Pot Holders: A Touch Of Nostalgia
There is so much for you to explore here with us if you are looking for unique ideas to create 22 crochet vintage pot holders. Get your equipment ready, choose the perfect yarn for your projects, check the needle’s grip, and get ready for an amazing journey.
Materials Required for Vintage Pot Holders
1. Hexi Puff Coasters
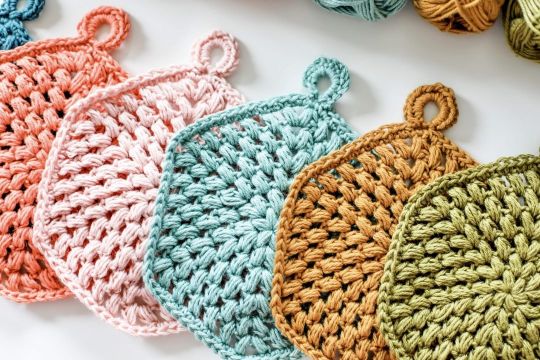
Enhance your special lunch with these amazing Hexi Puff coaster patterns.
- To initiate the Hexi Puff Coasters pattern, you must first create a magic ring and make chain 2 your first Double Crochet.
- Now stitch up about 11 Double Crochets into the ring, which will finally give you a cluster of 12 Double Crochets. Make the Hexi Puffs by binding them to the center.
- Close the cluster by dragging the loop from the beginning chain through each loop on the hook, pushing the stitches inward to form a puffy shape. Now, make as many puffy shapes as you want, and you can even use different colors for each puff.
- Now, set up seven hexi-puffs in a circle around the central one to form a hexagon. The edges must be sewn together to form a joint. To finish off the edges neatly, add a simple crochet border around it using slip stitches or single crochets.
- Weave all the loose ends and lock up your pattern to give it a neat and polished look.
2. Circle Hot Pad
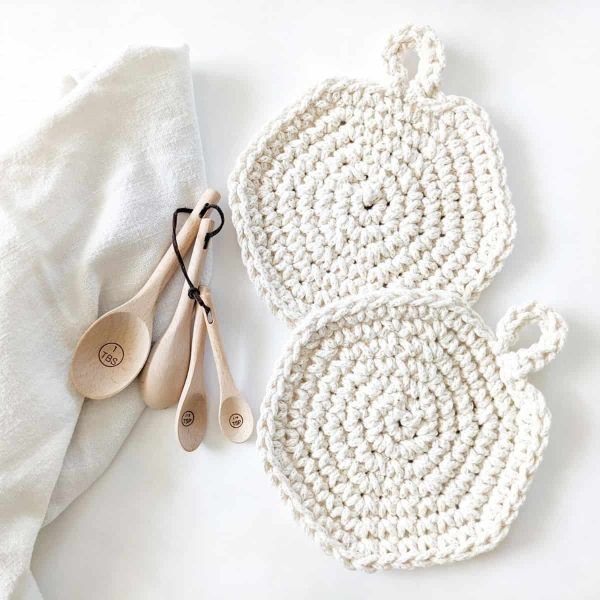
The thick circular hot pad crochet pattern is a perfect round pot holder that you can weave in easily after learning the techniques.
- Again, start by creating a magic ring. By twisting the yarn around your finger, you can create a magic ring and then put the hook through the ring and draw up a loop. Secure using Chain 1.
- Depending on your pattern, make the required number of single crochets, maybe up to 6 or 8 to the magic ring. To make the ring tighter, pull up the yarn’s tail ends. The circle will be completed when you add a slip stitch to the initial single crochet.
- A total of two single crochets should be worked into each stitch after the first chain. The circle is finished by slip stitching into the first single crochet.
- In the rounds that follow, Chain 1, work two single crochets into the first stitch, 1 single crochet into the next, and then repeat. Around the circle, repeat the similar pattern and finish it off by slip-stitching into the initial single crochet.
- The natural upward curvature of the hot pad will provide you with the shape of a bowl. And once you get the desired size of your project, make single crochets to give it a tidy edge.
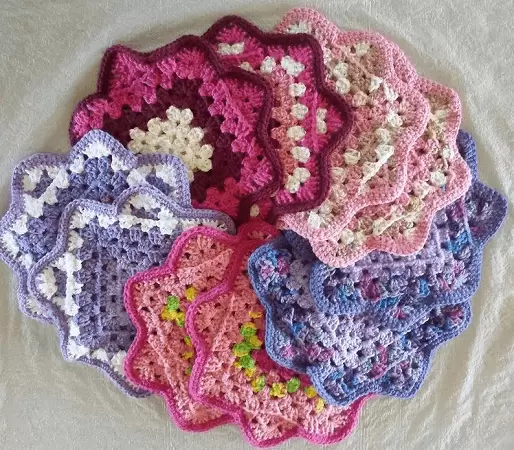
3. Flower Potholders
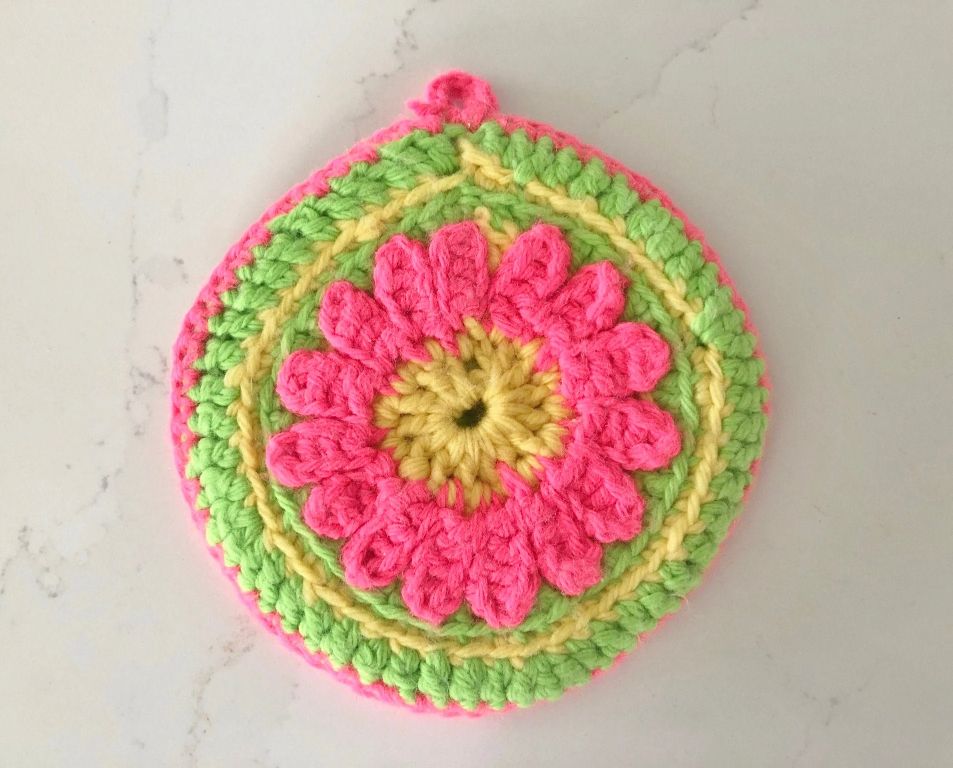
If you want to give a natural look to your pot holders, then beautiful flower patterns will do the work.
- Crochet a circle to use as the base of your flower pot holder, and start with a magic ring. Make a basic circle and then crochet several petals that will be joined to it. You may make each petal separately and attach them to the foundation by sewing.
- Starting with a chain of stitches that can be around 4-6, build a petal shape with Single Crochets and Double Crochets. The size of the petal will be determined by the rounds and amount of stitches you made.
- Now, use a yarn needle to arrange the petals equally around the foundation circle and stitch them there. Add a final touch by crocheting a decorative border at the top edge of the pot holder.
- Weave the loose ends, and you are done.
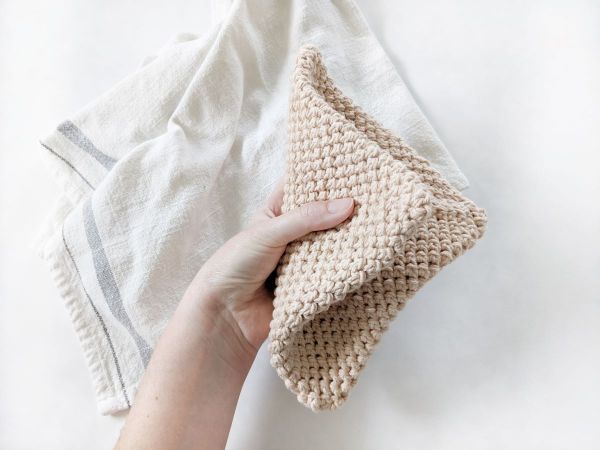
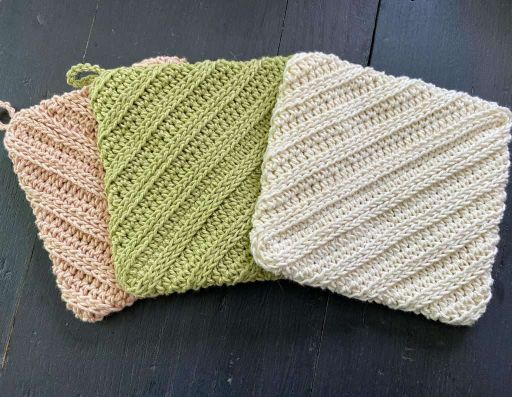
4. Ribbed Potholder
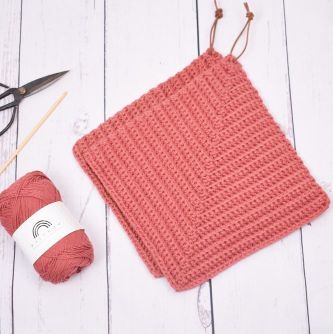
Ribbed Potholders have a simple yet beautiful texture that will amaze everyone with your creation.
- Start by chaining some 3 stitches. Your potholder’s breadth will depend on how long the chain is. In the second chain from the hook, make a single crochet. Now, use single crochets in every chain across the row.
- Give a turn to your project, Chain 1. Across the row, single crochet in only the front loop of each stitch. Again, turn your project, Chain 1. Single Crochet in each stitch throughout the row, focusing just on the back loop.
- Until the potholder is of your desired length, alternately repeat the ribbing rows. Try the FLO single crochets on one row and the BLO single crochets on the following. You must now give your project a clean edge after it has reached the required length. Do so by creating a round of single crochets around it. You may use both stitch loops to complete the round.
- Cut the excess yarn and weave the ends to make it tidy.
5. Mosaic Potholder
You can also create a unique mosaic pattern to give an aesthetic look to your potholder and earn admiration.
- Choose a mosaic crochet pattern or design as per your style. For mosaic patterns, only single crochets are used, and each row is made up of two different colors. You may get the width of your potholders by chaining an even number of stitches.
- Create a single crochet in the second chain from the hook. Using your primary color, single crochet the length of the row. You have to utilize both the Main Color and Contrasting Color for your mosaic rows.
- The mosaic effect is achieved by switching between single crochets in the color that is being used and skipping stitches in the contrasting colors. When switching colors, finish the final stitch of the previous row in the current color before you pull the new color to complete the stitch.
- Till your potholder reaches the desired length, continue creating the mosaic pattern. After you are done with the pattern, use single crochets around it to secure and then weave all the loose ends.
6. Holiday Potholders
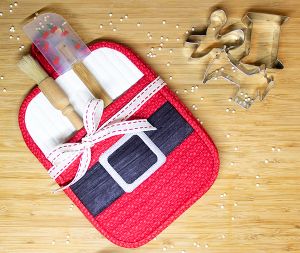
A more fun way of making potholders is by using holiday-theme ideas in your creation and letting everyone enjoy the looks.
- Choose a holiday theme for your potholder, like Thanksgiving, Christmas, or my own favorite Halloween. Choose a style that embodies the selected holiday. Initiate by chaining a few stitches together to form a foundation chain.
- Create a Single Crochet into the second chain from the hook. The main body of the potholder is made by single crocheting along each row in a neutral color. Change to the proper colors for your design to fit the holiday theme.
- With various hues, fill in the motif using color variations for your designs. Complete by doing a circle of single crochets around it. Use the yarn needle to weave the loose ends.
7. Crochet Microwave Bowl
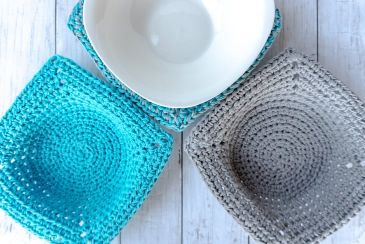
Microwave bowl crochet potholders give an amazing look and also keep your hands safe from being burnt.
- The bowl’s diameter should be measured before you begin. Chain several stitches that are a little less than the bowl’s diameter. This will make the cozy stretch and fit comfortably. Form a ring by slip-stitching the final chain to the first.
- Single Crochets should be made into the ring in a circle. This is when you will be creating the foundation. Now, Chain 1 and create a round of single crochets that work into the previous stitch’s BLO.
- Every round after that, stitch single crochets in BLO until it has achieved the desired height to cover the bowl. Make the transition to crocheting in both loops to create a beautiful edging. Use single crochets for a tidy border and cut the left yarn.
8. Chicken Potholder
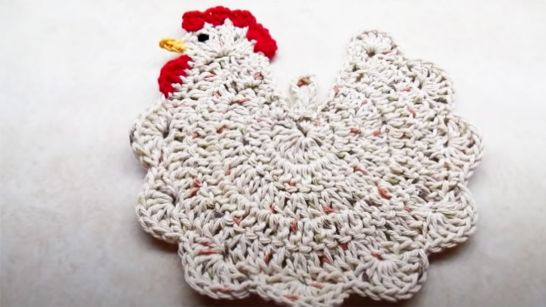
If you desire to give your potholders a farm look, then the chicken potholders can be an amazing choice.
- Choose yarn in different colors for the beak, body, feathers, and other characteristics of chicken. Make the body first by crocheting a circular shape. To get it the necessary size, creating a magic ring can be a fine choice. Add more single crochets to it.
- Use a contrasting color to create a little circle that will serve as the chicken’s head. Use the third color to crochet a little triangle shape for the beak and put it on the head. Use a red yarn to make the comb of the chicken and sew it to its head.
- Add tiny beads or buttons or embroider the chicken’s eyes. Utilizing the body color, create two little wing shapes and attach them to the sides.
- Use the same color to crochet a curved form for the tail and sew it to the rear of the body.
9. Scrappy Dots Potholder
Another unique pattern that you can use to create your potholder is the scrappy dots crochet pattern.
- Gather a range of yarn scraps in various colors. These might be the little yarn bits from your prior projects. Using one of the yarn scraps, begin by crocheting a circle. You may make it bigger by adding more single crochets over time using a magic ring.
- Change to a different color of yarn for every dot. Create a few single crochets, and then use the magic ring to crochet a little circle for each dot. Choose where to arrange the dots on the base circle.
- To join the dots to the base circle, use the yarn needle. Make sure that the dots are firmly secured by sewing them in place.
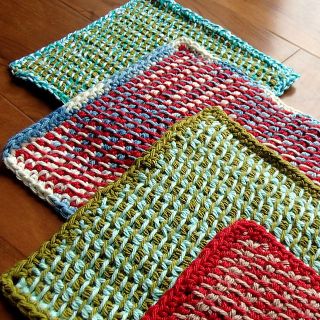
10. Woven Hot Pad
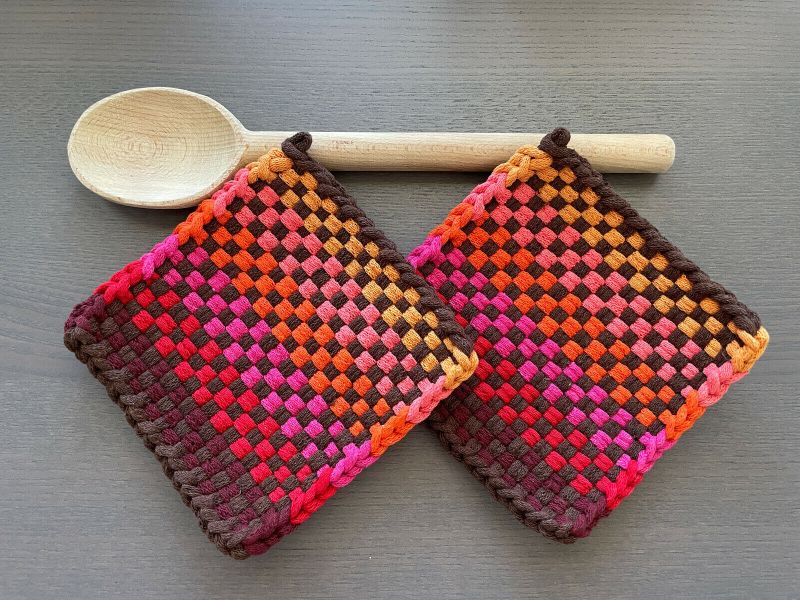
Want to give an exciting decoration pattern for your potholders? Woven Hot Pad can be an effective choice to work on.
- Start by cutting yarn into long, contrasting pieces. These pieces will help make the hot pad. Utilizing single crochets, make a foundation that is square or rectangular. Your hot pad’s total size will depend on that of the base.
- The cut strips of the yarn must be weaved through the stitches that are made around the base’s edges using a yarn needle. These stripes will form the vertical wrap. Create a new strip of yarn and weave it horizontally over and under the wrap. On each side of the foundation, repeat the pattern.
- Try weaving several colors to produce a colorful texture. To tighten the weaved rows up against one another, gently press them upward. This will result in a woven texture.
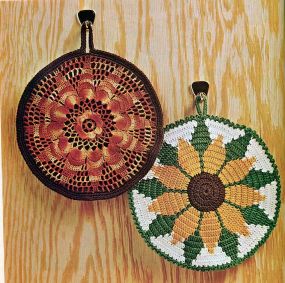
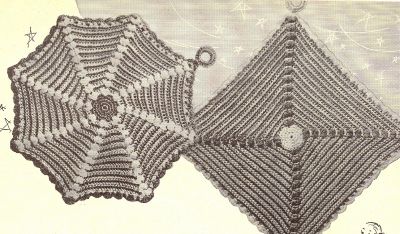
11. Vintage Hot Pad
Why not use a beautiful vintage pattern for your vintage hot pad? This will surely give you the nostalgic feeling that you desire.
- To generate a sense of Nostalgia, look for a vintage pattern you want to create. You can use lace designs, granny squares, or others. Pick the yarn shades that represent a vintage look. You may use soft pastels or subdued tones.
- Initiate by creating a foundation chain that will fit your hot pad as wide as you desire. Use your preferred vintage-inspired stitch pattern to crochet the Hot Pad’s main portion. This can be a simple square, circle, or other pattern.
- Around the edges of your Hot Pad, crochet a decorative border. You may use picot stitches or scalloped edges. Cut the tail and pull it through the last loop to secure it. Weave the ends.
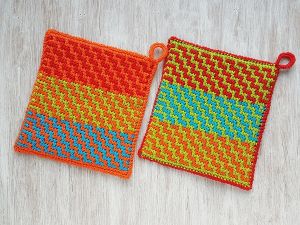
12. Two Color Tunisian Potholders
An antique technique to create the Tunisian Potholders will help you give an elegant look to your patterns.
- To make the potholders, use the yarn in contrasting colors. The colorwork pattern will be produced using them. Create a foundation chain with your desired width. Working the foundation row with color one, draw up a loop in each chain by placing your hook in the chain’s back bump.
- These loops should stay on your hook. With color one, begin the first row of the Tunisian Simple Stitch. Use your hook to pull a loop beneath the front vertical bar of the subsequent stitch. For each stitch across, repeat it.
- Pull through with color two to finish the last TSS stitch when you reach the end of the row. On the final yarn over the stitch, the color shift will take place. For the return pass, yarn over and pull through the initial loop on the hook, then, through two loops at once, continue till one loop remains.
- Change colors at the rows and then use a simple stitch or single crochet all around its edge.
13. Granny Square Crochet Potholder
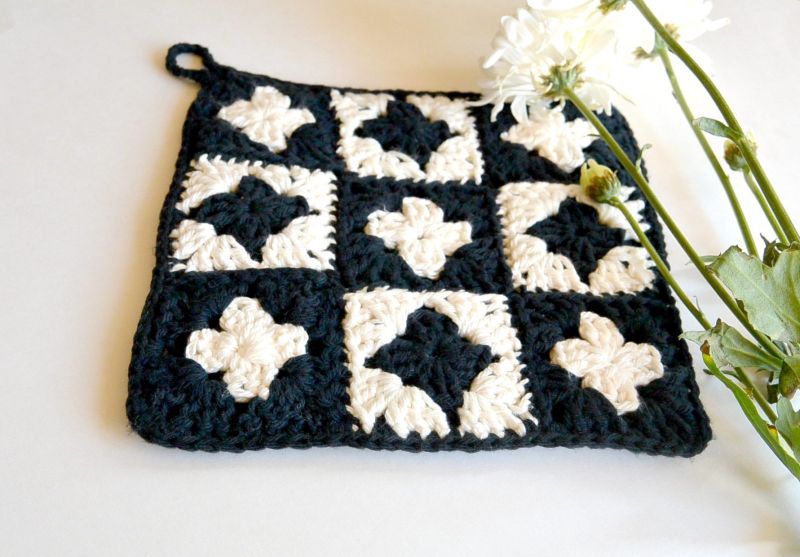
Add some modern designs to the vintage granny square crochet potholders to get the blend of both worlds.
- Choose yarn colors for granny squares that go with the style or decoration of your kitchen. Make a standard granny square to start. Create the magic ring and follow the pattern- Chain 3, which will be the first Double Crochet, create two Double Crochets, chain 3, and repeat.
- Using a slip stitch, join the final Chain 2 to the first Chain 3. Granny squares may be created in any number to get the desired size. The squares should be arranged in the desired pattern.
- By crocheting single or slip stitches across equivalent stitches on neighboring squares, join the squares together. You may achieve this either by connecting rows of squares or in a continuous line.
14. Double Thick Crochet Potholder
For better insulation, create a double-thick crochet pot holder that is both elegant and helpful.
- Chain some stitches, for instance, 24, and then add two more chains. Depending on this, your potholder’s width will vary. Create a single crochet throughout the row, starting with the second chain from the hook.
- Turn your work while chaining 1. A row of stitches should all be single-crocheted in the BLO. This gives the texture of ribs. Repeat the procedure to get the desired length. This ribbing will form one side of the double thickness.
- Fold the ribbed portion in half, right sides facing out, without cutting the yarn. Sew the two ends together to make pockets. Create single crochets through both layers while holding the two sides together to attach them. Work through the back and front loop.
- Single crochet the entire pot holder and then cut the ends and weave.
15. Check Potholders
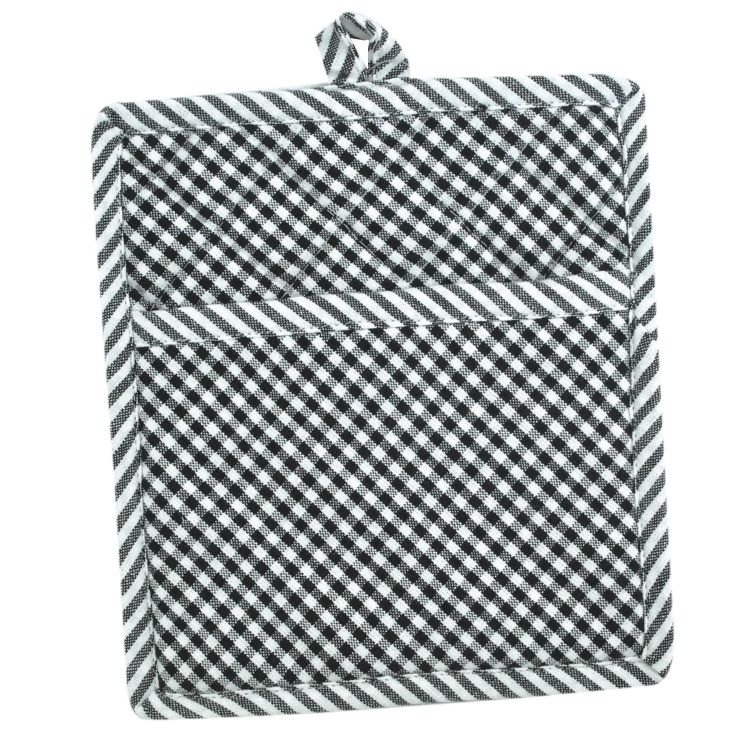
A checkered pattern is always loved, so create one in contrasting checkered stitches.
- For your checkered design, use two contrasting yarn colors. Add one more chain after chaining several stitches, like 28. Single crochet with color one in each chain across the row, beginning with the second chain across the hook.
- Chain 1 and then give a turn to your work. Use color second to single crochet in every stitch across the row. Change colors at the start of each row between the first and the second row. Use single crochets to border around the potholder.
- You can do the edges with colors one or two. Cut the excess yarn and weave the ends
16. Mushroom Potholder
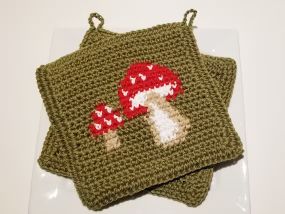
Do you love the Mushroom pattern on your decorations? Why don’t you give a chance to this amazing Mushroom Potholder?
- Choose yarn colors for the stem and the mushroom cap. Make a circle in crochet using the magic ring technique. To get the required size, increase the number of single crochets in the magic ring.
- Crochet a tube for the stem. Work single crochets in each chain across after making a foundation chain. Continue to crochet till you get the desired stem length. Using the yarn needle, sew the step to the mushroom head’s center.
- Make the edge neat and weave the loose ends.
17. Reindeer Hot Pad
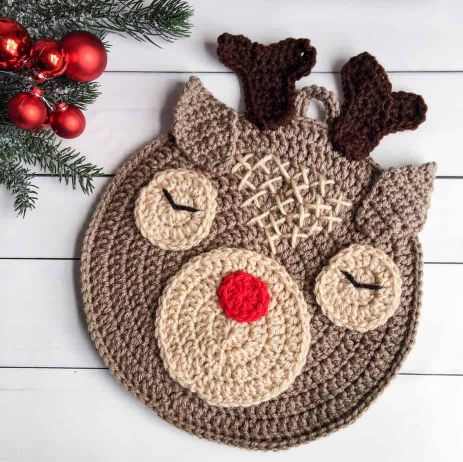
Your love for reindeer would be visible by creating the reindeer hot pad patterns.
- Starting with a brown yarn, crochet a pair of rectangles for the reindeer’s body and the head. Make two antlers out of beige or tan yarn. Make simpler or complex curving shapes.
- Use the brown yarn and yarn needle to sew the head to the top of the body. Using the black yarn, sew its eyes. Use black or red yarn for the nose. Make matching squares for the backside.
- Crochet to combine both front and back sides and seal it by weaving the ends.
18. Apple Shape Potholders

You can also try creating apple-shaped dishcloths or potholders.
- Starting with a red yarn, crochet a circle for the apple’s body. You can use single crochets or the magic ring for that. Use green yarn to crochet the leaf shape. Use triangular shapes or other patterns.
- Make a little stem using the brown yarn with a single crochet chain. Use a yarn needle to attach all these to the apple’s body. Form similar patterns at the back. Hold the potholders together and join by slip stitches or single crochets.
- Seal the ends with single crochets and complete your pattern by cutting off the extra yarn.
19. Pinwheel Whimsy Potholder
Creating a playful design for your potholder crochet will provide you with something unique to try.
- Choose two or more yarn colors for a striking pinwheel pattern. Crochet a pinwheel pattern first, and it can be formed using a square or circle with portions of contrasting colors.
- Section off the pinwheel pattern while switching the colors that you selected. This can be done by altering the motif’s color at precise locations. Using a yarn needle and the yarn, sew the pinwheel to the background.
- Use a solid color to crochet a similar square on the reverse side. Connect both sides together and secure the pattern.
20. Cupcake Delight Potholder
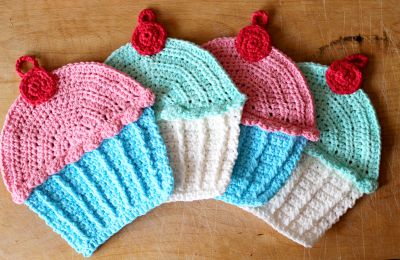
Cute cupcake designs are also amazing potholder patterns that can enhance your creation.
- For the cupcake foundation, start by crocheting the magic ring. Increase the number of single crochets for your required size. For the cupcake liner, crochet a smaller circle in a different color. For the cupcake’s top, crochet a bigger circle using an icing color.
- Align the centers and stack the cupcake base with icing on the top. Make a little red yarn ball for the cherry on the top and attach it to the icing’s middle. Use the additional designs as you want, like eyes and more.
- Make a similar pattern to the reverse side and then join them together with single crochets.
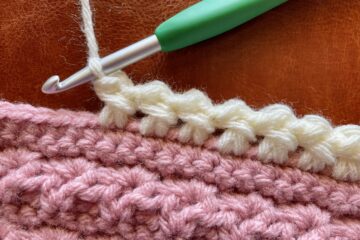
21. Popcorn Stitch Potholder

Let the taste ooze out in your crochet by creating a popcorn stitch potholder pattern.
- Choose your desired colors, make multiple stitches, about 28, and then add one more. Utilizing color one, create single crochets in every chain, starting from the second chain from the hook.
- Turn your work and chain 1. Utilizing color second, single crochet in each stitch throughout the row. Turn the project and chain 1. Use color second to create a row of single crochets.
- Work five double crochets into the same stitch to make popcorn stitches. To attach the popcorn, drop the loop from your hook, thread it through the top of the first double crochet from front to back, and pull it through the stitch.
- Switch colors if you want to, and finish off the pattern.
22. Retro Ripple Magic Potholder
Get ready for a retro look with the retro ripple magic potholder.
- Choose a vintage color scheme and form a number of stitches for the foundation chain. Start with a specific number of chains in the first row and make a double crochet in the fourth chain from the hook. Do it till you get the desired width.
- Chain 3 and in one stitch, double crochet twice. Double Crochet twice in the same stitch after skipping two stitches. Double Crochet the skipped stitch from Row 1. Continue the same pattern with different colors.
- Make a similar design on the reverse side, attach it using single crochets, and then sew it properly.
Wrapping Up!
We enlisted some of the prettiest and creative crochet potholder designs that you can learn and create for an amazing vintage look. From cupcakes to reindeer and Thanksgiving decorations to Halloween’s excitement, the ideas never stop generating. But you know these are not the only design patterns that you can follow. Creativity never limits, and you may use your divergent thinking for greater ideas.
The 22 vintage-inspired pot holders that we have discussed here are evidence of how the technique of crochet has endured through the ages in the world of handicrafts. So use your imagination, take help from our listing, and choose the most attractive colors to create the best crochet patterns that everyone will love and admire.
And if you get other new ideas, then do share them with the others.