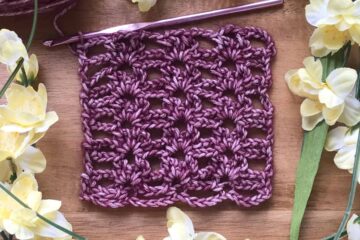
The popularity of sweater blankets has been on a steep rise in the past few years as we get to see more and more youngsters starting to learn how to knit and becoming crochet enthusiasts. This is leading more tutorial videos on YouTube and other leading blogs on making these sweater blankets.
“Betty Ann sweater blanket” came into existence when an online knitting blogger named BettyAnn used three of the blanket knitting patterns from an online website and combined them to make a blanket pattern; sharing it on Facebook made it blow up.
In this article, we’ll take a closer look at this blanket pattern and try to make one for ourselves with a step-by-step guide on the materials needed, preparation, design, techniques, finishing care, and maintenance of the Betty Ann sweater blanket.
So, without any further ado, pick up your crochet hooks, and let’s get knitting!
Materials Needed for Betty Ann Sweater Blanket
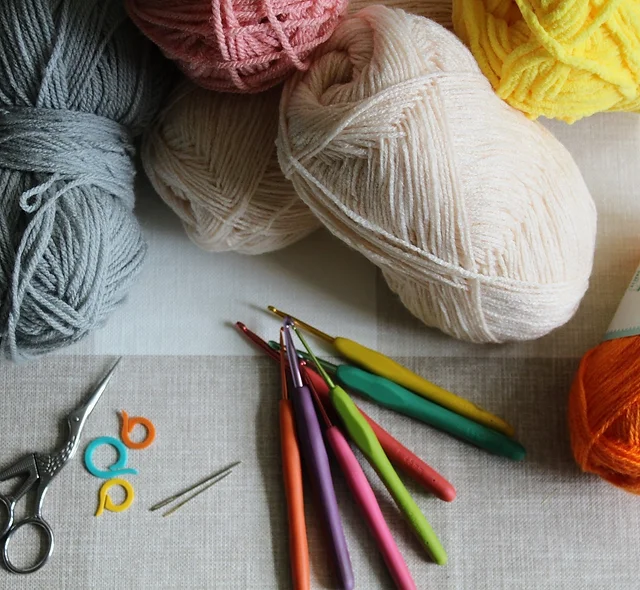
- Red Heart Soft (100% acrylic, 141 g/5 oz, 234 m/256 yds):3 skeins Black & 4 skeins White
- Size I, J, and K crochet hooks: We’ll need these to adjust the tension as per our requirement.
- Scissors
- Tapestry needle
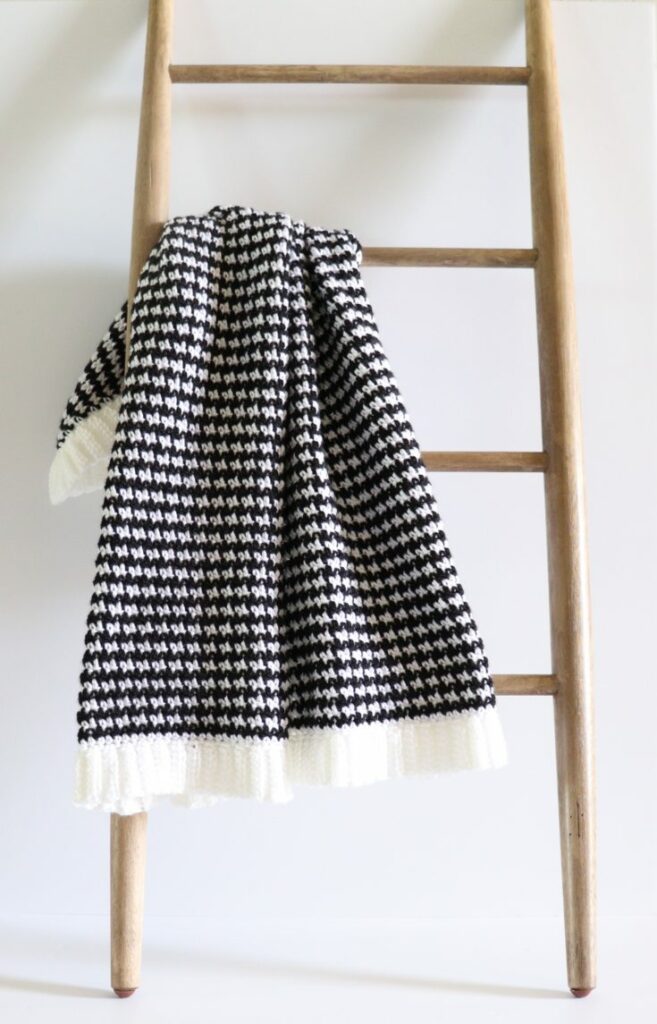
We recommend Red Heart Soft since that is the yarn that BettyAnn originally used to make the Betty Ann sweater blanket. The sizes and quantity of the yarn recommended here will yield a 36 x 36-inch blanket; depending upon the size of the blanket that you require, you may adjust the quantity accordingly. Also, we’re using black and white to match the exact results as Betty Ann’s sweater blanket, but we encourage our readers to try this pattern with different contrasting colors.
The I, J, and K crochet hooks are all listed in our requirements section, as there come certain points during the knitting when we need to adjust the tension of our yarn, which will be useful.
Scissors can be basic craft scissors or U-shaped yarn scissors, whichever works best for you. Tapestry needles will be useful in joining the finished pieces together to create the final blanket.
From Gingham to Griddle: The Betty Ann’s Pattern
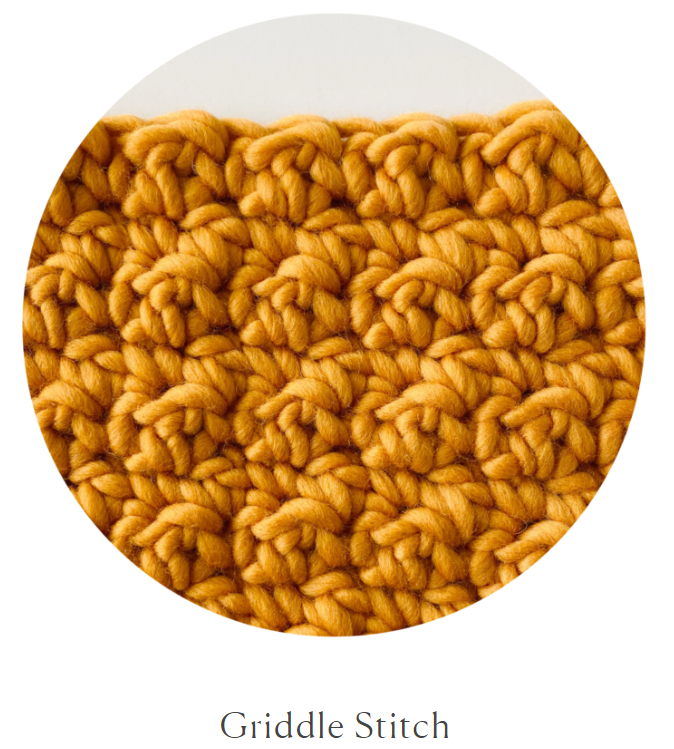
The griddle is a type of crochet stitch that uses an odd number chain with row 1 starting from the second chain and row 2 starting in the first stitch, and then the pattern repeats itself from row 2. We’re looking closer at the Griddle stitch because it’s the base of Betty Ann’s sweater blanket. The Tweed-like look that we see in the pictures is because of this Griddle stitch, which is derived from the Gingham pattern.
Upon close inspection, you will notice how the Griddle stitch is crucial in giving the Betty Ann sweater blanket its signature look, which was initially responsible for creating the waves of popularity we’re seeing across the internet. On a more basic level, we notice that the Griddle stitch involves a single crochet followed by a half-double crochet alternatingly.
The Exclusive Betty Ann Touch!
This is the reason why we’re here discussing and trying to learn the Betty Ann sweater blanket pattern; the combining of the three patterns is what made the blanket special. BettyAnn’s creativity led to the new and first-of-a-kind pattern that gave the blanket its signature look and feel. With the help of these combinations, BettyAnn was able to achieve something that was both aesthetic and appealing to most people connected with the online knitting community. Her choice of colors, patterns, and yarn made the entire difference and gave this design the name Betty Ann sweater blanket.
Step-By-Step Tutorial Guide for Betty Ann Sweater Blanket
Step 1: The Base Chain

We see the Betty Ann sweater blanket start with a base chain made slightly longer than the desired length; this is because once we reach the length that we finally require, we will have to accommodate for the shrinkage in length, which is a common phenomenon in the case of blocking the yarn. Blocking is done by steaming your finished piece; some people also prefer wetting the piece to steaming. This step ensures that all the stitches are even out and all the folds and curves come out as desired.
1st Row
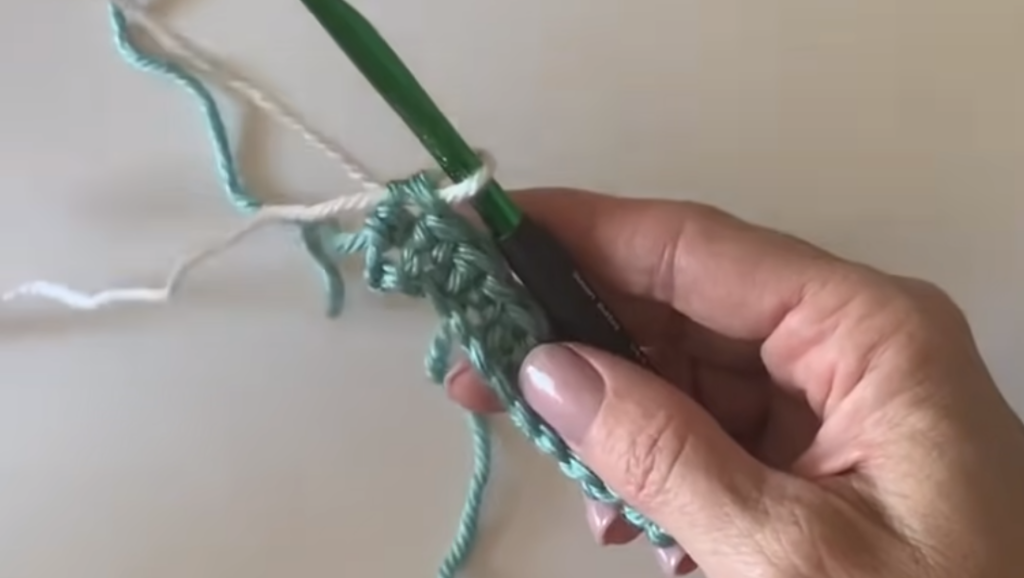
Single crochet stitches are what make up the first row of the Betty Ann sweater blanket. Later, we will use this first row to knit our Griddle stitch. This is the starting point wherein we start to use Betty Ann’s techniques; we’re already making accommodations for the Griddle stitch in our first step, so make sure you do the first row in a manner that there’s enough margin to incorporate the Griddle stitch in the steps that follow
2nd Row
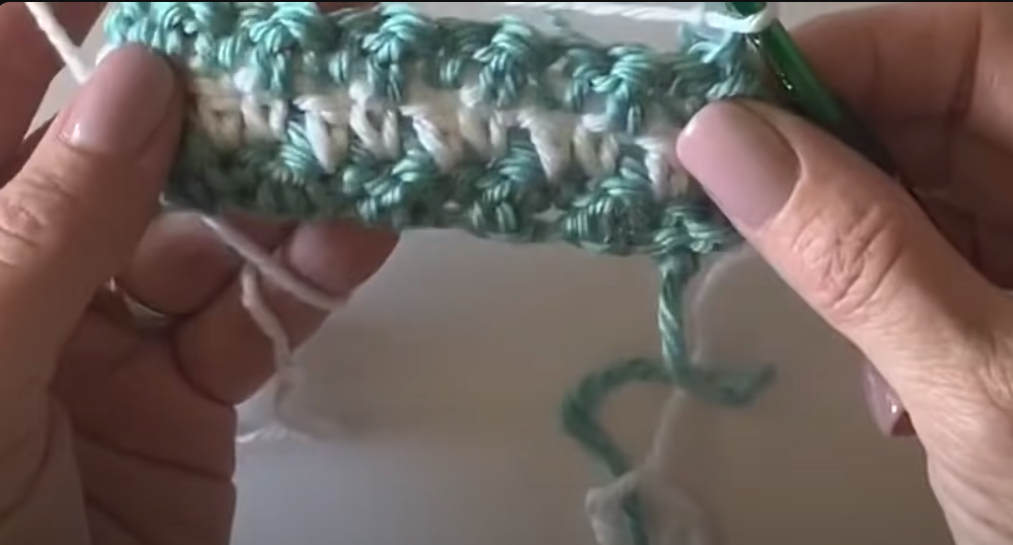
Now, we come down to the next row, which will be made using the double crochet stitches technique, and then we repeat the first row to create the Griddle stitch pattern alternatingly. We have to be mindful of the fact that the first repeating pattern is made perfectly, as that will act as our base to further work upon, as after this, there’s mostly repetition of the same alternating pattern.
Now, to make things more interesting, at this step, you can induce a little creativity with colors and patterns; this, in turn, will give a more aesthetic appeal to the finished piece. This step was widely emphasized by Betty Ann herself: Try to add a good amount of intricate design elements to your piece.
Step 2: Edges and Borders
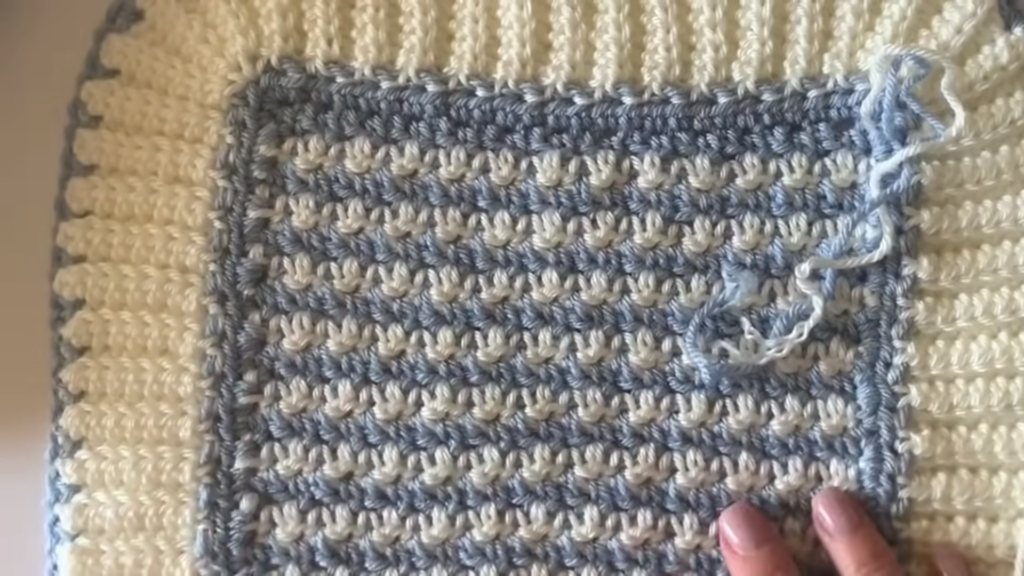
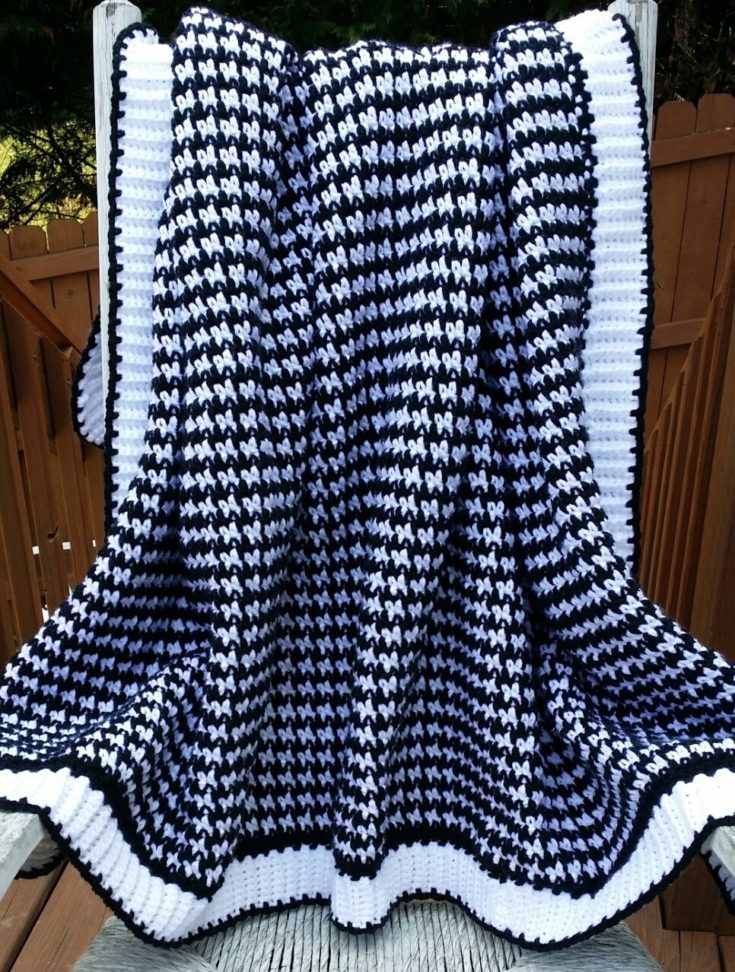
Just like a woodwork project is incomplete without polish, an intricately designed border for your piece is of utmost importance when it comes to the design and appeal of your piece. Betty Ann sweater blanket originally had a wide white border with a half-double crochet stitch technique. The border is supposed to be of a color that contrasts with the overall body of the piece; this will give it the design aesthetic as suggested by Betty Ann.
We suggest you don’t stop at the border and get creative in your approach, adding pom-poms or tassels. If you feel you can give it the desired personal touch, then be brave and go for it; who knows, the next article might be on a design named after you! We always encourage our readers to be creative and experiment, so why stop at pom-poms or tassels?
Step 3: The Final Step
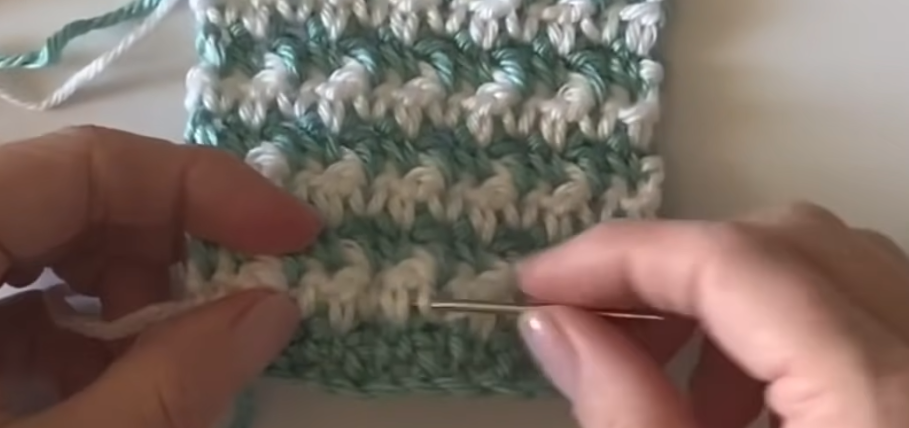
For this, we need to take up the tapestry needle and get to weaving any loose ends that are visible on the back or anywhere else on the piece. Remember, the piece is not finished until crafting is done, and this step of finding and weaving the loose ends is art. This will take some time and effort, but you must make sure your piece is rid of all loose ends and looks the way you want it to be. Take precautions while cutting away any loose pieces of yarn.
Step 4: Adding Final Touch-Ups
Betty Ann’s sweater blanket combines creativity and meticulous work, and her advice to people is to take your time while knitting a piece. There are several ways to ensure the final stitch of your piece, and in this case, we recommend the backstitch; this is because a backstitch is thought to be the strongest sealing stitch by many experts online.
Be that as it may, we still recommend using the stitch your heart desires; you can research online for this or ask your friend to suggest a technique. Now that the piece is almost done, little creativity efforts are encouraged to improve the overall look and feel of your blanket; add aesthetic design elements like loops, tassels, intricate border designs, etc. In short, let your imaginations fly! Essentially, the code is to follow aesthetics and be creative!
Now, to provide the necessary professional touch to your piece, we suggest you use a good blocking technique to seal the edges and even out the seams, stitches, and curves of your piece. This step is also crucial in molding the final piece into the originally intended shape.
Essential Tips on Caring and Maintaining Your Piece
In the event of avoiding any unwanted stain, we recommend using a mild detergent, massaging with your fingers, and letting it sit submerged for at least eight to ten minutes before rinsing off.
For machine washing, set your washing machine to gentle care and wash it in cold water. For hand-knitted blankets, tumble-dry poses no problem, but if you want to take things a step further, squeezing and towel absorption are two expert-recommended methods. Wringing the piece is to be avoided, and laying flat to dry is the best possible solution for drying your hand-knitted blanket. Dryers are also to be avoided in the case of hand-stitched blankets and other pieces.
Protection against humidity is also prescribed; for storing, we recommend a cool and dark place to avoid the attic or the basement due to humidity. Also, avoid hanging the piece for a prolonged period as it will lead to premature and over-stretching out of the piece.
As far as lint shavers go, it is advised to use a gentle enough approach when shaving off the lint from your hand-knitted sweaters and blankets. Never manually pull the pills/lint from the surface of your blanket; it can cause serious damage to your piece.
A Betty Ann sweater blanket that you knit for yourself would be the crown jewel of your collection, and following the prescribed steps to store and care for your blanket would ensure its long life and would protect its design elements and appeal for a longer time.
Conclusion
To wrap things up, with the rising popularity of sweater blankets online, we hope this article will prove helpful in knitting a Betty Ann sweater blanket yourself.
We feel that knitting a piece involves a lot of patience, is somewhat like a journey and an enjoyable one, and the results are like the destination and beautiful! Sure, sometimes it can get a little tedious, but that’s the beauty of this process. Once finished, admiring your result is a feeling unmatched by going to a shop and buying something for yourself.
Hand-stitched blankets are a love language in themselves, one of care and affection. Lastly, we would encourage all of your readers to try the Betty Ann sweater blanket yourself and share the results with your friends and family. So what are you waiting for? Grab that crochet hook, spin some yarn, and Happy Knitting!