Are you searching for a relaxing and mindful stitch to learn? Explore the world of gentle waves of the ripple crochet stitch. It is one of the easiest and most versatile stitch patterns that are perfect for beginners.
With the help of it, everyone can easily create different things, from stylish shawls and cozy blankets to warm sweaters. People prefer this specific stitch pattern because of its soothing pattern.
Furthermore, with its versatile pattern, you can add a touch of charm and elegance to any type of crochet creation. This article will highlight everything you must know about the crochet ripple stitch.
We will shed light on the crochet ripple stitch, what kinds of projects are suitable for this stitch pattern, and what is the ideal way to crochet it.
A Quick Overview of Ripple Stitch
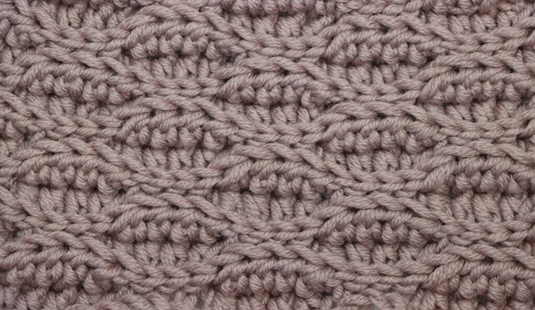
The ripple stitch is the easiest and beginner-friendly crochet stitch with subtle-looking waves. As this specific stitch pattern is created with double crotches stitches, it becomes easier for the designers to complete the stitch quickly than the other varieties.
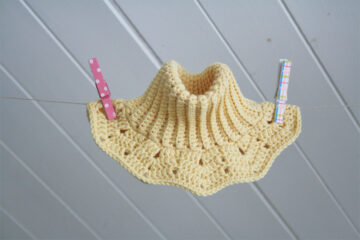
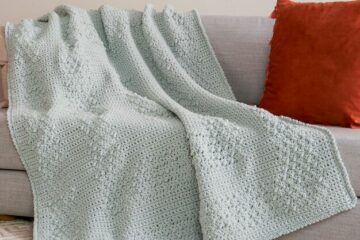
With the help of this unique and elegant stitch pattern, you can easily create gorgeous and soft blankets, scarves, shawls, etc. There are different ways to ripple crochet stitch effortlessly. In the simple and basic version, designers can create a smooth look with tiny gaps or holes.
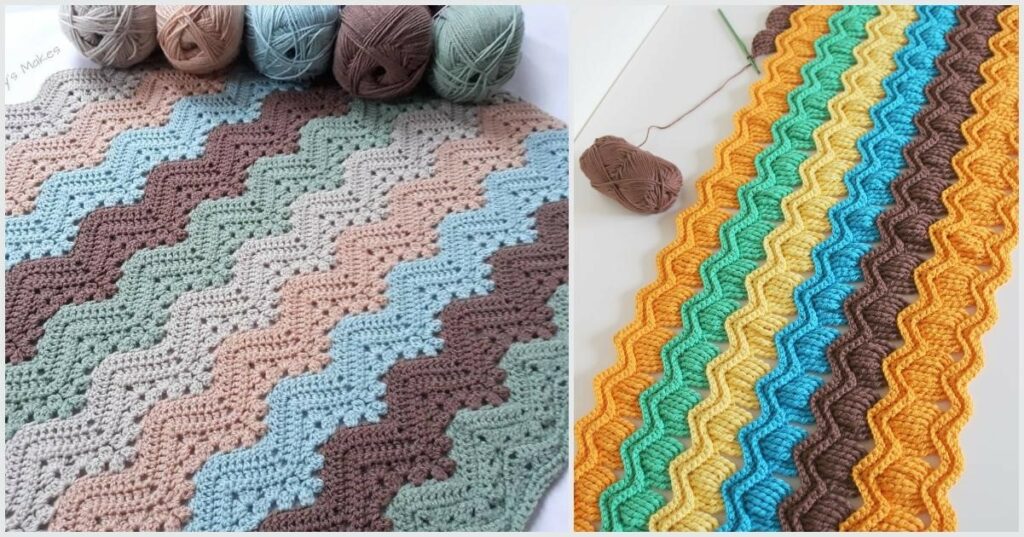
This specific stitch pattern is an ideal pick for intermediate crocheters. However, you can use your favorite yarn with your preferred weight and color. It specifically looks amazing with gradient yarn. The best part is that you can do this in three simple steps.
Assessing the Varieties of the Ripple Crochet Stitches
There are several varieties when it comes to ripple crochet stitches. It means you can add different eye-catching motions and different visual interests to the ripple crochet stitch patterns. Here, we will discuss a few varieties of ripple crochet stitches. So, without much delay, let’s quickly dive right in!
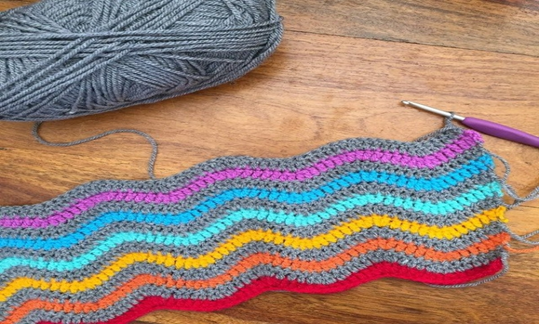
1. The Double Crochet Ripple
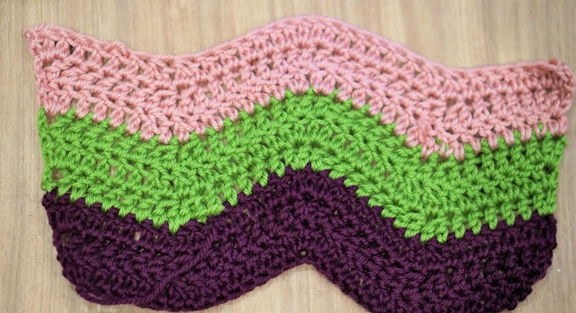
The double crochet ripple offers various textures to the crochet pieces. The designers can use the basic yet classic stitch to create different wraps and shawls. It is one of the most popular and well-known varieties many designers use to start their journey.
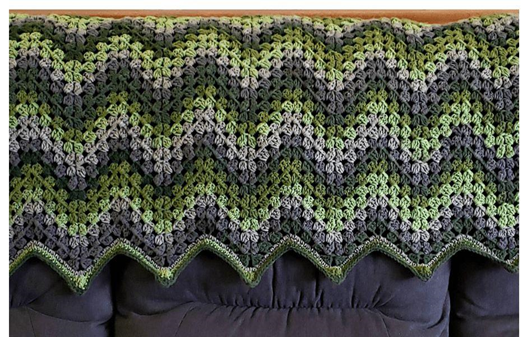
2. The Vintage Fan Ripple
The vintage fan ripple is another variety with great texture and wavy, raised, tall stitches. This specific variety works perfectly with the color changes. You can create this ripple crochet stitch easily and make it look advanced.
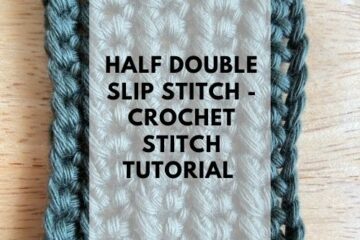
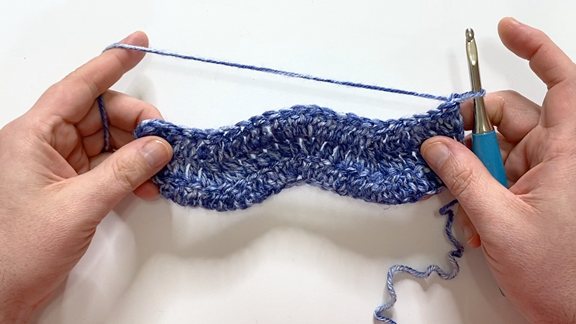
3. The Single Crochet Ripple
The single ripple stitch pattern is ideal for beginners because of its user-friendliness. It requires a single crochet and the knowledge and skills of stitch increasing and decreasing. The designers can seamlessly make beach bags, throws, and blankets with it.
4. The Granny Ripple Stitch
The granny ripple stitch is another popular ripple stitch that is similar to the original ripple pattern. You can create this specific ripple design by making clusters and skipping chains. Furthermore, you can easily crochet this pattern, making it a perfect pick for beginners.
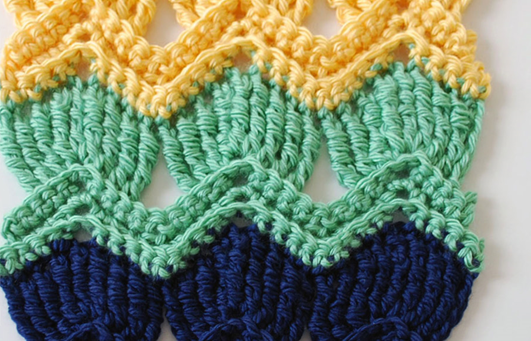
5. The Ripple Puff Stitch
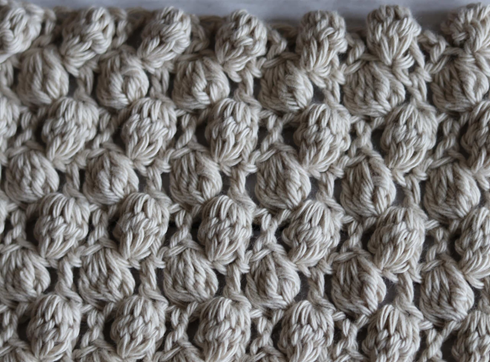
The ripple puff stitch has attracted many designers with its extraordinary luxurious charm. It offers a fantastic, raised look to winter wear. The best part is that it is simple to crochet, even if it looks too complicated.
The Ripple Crochet Stitch and How to Do it Effortlessly?
The significant advantage of using the ripple crochet stitch is its versatility. Therefore, you can easily pair it with any kind of yarn from your stash, from super bulky to lightweight. However, select a smooth yarn to make the stitch pattern look the best.
Also, using this specific stitch can highlight your pattern in the best possible way. If you wish to get a new and interesting look, using slightly textured yarn will be a perfect pick for you. It will help you make eye-catching, colorful knits for the desired results. The ripple crochet stitch process is easy and can be done with a few simple steps mentioned below.
Step 1: Choose the Right Supplies
You first need the correct materials or suppliers for the ripple crochet stitch. The primary two things that you require to start the crochet are perfect yarn and the crochet hook according to your preferred size. You can begin your journey with medium-weight yarn. This is so because beginners need a small amount of yarn for the practice swatch.
It is always good to choose a lightweight yarn to make the entire process easier and quicker. However, you can use a single-colored or textured yarn as your choice. But pay attention to the yarn material to ensure you can crochet soft sweaters, blankets, or throws.
Step 2: Pay Attention to the Pattern Notes
Well, there is no wrong or right side of the ripple crochet stitch. It is so because it is called a reversible stitch, which looks the same from each side. You must concentrate on the pattern notes because it determines the outcome of your project. Remember, chain 3 of each row is considered the double crochet stitch at the beginning.
Hence, the first stitch of each row will always be a chain 3. Your first ripple stitch must work in the same stitch from where the three other chains are coming from. It must be done to ignore dripping stitches at the start and end of the row.
Step 3: Stitch Multiple Rows
After understanding the pattern notes, you must concentrate on the multiple stitches. The ripple crochet stitch multiple is 14 + 3. It implies that 14 stitches are there from peak to peak. So, whenever you plan for your project using the ripple stitch, you must chain in groups of 14 while adding the three chains at last.
As this chain of ripple crochet will be condensed into peaks and valleys, this specific stitch will shrink after completing the first row. It implies that you must do additional work on planning the chain length for your project. So, improvise the pattern whenever you are ready for it.
Step 4: Proceed to Work with Stitch Abbreviation
After knowing stitch multiple and pattern notes, it is time to learn the stitch abbreviation and row pattern. It is especially important for beginners as it helps them in their future projects. So, the ripple crochet stitch abbreviations are:
- Dc- Double Crochet
- Ch- Chain
- Rem- Remaining
- St (s)- Stitches
- Rep-Repeat
- Hk- Hook
- Dc2tog- Double Crochet Two Together
Now, finally, let’s see the row pattern with these abbreviations to make you understand the process in better ways.
Row Pattern
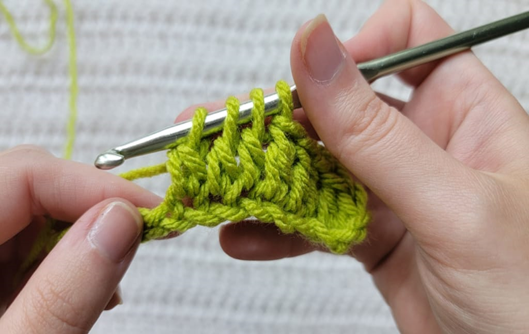
- Begin the pattern with the foundation chain of the 15, then dc in the fourth chain from hk. Then, dc in every 3 ch next.
- Now, it is time to Dct2og in the upcoming two stitches.
- It will create the initial peak in the ripple crochet stitch.
- Then, DC in each of the upcoming three chain stitches.
- Now, you will be able to make the first wave with 2 dc in the next ch twice.
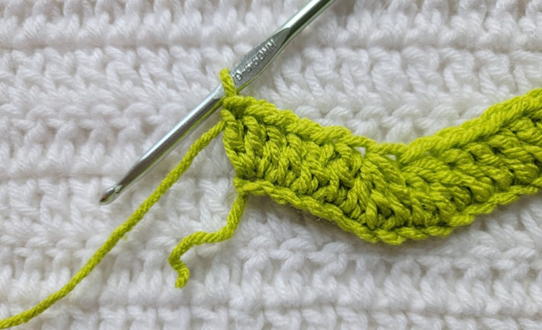
- Repeat the pattern till the last ch until you get the three stitches. You can even add more to get your desired size.
Embrace More Wave Ripple Crochet Stitch Techniques
The ripple crochet stitch mainly produces a reversible and light fabric with small gaps and holes. All these qualities make this pattern best for projects where draping plays a crucial role.
Also, it is great for projects with zero requirements for a lacey look. Here are a few techniques that you can add to your ripple stitch pattern to make it look more interesting.
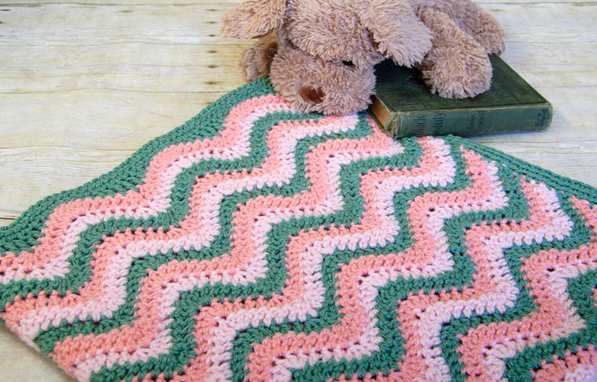
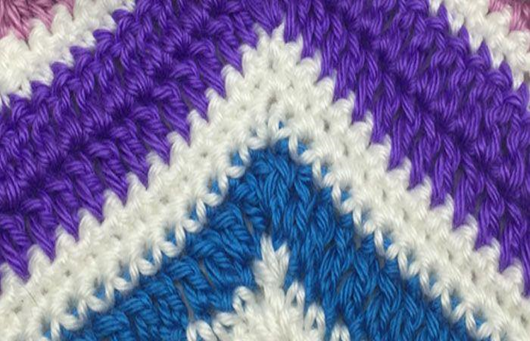
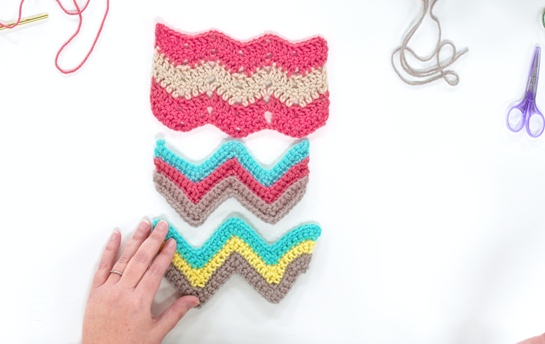
1. Chevron Stitch
![]()
If you wish to add a pop of colors to your project, consider adding the chevron stitch. You can use it in scarf designs to add a colorful and vibrant touch to it.
2. Lacey Ripple Stitch
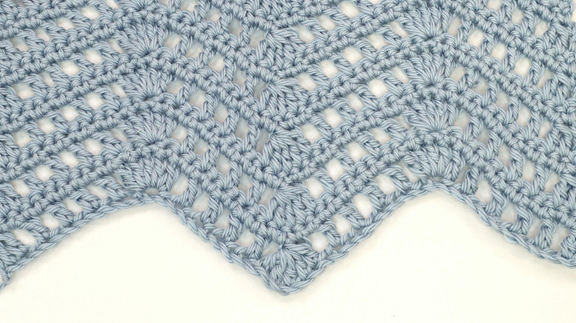
The lacey ripple stitch can also be an excellent addition to give your project an intricate texture. It produces stunning surface texture to give it a nautical, beachy vibe.
3. Almond Ridges
You can use almond ridges to create a gorgeous and extraordinary ornate pattern. It adds a special touch to the crochet to make it look simpler. It is an ideal option for beginners if you can handle the half treble and slip stitch.
Key Differences Between the Ripple and Chevron Stitch
The main difference between the chevron and ripple crochet stitch is their shapes of peaks and valleys. As we mentioned before, the ripple stitch offers a more gentle or subtle wave to the peaks and valleys. But, on the contrary, chevron stitches come up with more well-defined points.
The chevron stitches generally have the zig-zag pattern or the ‘V’ pattern. However, apart from the differences, they come up with many similarities as well. You must concentrate on the amount of space between the increases and decreases in both stitches. People prefer ripple stitches because of their multi-purpose uses.
How Can You Calculate the Ripple Crochet Pattern Properly?

Calculating the ripple crochet stitch pattern is easy if you get the right guidance. Remember, it is one of the simplest stitch patterns of all, and beginners can easily begin their journey with it. As the length of the starting chain of the crochet ripple stitch shrinks after completing the first row, you must pay attention to a few things.
You must identify how wide any single repeat is for your selected hook and yarn. Furthermore, you need to look at the stitch multiple as well to figure out how many chains you require in the single repeat. Once you know that, you must find out how wide a single repeat measures with the help of the hook and yarn.
So, begin with chaining the multiple and then add the required chains at last. After getting this information, divide the measurement to understand the number of repeats you require for the width you want for your project.
Ripple Crochet Stitch: Takeaway
In summary, the ripple crochet stitch is one of the most basic yet multi-purpose, beginner-friendly stitch patterns that one can master. All the ripple stitches consist of peaks and valleys made by working increases and decreases along the row at regular intervals.
The best part is that the ripple crochet stitches have different variations, which help the designers make several designs easily.
You can even pair it with your favorite yarn to make gorgeous home décor projects. So, the designers can select this stitch pattern for making different crochet projects. Selecting the correct size of your beginning chain length is crucial. It is so because the size varies in different projects.
We hope this article provides enough information about crochet ripple stitch to begin your next project.
Frequently Asked Questions
How to Do a Ripple Stitch Using a Single Crochet?
The single ripple crochet stitch pattern is mainly a basic wave pattern. You can easily create it with a single chain and crochet stitch. This specific pattern is especially beneficial for beginners. It is so because the pattern can be created easily to make beautiful crochet garments and Afghans.
What is the Quickest and Easiest Crochet Stitch?
The dc, or double crochet stitch, is one of the easiest and quickest crochet stitches. It works up very quickly while creating a medium-density fabric. With the help of two loops and one yarn, you can do this most efficient and easiest crochet stitch.