Nothing is more comforting than a crochet beanie in the freezing winters. Crochet beanies not only keep your head and ears warm but are in vogue, too. It is noteworthy that this cozy accessory is not boring regarding styles and patterns.
A classic beanie style that goes with any outfit is created with the timeless design of striped patterns. So whether you are discovering a new striped beanie crochet pattern or looking for designs as inspiration for your crochet journey, we have your back. We know how crucial it is to have a warm head throughout the chilly winter months. And what better accessory to accomplish that with than a beanie made by hand?
A striped beanie crochet pattern will not only keep you warm but also would look wonderful. And don’t forget, beanies made of crochet are wonderful presents!
Basic Crochet Abbreviations
In upcoming pattern guidelines, you’ll see these common crochet abbreviations used.
| dc2tog: double crochet 2 stitches together | sm/sl m: slip marker | edc: extended double Crochet |
| BPtdr: back post double treble crochet | BPdc: back post double crochet | BPtr: back post treble crochet |
| BPhdc: back post half double crochet | rnd: round rem: Remaining rep: repeat RS: right side | ch-: refer to chain or space previously made, e.g., ch-1 space |
| BPsc: back post single crochet | FPdc: front post double crochet | ch-sp: chain space |
| sp: space st: stitch tbl: through back loop tch: turning chain tr: treble crochet tr2tog: treble crochet 2 stitches together trtr: triple treble crochet yo: yarn over | hdc2tog: Half double crochet 2 stitches together ch: chain stitch dc: double crochet dtr: double treble crochet FL/FLO: front loop/front loop only FP: front post hdc: half double crochet ps/puff: puff stitch sc: single crochet sc2tog: single crochet 2 stitches together sh: shell sm/sl m: slip marker | md(s): round(s) mm(s): millimeter(s) pm: Place marker prev: previous ehdc: extended half-double |
| pc: popcorn stitch | FPhdc: front post half double crochet | esc: extended single crochet |
| foll: following | etc: extended treble crochet | mc: main color |
| yoh: yarn over hook | bp: back post | FPdtr: front post double treble crochet |
Extensive Guide to Striped Beanie Crochet Patterns
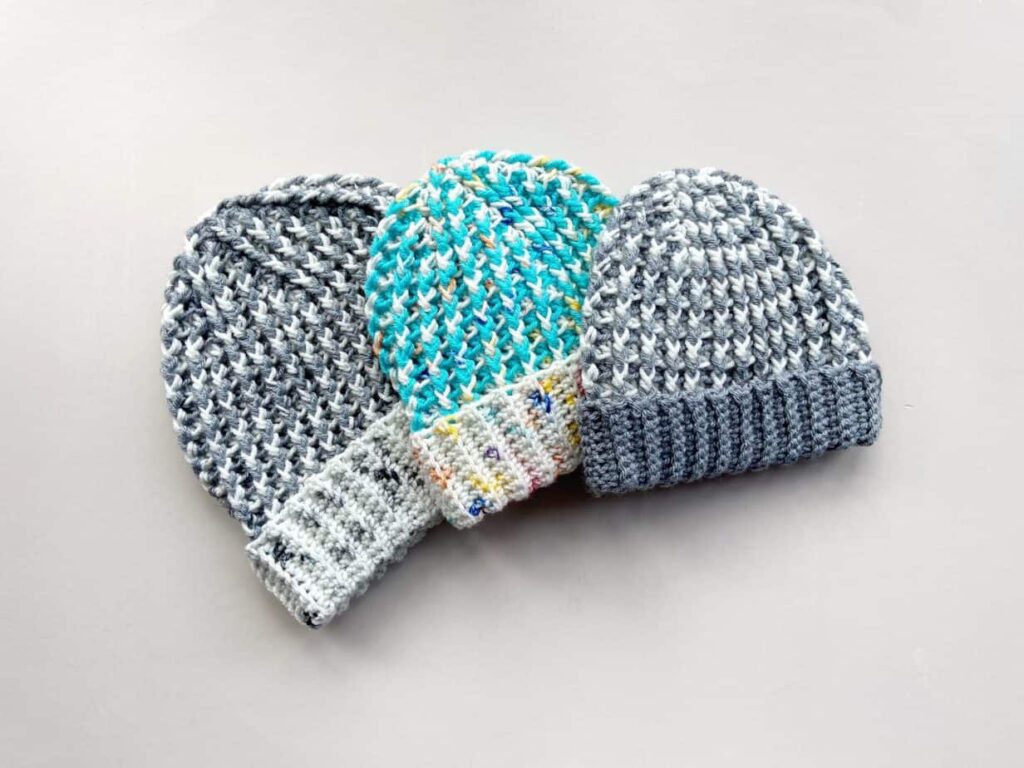
1. Basic Back Loop Beanie
This Basic Back Loop Beanie design is perfect if you’re searching for a beanie that’s extremely suitable for beginners. These beanies, which come in seven sizes ranging from newborn to adult, are very quick to make and simple enough for a beginner crocheter. The tutorial for this striped beanie crochet pattern is easily available.
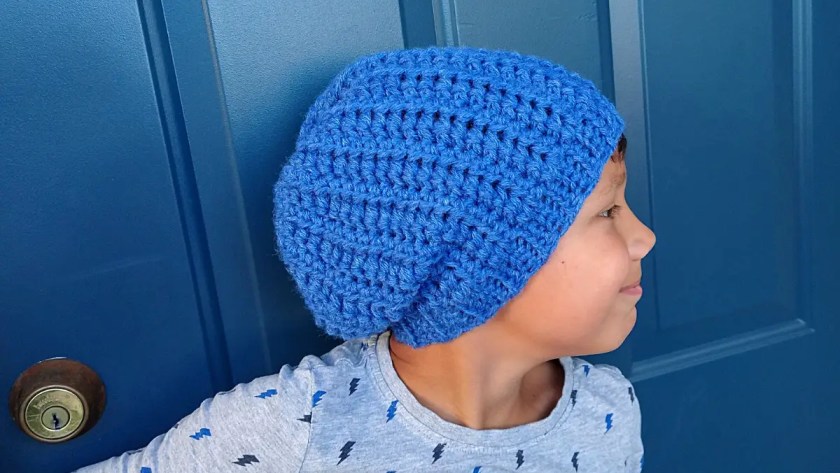
2. Single Crochet Loop Beanie
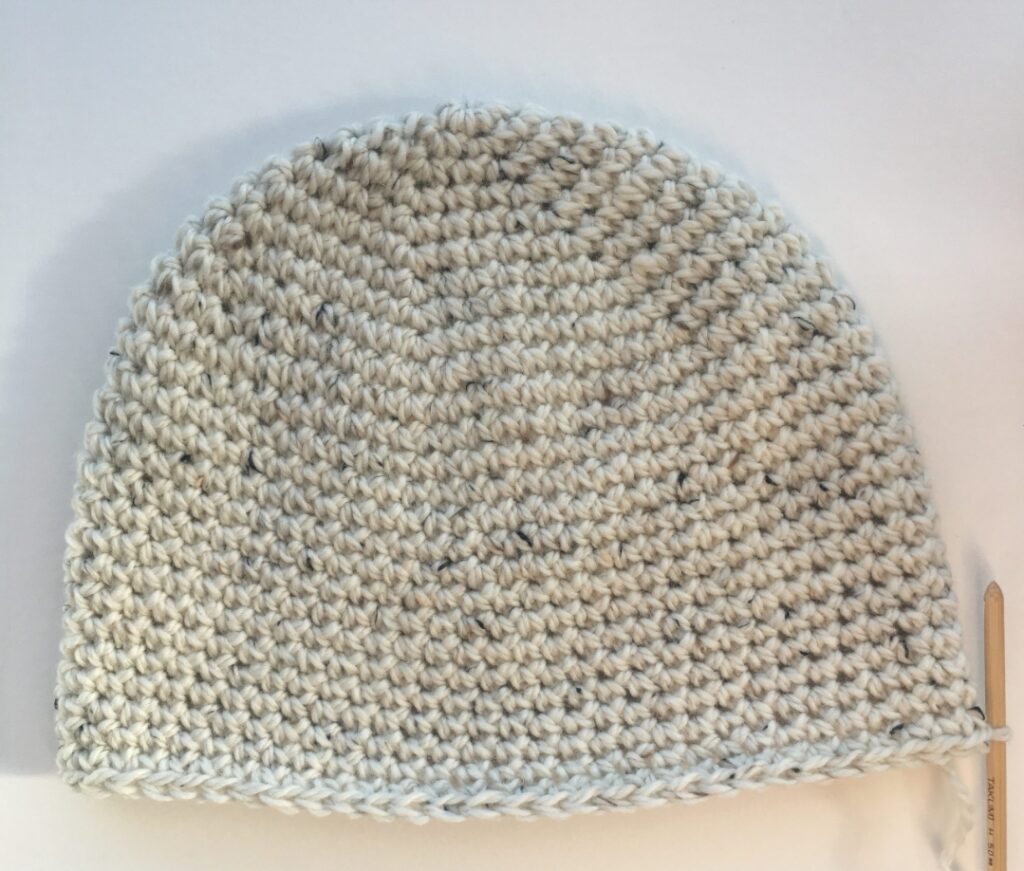
It’s easy to follow and makes the ideal winter beanie with this single crochet beanie pattern. This simple striped beanie crochet pattern is ideal for everyone to make, wear, and give as gifts to their loved ones.
Single crochet stitches are used throughout the beanie pattern, which is worked from the crown downward. Every round of the crown’s rounds is larger than the one before it until it has the diameter required for your size. Once you achieve the desired length, continue working the beanie in an even pattern. This striped beanie crochet pattern is always in style. In the final rounds, you have numerous alternatives for finishing the beanie.
You could also give it your personal touch. You are free to use any striped pattern throughout the beanie pattern.
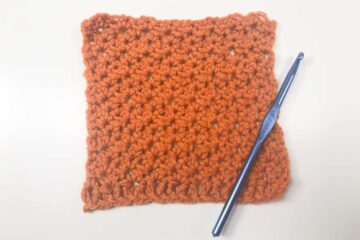
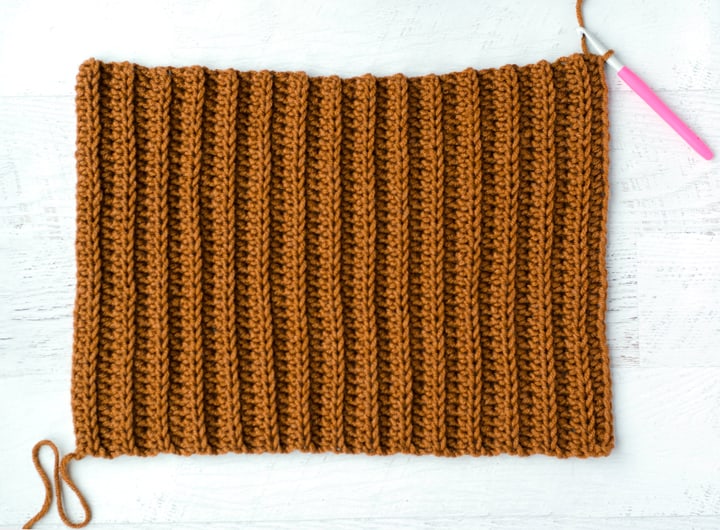
3. Chunky Ribbed Beanie
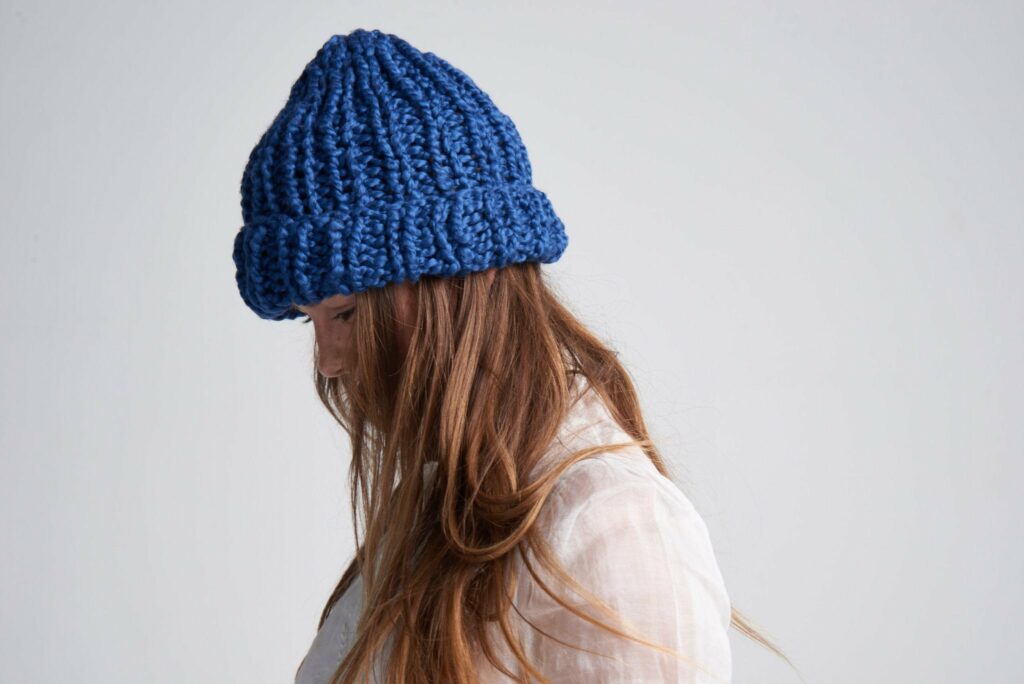
Another striped beanie crochet pattern is the Chunky Ribbed Beanie. These ribbed beanies are an easy-to-make crochet project that is satisfying to finish. This crochet pattern is perfect for beginning crocheters.
The chunky yarn used to create the warm and cozy beanie has a beautiful texture, making it perfect for freezing temperatures. It’s also a very cost-effective striped beanie crochet pattern because it just requires a tiny bit of thick yarn to make.
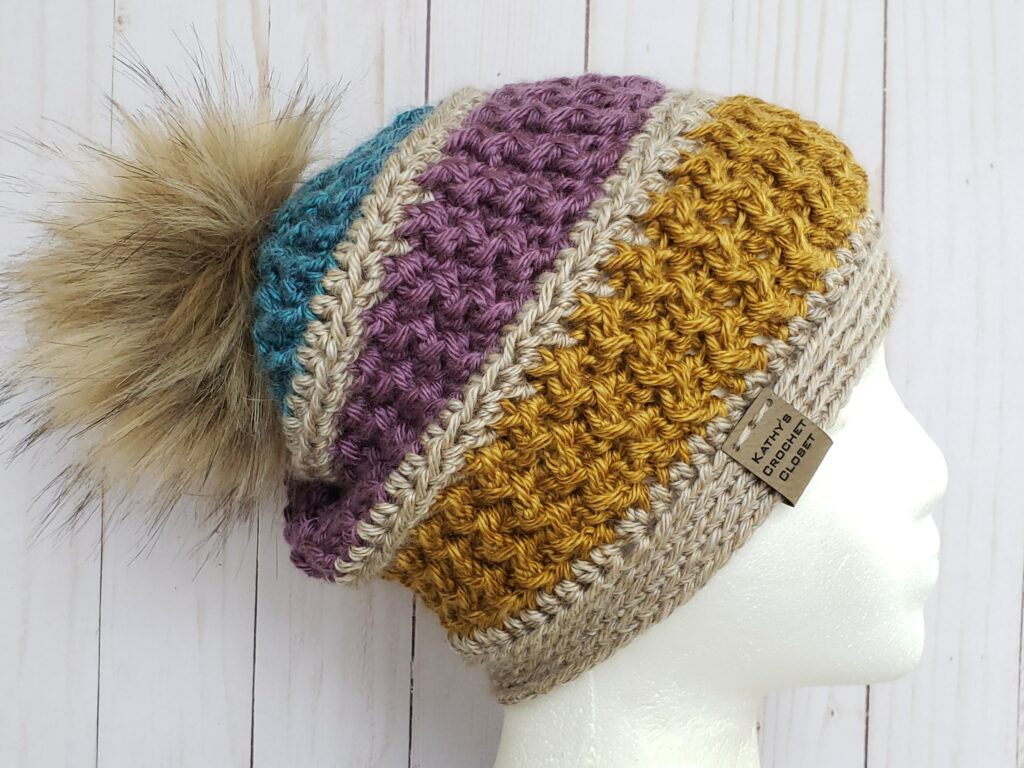
4. Matteo Beanie
The Matteo Crochet Beanie is next in the list of striped beanie crochet patterns. The Matteo Crochet Beanie design is rich in intricacy. This crocheted beanie with a top-down design is fascinating.
Everybody deserves a go-to crochet cap like the Matteo Beanie, as it fits snugly and is cozy. It’s a fantastic gift for everyone—men, women, and children alike.
Double crochets and front post double crochets are alternated to create the Matteo Beanie’s texture. Both a dc and an fpdc will be worked into one another. If you know someone who likes to have striped beanie crochet patterns, they must have this one in their collection.
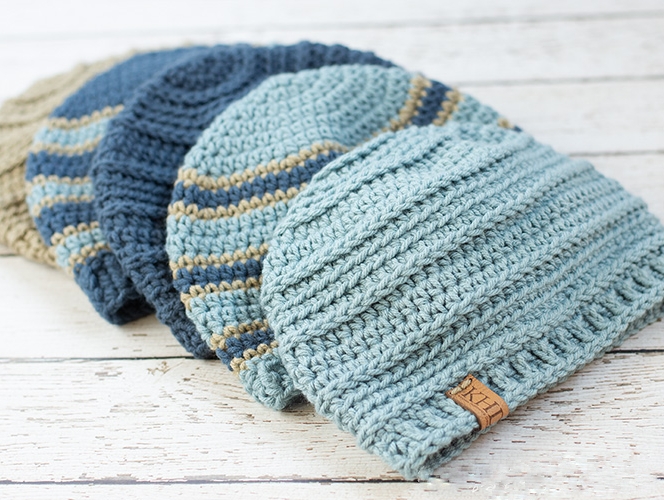
5. Easy Striped Beanie for Men
There are two different beanies here, each with a unique striped pattern. The first striped beanie crochet pattern is available in two sizes and suits adult heads that are large or x-large and teens. The subsequent version of this striped beanie crochet pattern is available in five sizes and suits adult heads from x-large to toddler. The stripes on the first one are created using three distinct colors of yarn, but the stripes on the second beanie are created using only one color and textured stitches.
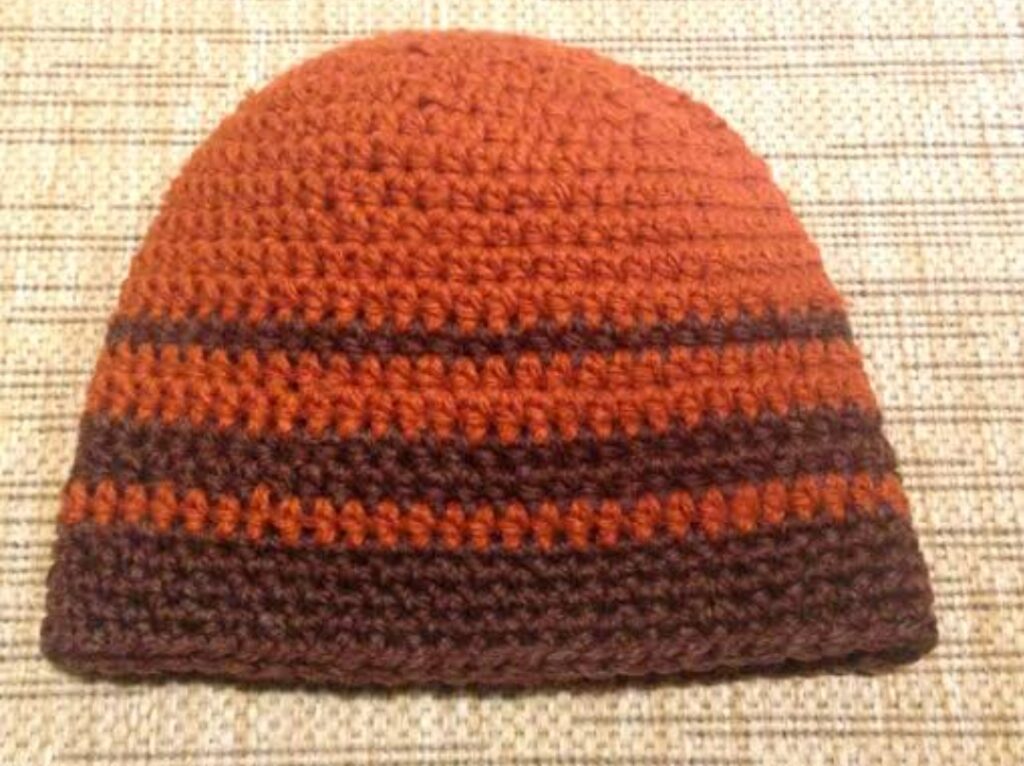
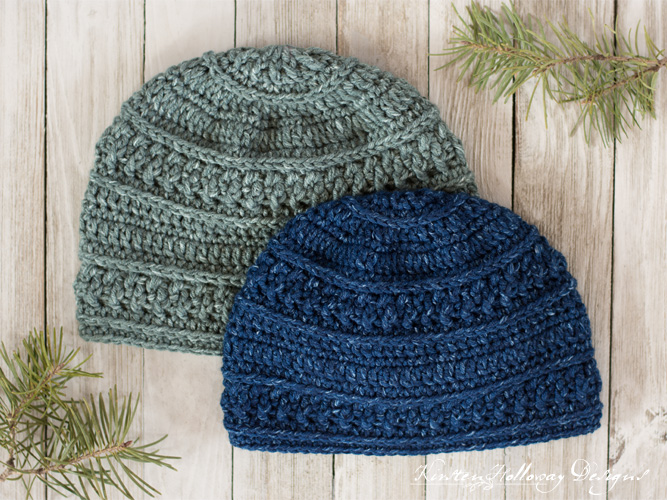
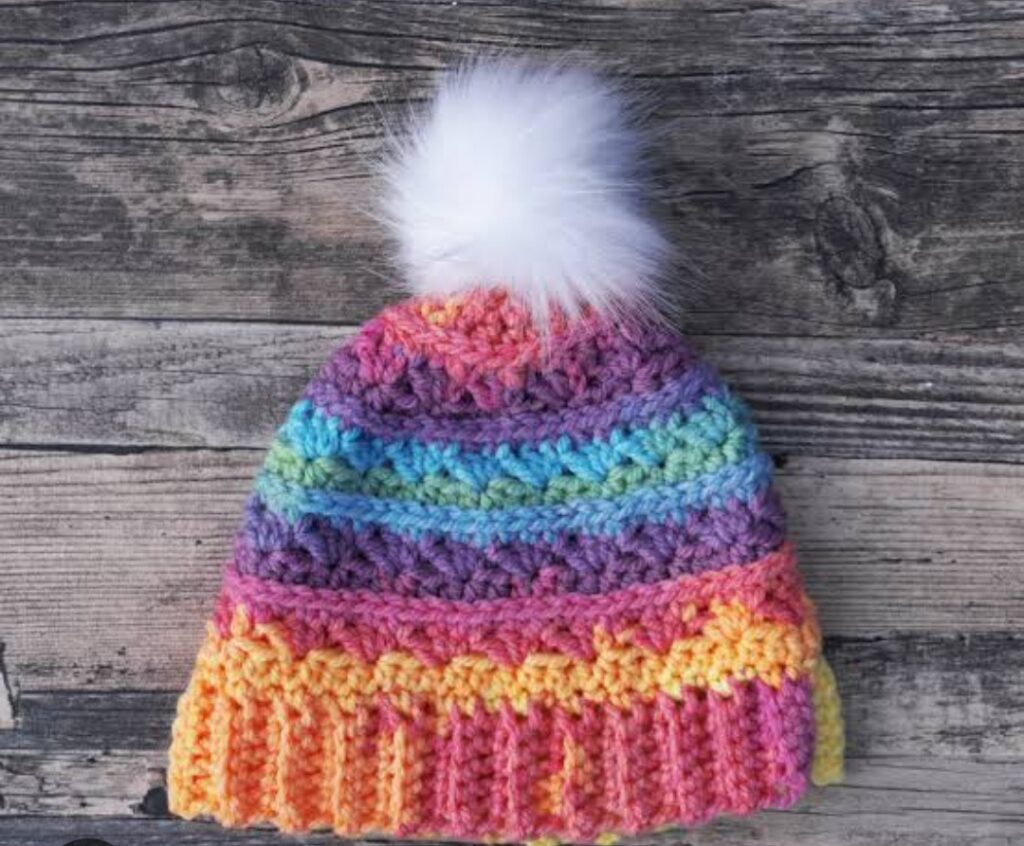
6. Silver Beach Crochet Beanie
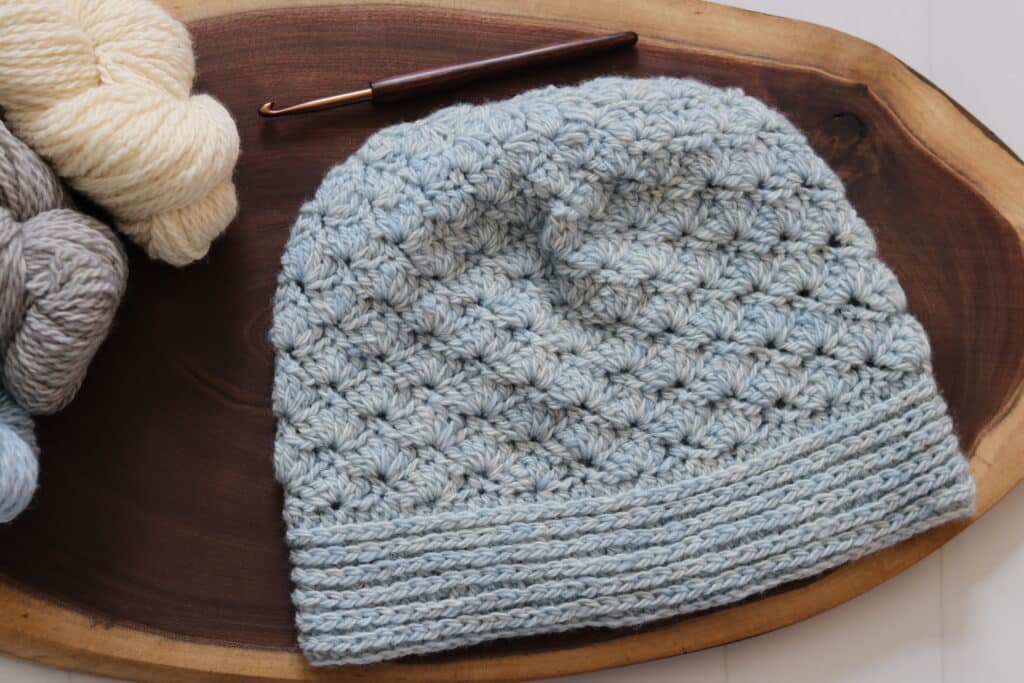
This striped beanie crochet pattern is quite versatile. The pattern of the crown of the beanie is given below. Any wanted pattern could be used for the body. Here is a guide to the striped beanie crochet pattern.
- R 1: Ch 2, and sl to join after creating a magic ring out of 12 DC. [12]
- R 2: Ch 2, insert two crochets (dc) into each stitch around, and join. [24]
- R 3: Ch 2, *dc in first st, 2dc into next st* repeat from * to * in circle, sl to join [36]
- R 4: Ch 2, *dc in first 2 stitches, 2dc into next stitch,* repeat from * to * around, sl to join [48]
- R 5: Ch 2, *dc in first 3 stitches, 2dc into next stitch* repeat from * to * all the way around, sl to join. [60]
- R 6: Ch 2, [72] *dc in first 4 sts, 2dc into next st* repeat from * to * around. Sl to connect.
7. Salt of the Earth Men’s Crochet Beanie
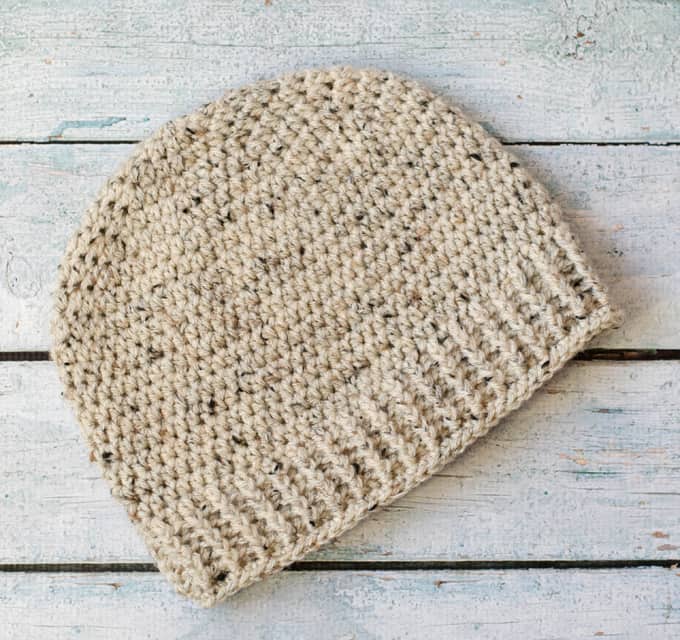
Finding a nice striped beanie crochet pattern seems challenging. One skein of yarn is all that is needed to complete the Salt of the Earth Men’s Crochet Beanie. Create a magic ring.
Here are instructions for this striped beanie crochet pattern’s magic ring.
- R1: 8 hdc into the ring (8 stitches). Till row 18, continue working in rounds.
- R2: 16 st around, 2 hdc in each stitch
- R3: (24 stitches) *hdc in next stitch, 2 hdc in next stitch
- R4: (32 stitches) *hdc in next 2 st, 2 hdc in next st, repeat from *
- R5: (40 stitches) *hdc in next 3 st, 2 hdc in next stitch
- R6: (48 stitches) *hdc in the next 4 stitches, 2 hdc in the next stitch
- R7: (56 st) *hdc in the next 5 stitches, 2 hdc in the next stitch
- R8: (64 st) *hdc in the next 6 stitches, 2 hdc in the next stitch
- R9: (72 st) *hdc in the next 7 stitches, 2 hdc in the next stitch
- R10: 18: hdc all around (72 stitches). Sl st in next st at the end of row 18
- R19: Ch2, hdc all around (72 stitches), connect
- R20: 24: Ch 2 (counts as 1st st), repeat from * to * around. Front post hdc in next st, back post hdc in next st. Join with a slip stitch to the top of the first stitch. (72 st)
- R25: ch 1, sc all around, attach to first stitch (72 stitches).
That’s all it takes to create the major part of this striped beanie crochet pattern.
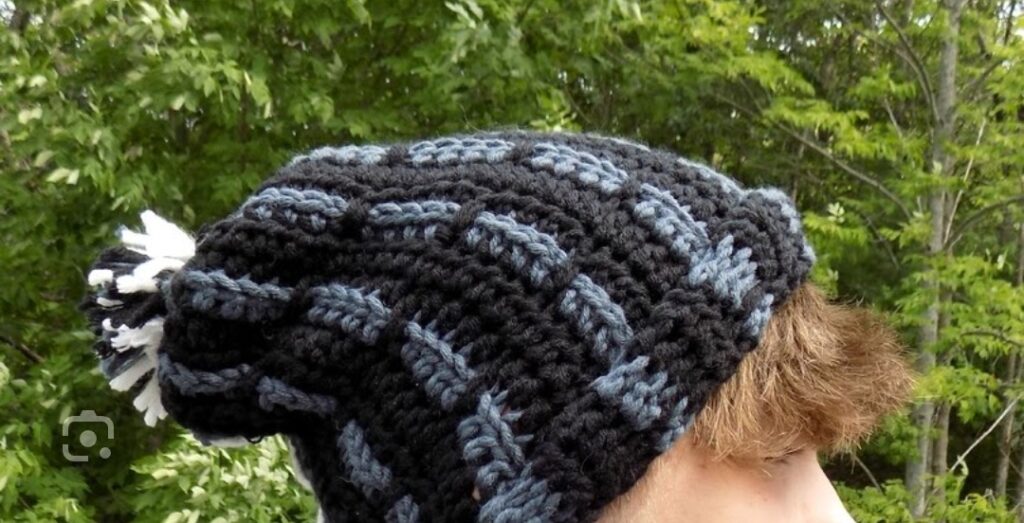
8. Herringbone Men’s Crochet Beanie
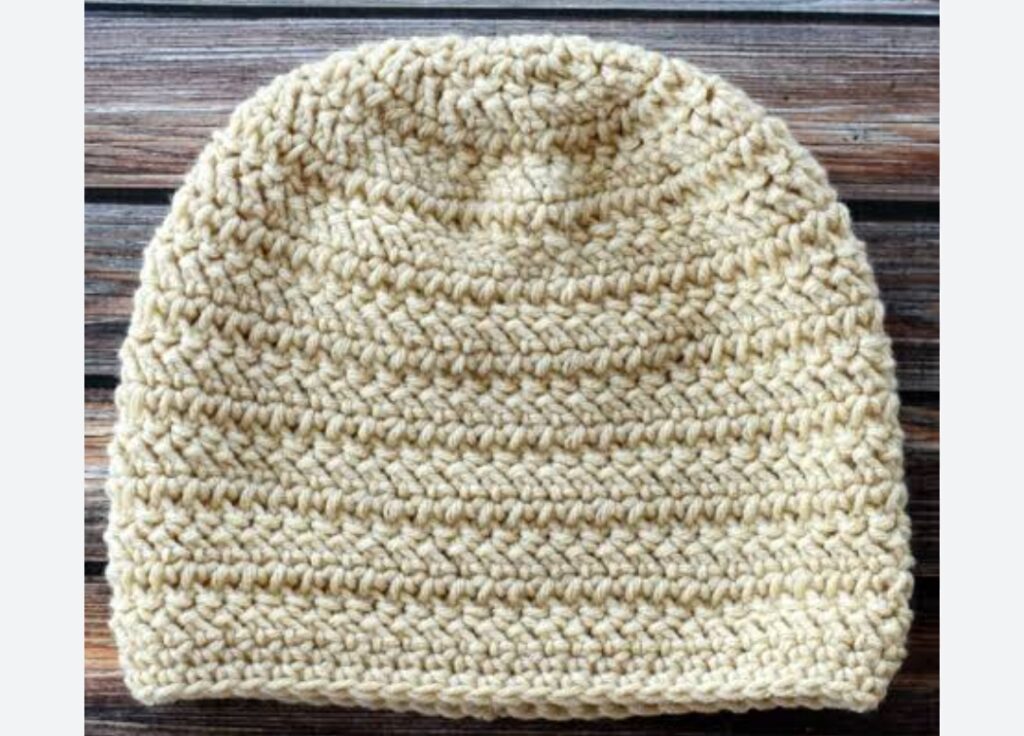
The guide to Herringbone Men’s striped beanie crochet pattern is as follows.
Crown
- Ch2, create a magic ring with 12 HHdc, and sl. [12]
- Alternatively, ch 3 and insert 12 double crochets into the 3rd ch from the hook
- R 2: Ch 1, turn, work 2 dc in each stitch around, sl. [24]
- R 3: Ch 1, turn, dc in the next stitch, 2 dc in the next stitch, rpt * to * around, sl. [36]
- Ch1, turn, *dc in next 2 stitches, 2 dc in next stitch*, repeat from * to * around, sl. [48]
- R 5: Ch 1, turn, *dc in next 3 stitches, 2 dc in next stitch,* rpt * to * around, sl.
- Ch1, turn, dc in the next 4 stitches, 2 dc in the next stitch, rpt * to * around, sl. [72]
- R 7: Ch1, turn, hdc in each stitch around, sl. [48(60, 72)]
- Ch1, DO NOT TURN, hdc in each stitch around, sl. [48(60, 72)] in rounds 8 and 9.
- R 10: Ch 1, DO NOT TURN, work through 3rd loops, HHdc in each stitch around, sl
- At this stage, the size of your beanie will be 2.75″(3.5″, 4″)
- R11: Ch 1, turn HHdc in each stitch around, sl
- Repeat Round 112(5, 8) as needed
- Repeat Round 11 two times (2, 8) total.
9. Bayers Beanie
Follow the following instructions to crochet this striped beanie crochet pattern-
- R 1: Ch 101, 2 sc in the second ch from the hook, 2 sc in each sc across, turn, 100 sc
- R 2: Ch1, sc in BLO of each stitch across, turn—100 stitches
- R 3-80: Row 2 should be repeated
- Leave a lengthy tail for stitching when you finish.
Joining Process
The joining process for the striped beanie crochet pattern is as follows.
- To make the beanie twice as thick, fold the tube in half. The unsewn edges make up its top, while the rolled edge represents the brim.
- Pinch the top of the beanie into four halves to form an ‘X’ shape before sewing it shut. Sew all four sections closed. The ends should be woven in.
- Turn the beanie right side out, with the sewn seam on the inside. That is all it takes to make this striped beanie crochet pattern.
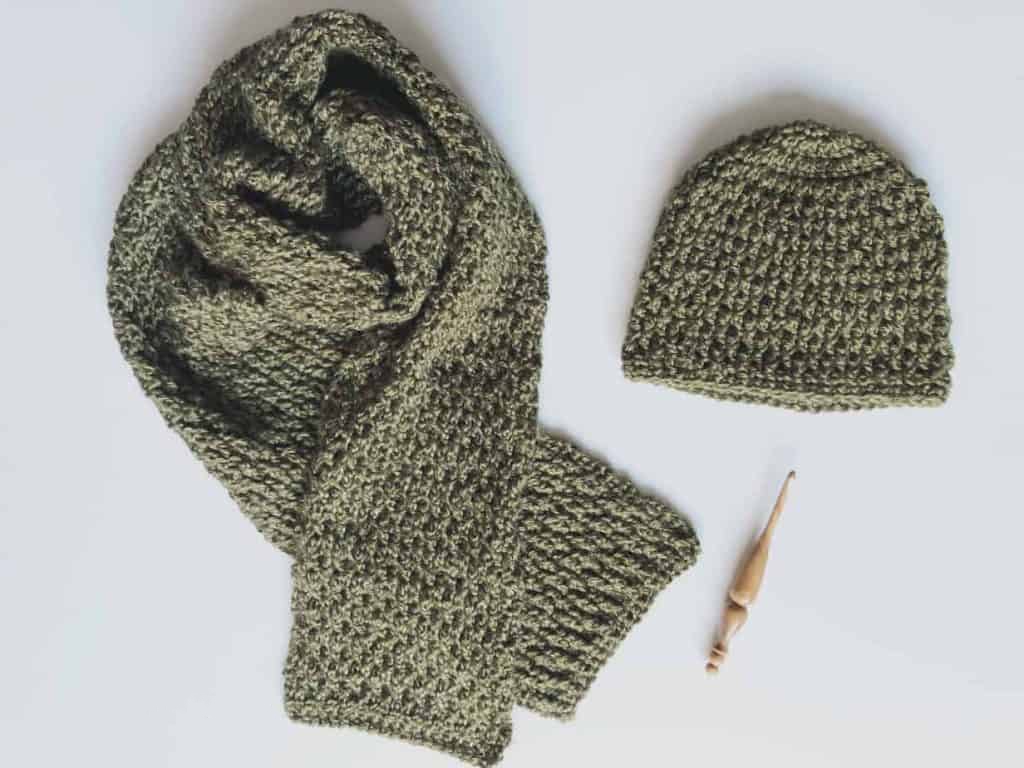
10. Simple Seed Stitch Striped Beanie Crochet Pattern

You’ll pick up this pattern quickly if you’re familiar with the seed stitch. If not, the Seed Stitch beanie’s design is fairly straightforward: To ensure that a double crochet is always worked into a single crochet stitch or vice versa on the rounds that do not increase, it alternates sc and dc stitches in one round, then dc and sc stitches in the next.
Materials Required: 150-225 yards of Caron or hook to obtain gauge, 5.5mm. One pound of heavier #4 worsted weight yarn in the colors of your choice.
The following stitches were used.
- ch = chain sl st = slip stitch
- sc stands for single-crochet
- hdc stands for half double crochet
- dc stands for double crochet
- FPsc stands for front post single crochet
- BPsc stands for back post single crochet.
- 13 hdc stitches every 4 inches; hdc stitches should be 1/2″ tall. After round 4, the circle should measure 3 1/2″ wide, 4 1/4″ across, and 5″ across after round 6.
11. Wanderlust Beanie
Michele Costa created the traditional Wanderlust striped beanie crochet pattern for Handspun Hope and knits up easily in your hands using our delectable Angora, and Merino blend yarn.
These are the supplies you will need:
- Hope Organic Handspun Angora and Merino Blend, Sport Yarn, 1 Skein/100 grams/165 yards
- Circular needle, 16″, US 8/5 mm
- 5mm double-pointed needle set
- Weaving ends using a tapestry needle
12. 3 Season Striped Beanie Crochet Pattern
- R 1: 5 Ch R: connect in a circle. Or make a magical circle. Ch3 counts as the first double crochet; link to it with a slip stitch for a total of 10 double crochets
- R 2: Ch 3, join, and make 2 chains in each of the 20 chains
- R 3: Ch 3, 1 DC in same stitch, *1 DC in next stitch, 2 DC in next stitch*,
Repeat from * to * all around, join, and make 30 double crochets
- R 4: Ch 3, 1 DC in the same stitch, *1 DC in next 2 SC, 2 DC in next SC*,
From * to *, repeat around, join, and make (40 dc)
- R 5: Ch 3, 1 DC in the same stitch, *1 DC in next 3 SC, 2 DC in next SC*,
From * to *, repeat around, join, and make (50 dc)
- R 6: dc in total, 1 dc in each dc all around, join
- R 7: Ch 4, skip the next dc, *dc in next st, ch 1, skip next st*
Repeat from * to * around, connect, and work 50 stitches
- R 8: Ch3, 1 dc in the first st, *1 dc in the ch-1 space, 1 dc in the next dc*. * to * around, connect, (50 sts)
- R9: nine AM R: 14 – Rep R: 7 and 8, alternating rounds of Ch1 following R: 14.
If you desire a thicker band, work more sc rows.
13. The Exceptional Beanie
- R 1: HHDCSLT2TOG in the second and third chains from the hook; continue across, always beginning in the stitch just worked; HHDCSLT2TOG in the stitch just worked [1 hhdc, 12 hhdcslst2tog]
- R 2: Ch 1, turn, and hdc in every stitch across. [13 hdc]
- R 3: Ch 1, turn hhdcslst2tog in the first and second stitches. Continue hhdcslst2tog through, always beginning in the st recently completed. [1 hhdc, 12 hhdcslst2tog]
- R 4: Repetition of Row 2
- R 5-8: 2 times through Rows 3 and 4.
Check your gauge swatch’s center 10 stitches to see if 10 stitches = 4″
14. The You & Me Striped Beanie Crochet Pattern

- R 1: Ch 1, turn 10, 12, 14, or 18; 1 slip stitch in the second chain from the hook and in each ch across
- R 2: 1 sc in first st, 1 fpesc in each stitch up to the last one, 1 sc in final st, ch 1, turn 10, 12, 14, 18
- R 3: Ch 1, turn 10, 12, 14, 18>, 1 sc in each stitch across.
- R 4: 1 sc in first st, skip next st, 1 fpesc in each st until final st, (1 fpesc and 1 sc) in last st, ch 1, turn 10, 12, 14, 18>
- R 5l: ch 1, turn 10, 12, 14, and 18; 1 stitch in each stitch across
- Repeat rows 2–5 until row 19 (23, 25, 29). To make the beanie looser or tighter, you can add or delete rows.
After stretching, measure the rectangle (width x height):
- Infant: 11″ x 6″
- Child: 13″ x 7″
- Teen: 15″ x 8″
- Adult: 17.5″ x 10.5″
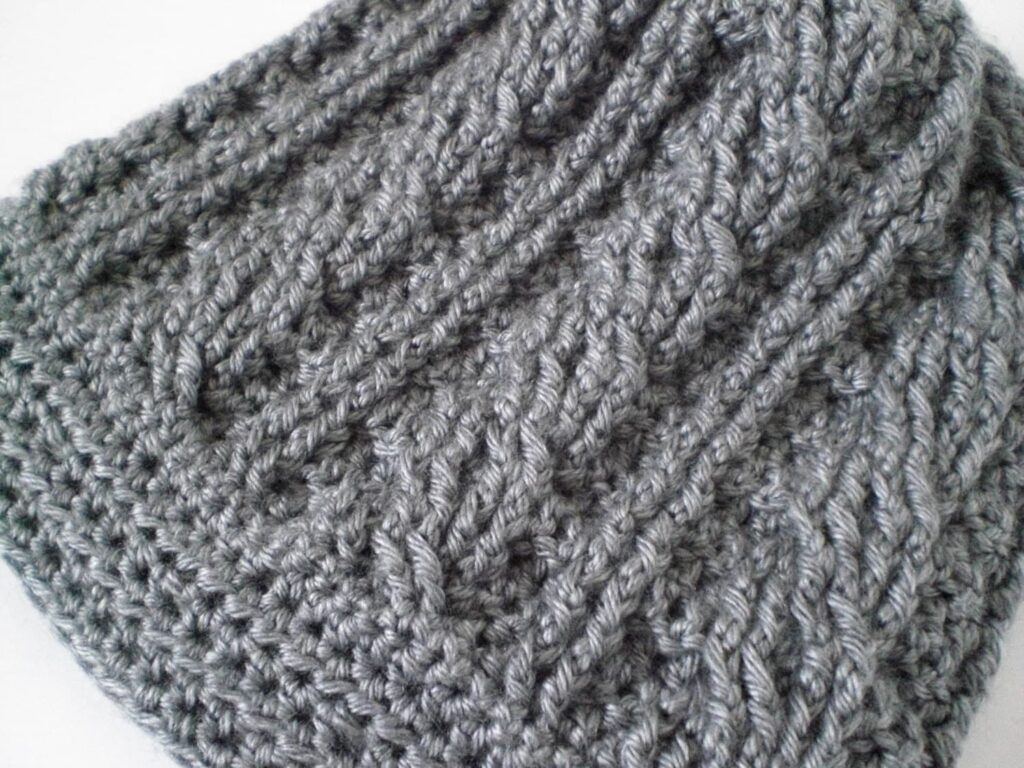
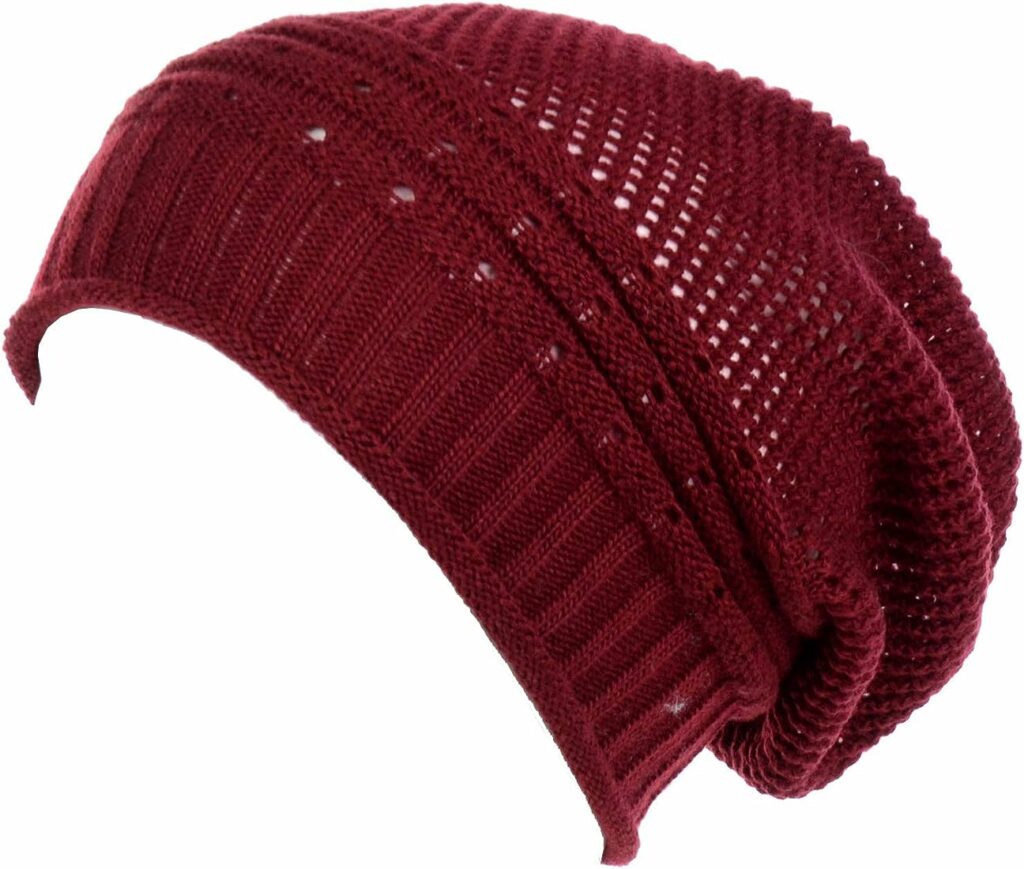
15. Ribbed Wonder
Half double crochet is used to create rows of this striped beanie crochet pattern, which are then joined at the end to form a tube. The top is then formed by cinching one end together.
- Beginning with row 2, just the back loop of the stitch closest to you should be used when crocheting.
- R 1 (35 stitches): Hdc in the third chain from the hook and in each chain across the row
- R 230: Ch 2 (does not count as a stitch); 35 stitches are made by working in the back loop throughout the row.
The beanie is around 13′′ broad by 20′′ tall after row 30.
16. Samatha’s Hope Beanie
- R 1: Each beanie Begins by scoring (57, 60) evenly all around
- R 2: Ss to join, ch 1 (not a stitch), hdc in each stitch around
- R 3: SS to connect, work as follows: Ch1 (counts as a sc), 2dc in the first stitch, sk2, *(1sc, 2dc) in the next stitch, sk2 stitches* repeat from * to * all the way around
- R 4: Ch1 (not a stitch) hdc in each stitch around. Working exclusively into the third loop, SS to enter Round 5
- R 6-8: Repeat rounds 3-5 for medium size
- Repeat rounds 3 and 4
- R 11: In this round, only work into the third loop
- Ch2, hdc in the next 2 stitches, hdc2tog in the next st, *hdc in the next st, hdc2tog in the next, hdc in the next 2 stitches* Repeat from * to * all the way around. HDC in the last four stitches (42) SS to join
- Repeat round 3 in round twelve (42). Round thirteen: Ch2 (counts as a stitch), hdc in next stitch, hdc2tog in next stitch, *hdc in next stitch, hdc2tog in next, hdc in next 2 stitches, hdc2tog* Repeat from * to * around SS to join (30).
17. Freshman Slouch
- R 1: Fhdc 29(34), ch 2, turn (29) in with A.[34]
- R 2: Ch 2 and turn (29), hdc in each stitch across.[34]
- With B, work Row 3: 24 hdc, 5 ch-1; *ch 1, sk 1, hdc x 4* across; ch 2.[28 hdc, 6 ch-1]
- With A, work Row 4 of the following pattern: 24 hdc and 5 Lhdc in total.[28 hdc and 6 Lhdc]
- R 5: Ch 2 and turn (29), hdc in each stitch across.[34]
- R 6: with B: 24 hdc, 5 ch-1; ch 2, turn. Row 6 with B: hdc x 4, *ch 1, sk 1, hdc x 4* across.[28 hdc, 6 ch-1]
- With A, R 7. BLO: (24 hdc, 5 Lhdc) hdc x 4, *Lhdc, BLO hdc x 4* across, ch 2.[28 hdc and 6 Lhdc]
- Repeat Row 8 with B, Row 9, Row 3, Row With A, Row 10, Repeat Row 11, Repeat Row 5 With B, Row 6, Repeat Row 13, Repeat Rows 14 through 37 (43). Repeat rows 2-7, leaving a long tail at the end of row 37(43).
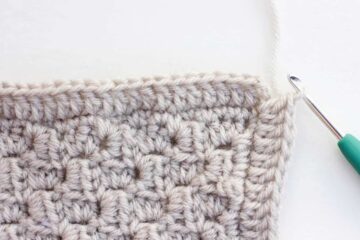
18. Squishy Stripes Beanie

- R 1: FHDC 15, or the number of stitches required to measure from the point of the nose to the pinnacle of the crown. Turn after the first ch.
- R 2: Ch 1, turn, and sc in the third loop of each stitch across. A demonstration is shown in the photo below and the movie above.
- R 3: Hdc in each stitch across ch 1, and turn
- R 4: Ch 1, turn, and sc in the third loop of each stitch across
- Rows 3+4 are repeated until the desired circumference is obtained. You’ll need to experiment/take measurements, but it requires a total of 30 rows for my head to fit comfortably
- Make sure that the total number of rows is an even amount.
- Fasten off, leaving a tail of around 18 inches (45.5 cm) for stitching.
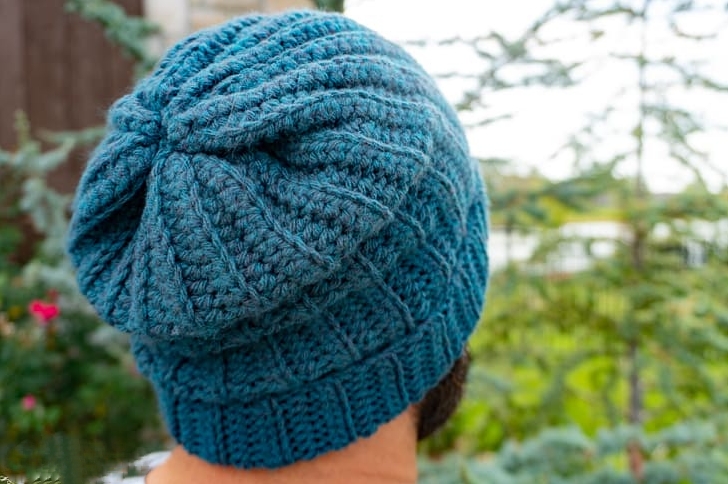
19. Thick Mesh Slouch Beanie
- R 1: Ch 2, then dc in each stitch around (60 stitches)
- R 2: Ch 2; repeat for a row, adding FPDC and BPDC to the following two dc. When you get to the end of the row, sl st at the top of the first ch 2 (the beginning ch 2 will count as a BPDC)
- Repeat rounds 2-5
- R 6: (Change to your 6mm/J hook and the primary color you select for your striped beanie crochet pattern)
- R 7: Ch 1 and from now on, for the first stitch of the round, we will work to the right (for right-handers) and DC in the skipped stitch from the previous round and ch 1
- R 8: Ch 1, and then working two rows down, working this initial stitch in the other way, you will DC and ch 1 into the gap between the first and second row’s dcs
- Repeat round 8 until your beanie measures 25 cm (10 inches) from the rim to the last round worked.
- Lastly, close your cap while returning to your 5mm/H hook.
20. Walcot Beanie
Last but not least, the striped beanie crochet pattern is Walcon Beanie.
- R 1: 6hdc into the magic ring; switch to yarn B when you ss in the first stitch to join [6]
- R 2: ch1, *FPdc in next, hdc-inc, rep from * around, ss in first st to join [12]
- R 3: ch1, *FPdc in next, 2hdc in next, rep from * around, ss in first st to connect [18], change to yarn B
- R 4: ch1, *FPdc in next, hdc in next, FPdc in next, hdc-inc, rep from * around, ss in first st to join [24], change to yarn A
- R 5: Ch1, *FPdc in next, hdc in next, FPdc in next, 2hdc in next; rep from * around; change to yarn B; ss in the first stitch to join [30]
- R 6: ch1, *(FPdc in next, hdc in next) twice, FPdc in next, hdc-inc, rep from * around, ss in first st to join [36], change to yarn A
- R 7: ch1, *(FPdc in next, hdc in next) twice, FPdc in next, 2hdc in next, rep from * around, ss in first st to join [42], change to yarn B as you ss in first st
- R 8: ch1, *(FPdc in next, hdc in next) three times, FPdc in next, hdc-inc, rep from * around, ss in first st to join [48], change to yarn A as you ss in first st
- R 9: ch1, *(FPdc in next, hdc in next) three times, FPdc in next, 2hdc in next, rep from * around, ss in first st to join [54], change to yarn B.Round 10: ch1, *(FPdc in next, hdc in next) four times, FPdc in next, hdc-inc, rep from * around, ss in first st to join [60], change to yarn A.
The Body of the Striped Beanie Crochet Pattern:
- Ch1, [24 (36, 48, 48, 60, 60)] FPdc in next, hdc in next, rep from * around. Change to the next color when you ss in first st to join.
- Rounds 2-8 (9, 11, 11, 12, 12): Repeat Round 1.
The Final Verdict
The collection of these 20 striped beanie crochet patterns essentially serves as an example of the tremendous variety and ingenuity that the crochet community has to offer. There is something for every crochet fan here, from eye-catching motifs to more subdued and traditional choices. These striped beanie crochet patterns offer warmth and a platform for creative expression. The above-listed ideas and multiple step-by-step quick tutorials will guide you through the process of weaving love and warmth.
It’s time to brighten your crochet collection with these super cool striped beanie crochet patterns. Create an assortment of colorful variations, sure to please anyone’s taste! So gather your hooks and vibrant yarns and set out on a mission to create chic, striped beanies that are both trendy and practical.