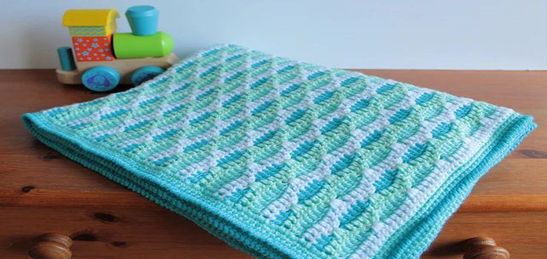
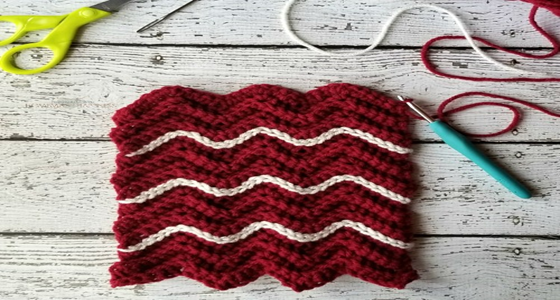
Want to try some new stitches for your upcoming baby blanket project? You might like the crochet ripples pattern stitch. It is a beginner-friendly pattern, and you can crochet ripple stitches if you know the basic stitches (like sc, dc, hdc, ch, etc.).
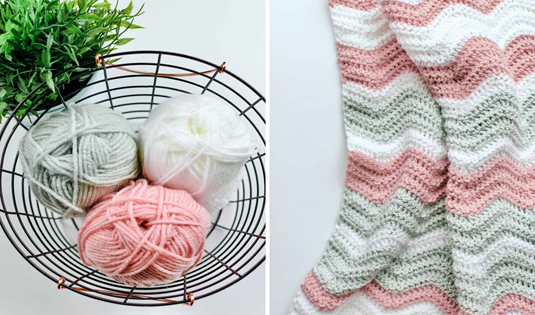
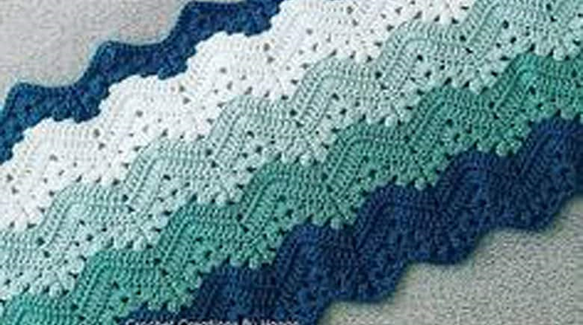
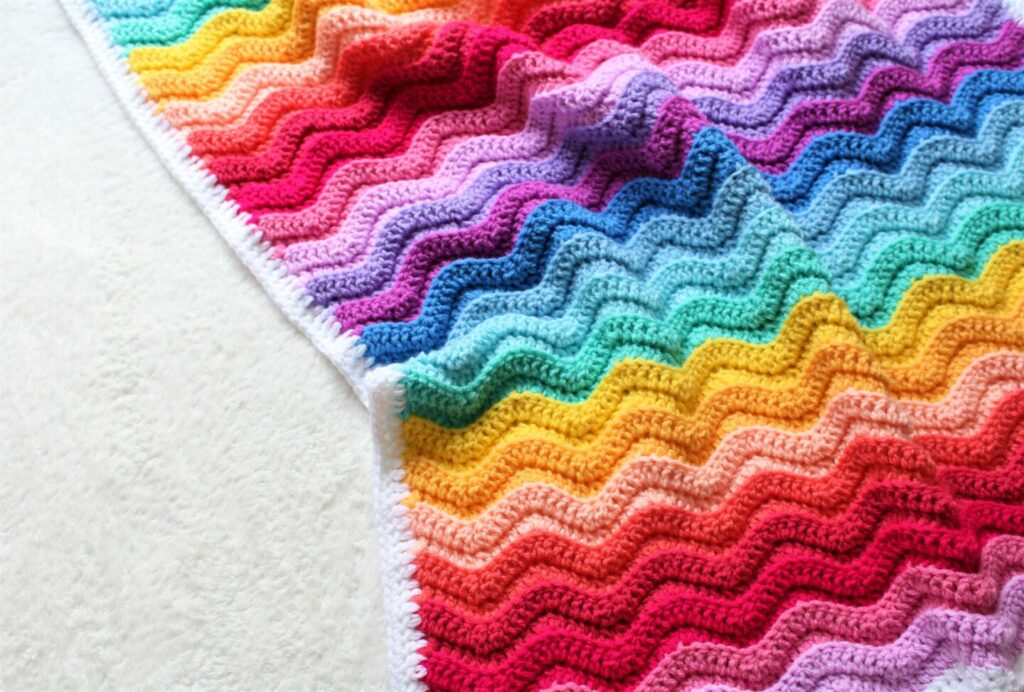
Also, the stitch pattern creates a beautiful ripple-like texture ideal for baby blankets. You can use this stitch pattern to create beautiful, colorful, and cozy baby blankets. It is an easy-to-crochet pattern that you can use for a fast and beautiful baby blanket pattern.
Still, many people think it is a complex stitch and often attempt it after they reach the intermediate level. But if you know the right trick, you can easily master this pattern. In this blog, we will provide a tutorial guide on crochet ripple baby blanket pattern stitch. Here, we will discuss ripple stitch, how you can crochet it, needed materials, and more.
So, let us start exploring together!
What is Ripple Stitch?
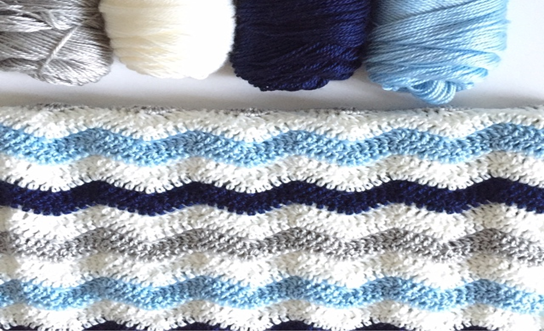
Let us learn about what ripple stitch is before we learn about how you can crochet a ripple stitch baby blanket and other details related to it. The crochet ripple baby blanket pattern is quite popular. It uses ripple stitch to create warm and cozy baby blankets.
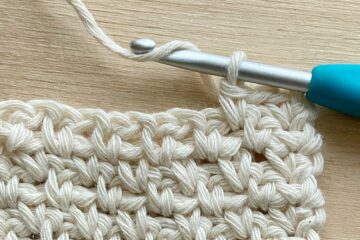
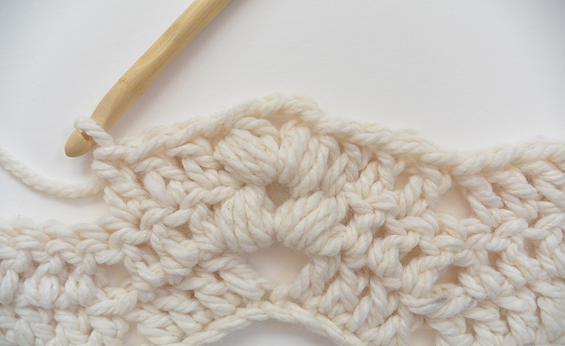
Ripple crochet stitch is a beginner-level one that creates a subtle ripple or wave-like pattern. It uses a half-double crochet (hdc) stitch to create the wave-like pattern. This stitch pattern also includes several other basic crochet stitches like chain single and double crochet stitches.
Is Ripple Stitch Good for Beginners?
Most beginners avoid ripple stitch as they assume it is a complex pattern. But the reality is exactly the opposite. Ripple crochet stitch is a beginner-friendly crochet stitch pattern. So, it is a great choice for beginners.
The Ripple pattern uses some basic crochet stitches such as single crochet (sc), double crochet (dc), half double crochet (hdc), and chain stitch (ch) to create the waves. Also, ripple stitch patterns work up faster and more smoothly. It can be a great option to practice these basic stitches and create something new.
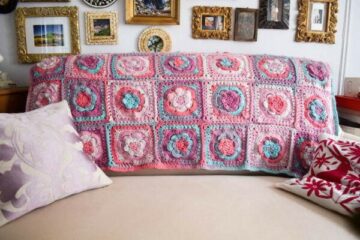
The ripple or wave-like pattern also looks beautiful in various crocheted items like sweaters, placemats, baby blankets, throw blankets, etc. If you want to crochet ripple baby blanket patterns, you need basic crochet materials and stitches.
Plus, color work in crochet ripple stitch is very simple and fun. We recommend you use self-stripping yarns for a smooth color-changing experience with ripple stitch patterns. Also, the ripple stitch pattern combines multiple basic stitches, making it easy to memorize and work for a beginner.
Understanding Crochet Ripple Pattern: Important Stitches
If you want to build a crochet ripple baby blanket, you must know the important stitches you can follow for the crochet ripple pattern. Learn in detail about the stitches before you start crocheting.
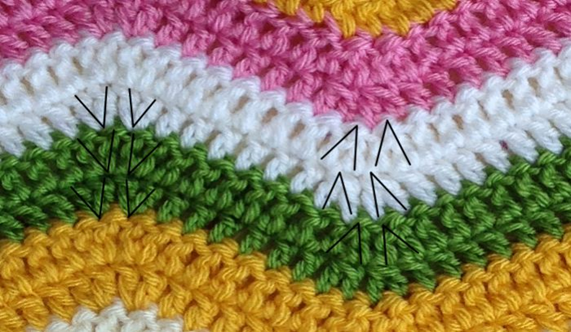
- Half Double Crochet Or Hdc: Yarn over and then insert the hook from the front to back position of the designated stitch and pick up a loop. Then again, yarn over the hook and pull it back through all three loops in the hook.
- Half Double Crochet Increase: Make two and a half double crochet stitches if you want to increase. This increase in the same stitch creates a perfect “peak” in your ripple pattern.
- Half Double Crochet Decrease: Hdc2tog denotes “half double crochet two together,” It is a decreased stitch. This pattern creates “valleys” in the ripple pattern.
- Half Double Crochet Two Together Or Hdc2tog: Hdc2tog is “half double crochet two together,” a decrease stitch. In the ripple pattern, this particular stitch creates the “valleys.”
- Chain Stitch: Make a slip knot and insert the hook into the slip knot point. Then, bring the yarn over the hook shaft and ensure the position is from back to front. Repeat steps two and three and check the desired number of stitches for the perfect pattern.
- Back Loop Only Or Blo: If you want to crochet in the back loop only, insert the hook into the back loop of the stitch. Now, you can complete your stitch. Start working lower the back loop that creates a subtle ridge. Also, it gives an interesting visual detail.
- Stitch Multiple: 12 + 2 is the stitch multiple. It is followed particularly for this particular ripple pattern. It means each ripple from peak to peak is generally considered 12 stitches wide. If you want to make a larger blanket, adding more starting chains with multiplication numbers of 1 is important. Then, you must add an extra 2 stitches in case of the first turning chain.
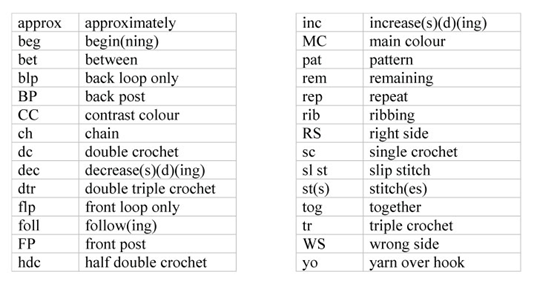
Choosing The Best Yarn for a Crochet Ripple Pattern BabyBlanket
Choosing the best yarn for your crochet ripple baby blanket is essential to make a beautiful baby blanket with a ripple pattern. Choosing the right yarn will help you get your desired thickness, softness, and textures for the baby blanket.
We always recommend choosing a high-quality yarn such as Lion Brand mandala watercolor yarn. The yarn category is bulky or chunky. 5. It is a non-peeling acrylic yarn with a blend of wool and a little bit of nylon.
The yarn comprises 75% acrylic, 15% wool, and only 10% nylon. We prefer this yarn for the crochet ripple baby blanket as it creates soft, snug, yet strong. You can also choose other types of yarn to crochet ripple baby blanket patterns like worsted weight, cotton, ultra-soft, etc.
No matter what type of yarn you choose, always choose high-quality, skin-friendly yarns that are not harsh on the baby’s skin. Also, use self-striping yarns for easy color changes.
Choosing The Right Hook for a Ripple Pattern Baby Blanket
Identifying the right crochet hook is also essential to crochet a perfect-size crochet ripple baby blanket. We recommend using a 5.5 mm crochet hook (standard size for crocheting baby blankets). This will ensure you will get the right size of the baby blanket at the end of your project.
Also, remember to check the gauge and tension size. For instance, if your gauge is too loose, use a smaller crochet hook, such as 4 or 4.4 mm. In contrast, if your gauge is too tight, you can try a bigger hook to make a perfect ripple baby blanket.
Tips for Changing Yarn Colors
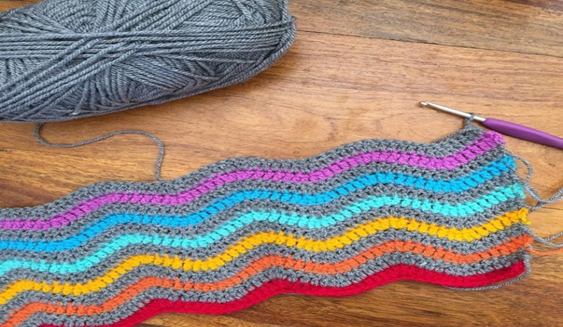
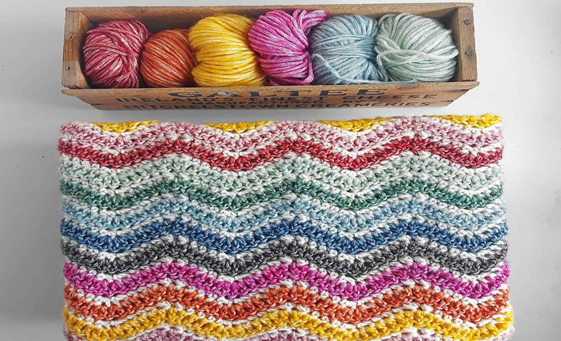
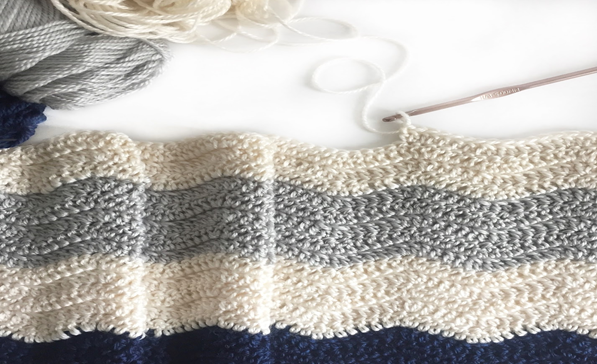
Ripple crochet baby blanket patterns look beautiful with multiple colors. The pattern mostly uses two to three colors to create a colorful and eye-catching baby blanket. We prefer to use self-striping yarns for the ripple baby blanket pattern. Here are some useful tips to change color in the ripple stitch pattern-
- If you want to sequence the color-changing strips according to your wish, you must do self-stripping.
- For self-stripping color changes, you will need 4-5 skeins.
- But if you do not want to change the color sequence with self-stripping, you can crochet the entire ripple baby blanket with only 3 skeins.
- To change the color in the ripple stitch pattern – Work the last stitch of your existing yarn. Stop just right before the last stitch. Then, begin with the new yarn from the next row. Now, draw loops through the hook and yarn over to complete the stitch.
Crochet Ripple Baby Blanket Stitch Abbreviations
You must also learn about the abbreviations for the written instructions of a crochet ripple baby blanket pattern. It will help you follow the steps easily without any fault. Here is a list of abbreviations (US) for the baby blanket pattern-
- Hdc – Half Double Crochet
- Hdcblo – Half Double Crochet Back Loop
- Ch – Chain
- Chs – Chains
- St – Stitch
- Sts – Stitches
- Hdc2tog – Half Double Crochet Two Together
- Hdc2tog blo – Half Double Crochet Two Together, Back Loop Only
Materials Needed for Crochet Ripple Baby Blanket
In this section, we will discuss a few materials used to make a crochet ripple baby blanket. Like the other baby blanket patterns, you only need the basic crochet supplies like – yarn, hook, scissors, gauge, and a tapestry needle.
1. Yarn
With unlimited color choices, you can choose a perfect piece of yarn according to your needs. When you search over the internet, you can find yarns of different brands. Choose a 100% acrylic yarn that has all-over beautiful work. Make sure it is washable.
2. Hook
For the right hook size, browse the internet and select the appropriate size that matches your convenience. It is the hook that makes the difference and leads to the lawlessness in giving your project the final touch.
3. Gauge
It is necessary to check the gauge of your ripple blanket to ensure the right size. If you want to make the gauge tight, try a larger hook or use a smaller hook in case of a looser gauge.
4. Other Materials
There are other materials like scissors, a measuring tape, or even a gauge ruler you need for the project. A tapestry needle is also necessary for performing a great weaving in ends. Stitch markers aren’t necessary, but they can help you track the stitches.
Essential Notes on Crochet Ripple Baby Blanket Pattern
When you are learning to crochet a ripple baby blanket, here are a few essential points that you must adhere to ensure success in your project.
- In different US terms, the pattern is written for a clarified idea.
- The blanket is great, positioned in one piece and rows.
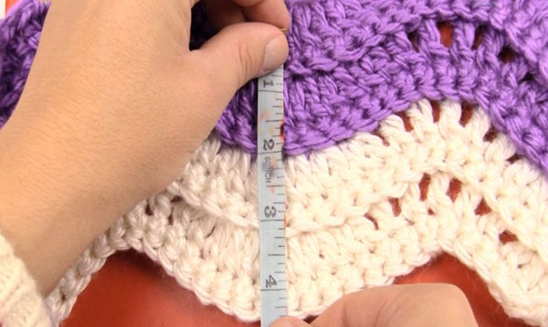
- Generally, the finished size of the ripple baby blanket is 27″ x 30″, but you can adjust the size according to your needs.
- Crochet hook sizes are not universal for all. If you want to crochet tightly, up the hook and, loosen it, go down a hook. It’s totally up to you.
- You will have to work in every chain of each row positioned at the end.
- For this ripple blanket, the gauge is not important.
- Remember that the dc2tog type is the same as the double crochet decrease.
- If you use an ombre-coloured yarn, you will see it create vibrant stripes during the making. Or, you can even change the yarn colors in every 3rd row and create beautiful stripes.
Ripple Baby Blanket Pattern Tutorial Guide
When you are reading about the crochet ripple baby blanket, taking a look and reading the details on the pattern instructions can give you a clear idea.
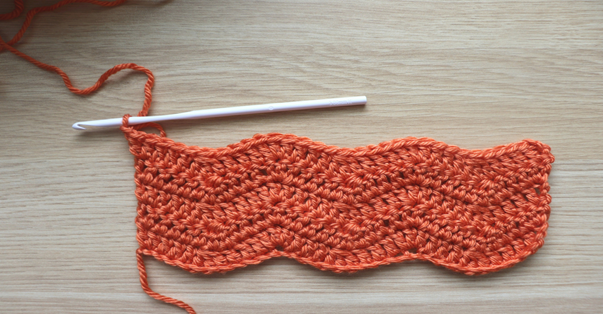
1. Begin with the Foundation Chain
The most essential step to proceed with any of your crocheting projects is the establishment of the foundation chain. Be very sure to maintain the appropriate tension so that you don’t have to begin all over again if the steps get distorted.
2. Row One
In the case of row one, you will follow using 2 hdc located in 3rd ch from the hook. The next one is 2 hdc positioned in the next ch and hdc2tog 4 times. Then, again, the *2 hdc in the next 4 chs. Then, again, the hdc2tog 4 times and then repeat from and across until the last 2 ch. Then, go for the 2 hdc present in the last 2 ch. Now, Turn. (144 sts)
All these stitches are created in the back loops only. Only each row’s first and last increase is left because both are made under both loops and create a sturdier edge.
3. Row Two
Ch 2 – This does not count as a stitch. Here, the 2 hdc are used in the first st, then 2 hdc-blo in the next st. Again, you have to choose hdc2tog-blo 4 times and *2 hdc-blo in every one of the next 4 sts. Then, choose hdc2tog-blo 4 times and repeat from and across until the last 2 sts. Then, again, follow the process, which is 2 hdc-blo in the second position to the last st, and then 2 hdc in the last st. Now, turn. (144 sts)
Reasons Why Your Ripples Aren’t Lining Up?
Many people face this difficulty while crocheting the ripple stitch pattern for the first time. If you are also struggling to keep your crochet ripple baby blanket’s ripples lined up, read below. Here are some common reasons why the ripples are not lining up
- It can happen if you do not work with the ch 2 at the end of the row. Without this step, the pattern can look complete, but in the end, it affects the lining. So, never forget to work on the last 2ch at the end of the row.
- Another reason your valleys and peaks of the ripples are not lining up is you are doing Hdc2tog in one stitch instead of two stitches. This can also affect the lining. So, ensure you are following all the instructions properly.
Additional Tips for Success

Regarding the crochet ripple baby blanket, remember a few additional blanket-making tips to achieve success.
- Consistent Tension: Consistent tension is crucial for crocheting if you expect a professional-looking result. Make sure that you maintain an even tension, which needs practice. Don’t worry if you can’t do it right immediately because good things take time. Keep practicing, as it makes the work perfect!
- Take Breaks: Crocheting is fun when you are working in a comfortable and well-lit space. Take regular short breaks because it will help you to prevent hand cramping. You can also find more interest in the project to keep you engaged.
- Block The Blanket: Blocking the ads creates a nice finishing touch to the ripple baby blanket. If you want to block the blanket, gently wet it and lay it flatly on a towel or over a blocking mat. Then, allow it to dry completely. Though you might find it an extra step, the result will be worth it.
Crochet Ripple Baby Blanket Tutorial: Wrapping Up
Ripple crochet stitch is one of the easy and versatile crochet stitches for baby blankets. The ripple-like pattern looks incredible on baby blankets and creates a thick, warm, soft texture. The crochet ripple baby blanket patterns are very trendy these days, and most people love them to use for little kids. The stitch pattern is beginner-friendly, so you can crochet this pattern with the knowledge of basic crochet stitches.
The pattern also works up fast, so you can crochet a ripple baby blanket within a short time. In this ripple baby blanket tutorial, we have covered a comprehensive guide on crocheting the ripple stitch baby blanket step-by-step.
We have also discussed all the essential details you need to learn before getting started, such as what a ripple pattern is, which basic stitches it includes, materials needed, tips, and more. So, arrange your crochet materials and start crocheting a ripple baby blanket today.
Frequently Asked Questions
What is the Difference Between the Chevron and the Ripple Stitch?
Many crochet online tutorials use the terms chevron and ripple interchangeably. But they are a bit different from each other if you look closely. The Crocheted chevron pattern has sharp edges on the valleys and the peaks. On the other hand, the ripple pattern has smoother valleys and peaks.
Can I Use Bulky Yarn for A Crochet Ripple Baby Blanket?
There should be no problem using a bulky yarn for a crochet ripple baby blanket. But you must remember that the look of the ripple pattern may change a bit when you use a bulky yarn. You can first make a swatch to know if your chosen yarn will be suitable for the pattern.
Can I Adjust the Size of A Crochet Ripple Baby Blanket?
The best part of the ripple pattern is that it is flexible. You can adjust the size of the crochet ripple baby blanket by subtracting or adding stitches to the foundation chain. But you must follow the 12+2 stitch multiple when calculating the chain numbers.