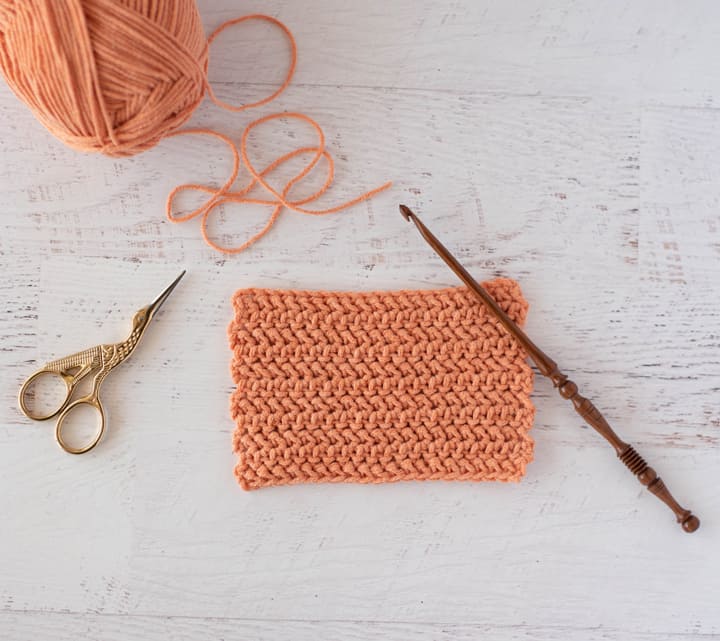
Have you ever wondered if any crochet stitches leave no ‘holes’ in the blankets or garments? We were curious to know, and then we came around the herringbone crochet blanket that has a texture similar to the half double crochet but is more firm and without the gaps.
With the growing love for crochet in modern days, designers and crocheters are becoming fond of trying their hands at new designs and patterns every day, and we thought it would be apt for us to let you know about the recent trending herringbone crochet blanket.
Don’t worry; there’s no science involved in it. It is extremely easy to execute the stitch, and we will explain each step in the easiest possible manner. What is the basic necessity of crocheting? The right materials. Grab them first!
Materials Required for Herringbone Crochet Blanket
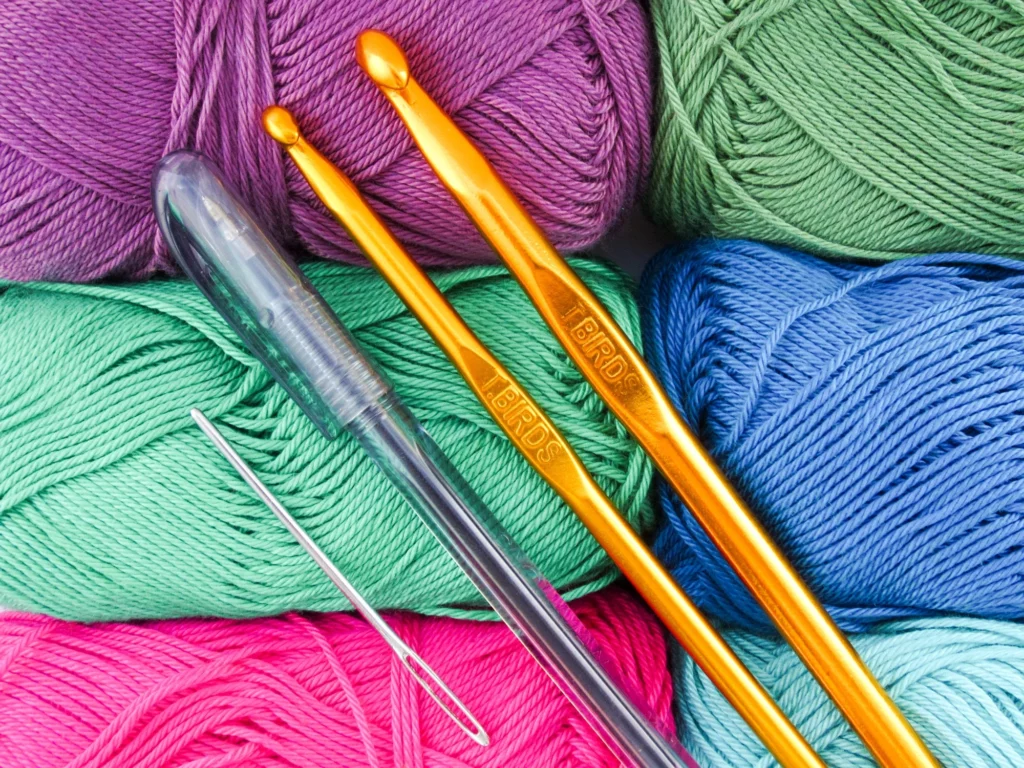
To avoid any last-minute hassle of looking out for required materials, it is preferred first to arrange all the materials and then sit back to focus on the stitch.
| Yarn | Tape Measure |
| Hook(s) | Tapestry Needles |
| Scissors | Stitch Markers |
It is important to choose the right weight of yarn for your projects, and the hook and gauge should complement the yarn. If there is no parity between the two, the texture of the final result will not turn out to be as expected.
Various Stitching Skills
The crochet stitching skills differ from the general stitching skills and require using yarn and crochet needles. Crochet stitching requires you to form loops directly on the fabric with bigger stitches than knitting.
The resultant fabric is dense and textured, and the pattern requires basic knowledge and some practice. Each crochet stitching technique differs from the others in terms of texture and ways of placing the needle to tie the knot.
The six basic crochet stitching techniques are- chain stitch, single crochet stitch, double crochet stitch, half double crochet stitch, treble crochet stitch, and slip stitch.
The skills required to make the herringbone crochet blanket are:
Chain Stitch
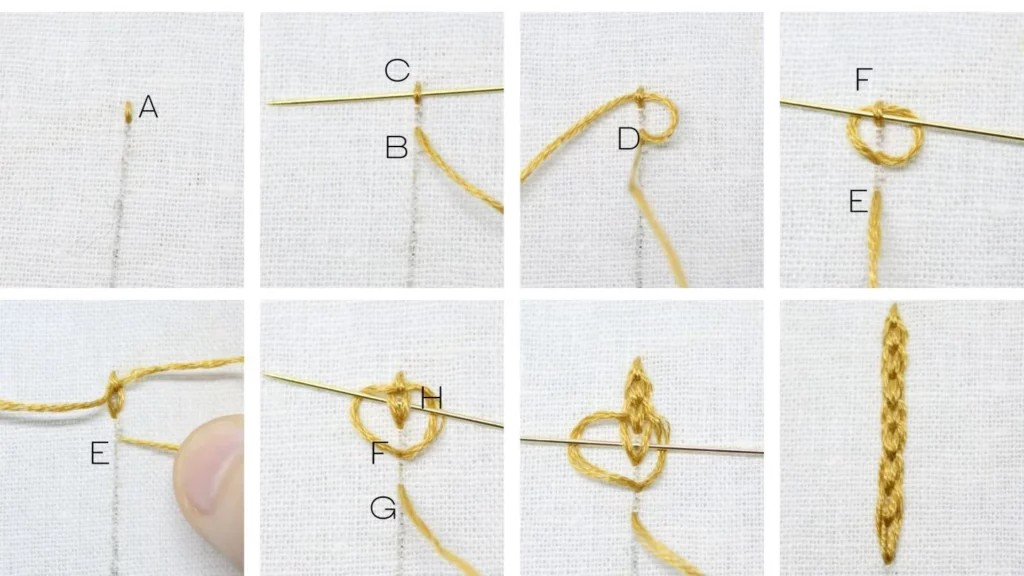
It is the base of any intricate design. For this, you need to start with a single small stitch and then come back through a spot in line with the stitch. For the grip, loop the thread through the first stitch and put the needle back through the hole it came from.
Half Double Crochet Stitch
The half double slip stitch is done in the following pattern- Yarn over, insert hook, yarn over, and pull through all the loops on the hook. One stitch gets completed after one such round.
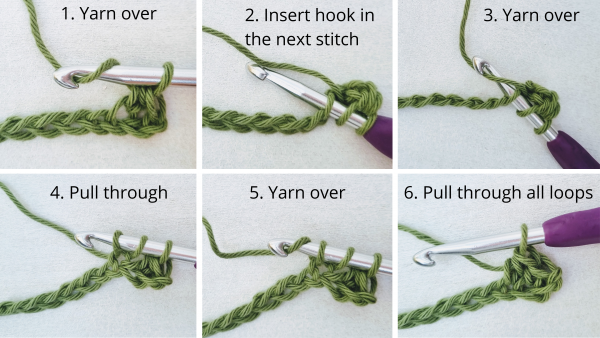
What is a Herringbone Half Crochet Stitch?
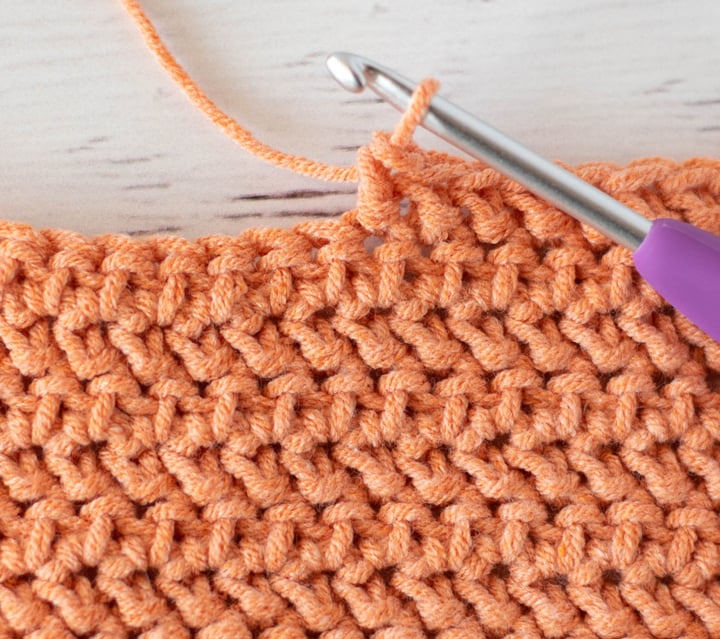
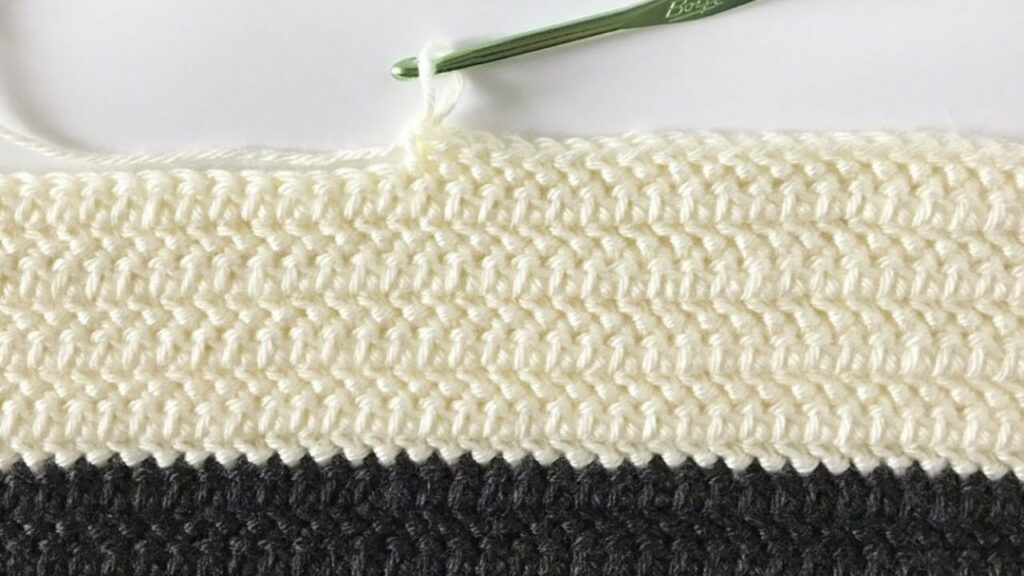
Just like the regular half double crochet stitch, the herringbone crochet stitch is easy to make, and the texture is soft and easy to carry. It is worked up by yearning over, inserting the hook through a designated stitch, yarning over, and pulling the hook back through the stitch(3 loops on the hook), now pulling the hook through one loop (two loops on the hook), then yarning over and pulling back through the last two loops.
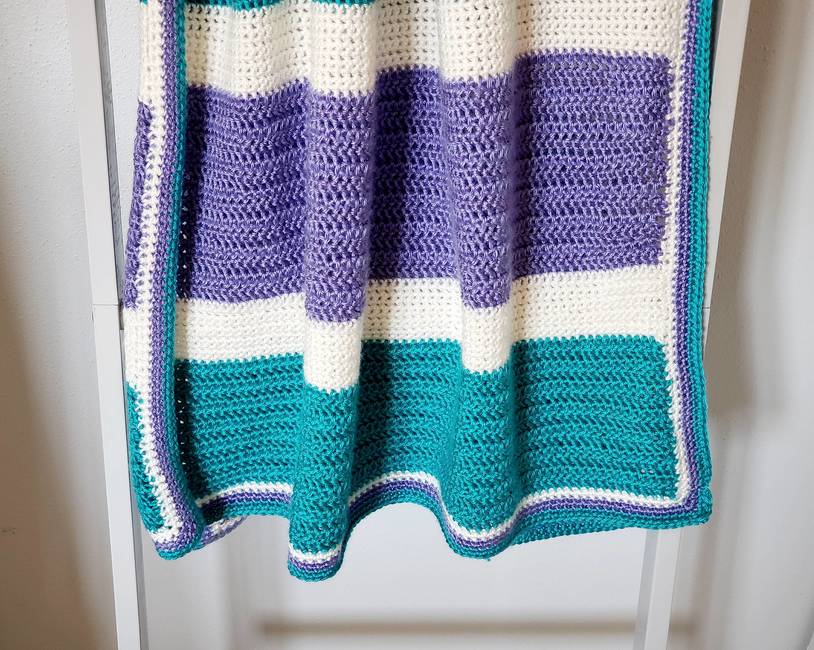
The pattern is worked in rows and is a 1-row repeat stitch, which makes it easy to change colors while making the herringbone crochet blanket.
When to Use Herringbone Half Crochet Stitch?
If you are looking to knit pieces without having holes in the garments or blankets, you must go to the herringbone half stitch. Due to the absence of ‘vintage holes,’ the pattern gives an oomph modern look to the garments, blankets, wall hangings, and rugs. It has the perfect texture to make tops and sweaters, along with blankets.
An important part to note about the stitch is that you might encounter scalloping of the edges, and they might tend to look away while you are working with the stitch. But, it maintains this consistency, and by the end of the complete project, it will align together, leaving no wavy trails.
Thus, if you are looking for a modern ‘no-hole’ project, herringbone half crochet stitch is the one for you.
Detailed Guide on Herringbone Crochet Blanket
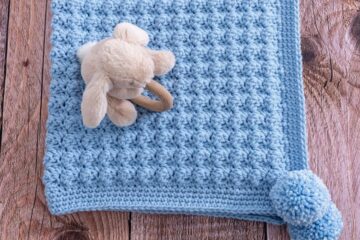
The fall season is already around, and there isn’t much time left for the snow to pour down and establish a cool, cozy climate. A soft and squishy blanket is what you will need to keep you and your loved ones protected from catching cold. And if you love crocheting, this is the perfect opportunity to start working on the herringbone crochet blanket. Without further ado, follow the simple steps given below to make a beautiful blanket.
1. Dealing with the Pattern
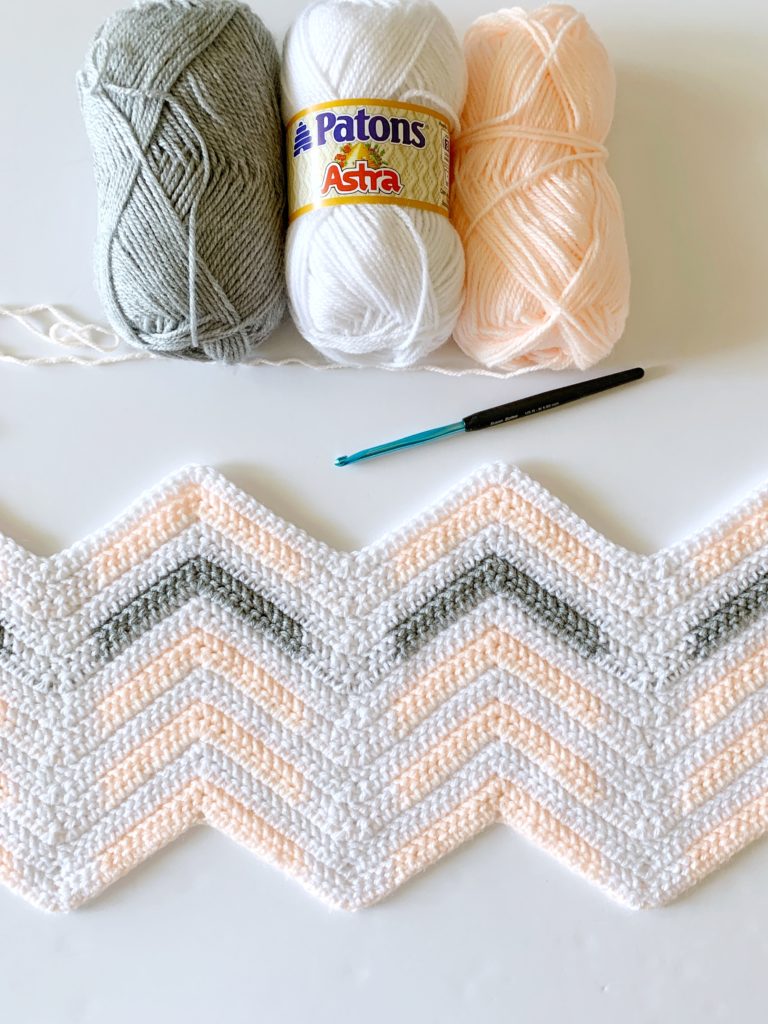
We have used weight-5 yarn and a hook of size 8 mm. The label recommends using a 6.5 mm hook, but we prefer to use a bigger hook for easy working. You can choose a hook size of your individual preference. Let’s get started!
Stitch chains in any multiples. Chain amount of stitches required to obtain your measurement + 2.
- Row 1: In the second chain from the hook, yarn over, insert the hook into the next chain, and again yarn over. Then, like in a stitch slip, draw the yarn through the stitch and first loop on the hook. Yarn over and draw through the remaining 2 loops, making a herringbone half double crochet stitch. Repeat this pattern till the last chain of the row. Then, stitch 2 chains and turn the work.
- Row 2: In the 1st stitch of the row, yarn over, insert the hook into the next stitch, and again yarn over. Then, like in a slip stitch, draw the yarn through the stitch and the first loop on the hook. Yarn over and draw through the remaining 2 loops, making a herringbone half double crochet stitch. Repeat the pattern till the last stitch of the row, then stitch 2 chains and turn your work.
For as long as you want your blanket to be, keep repeating the steps of Row 2 till your desired length is achieved. Immediately after working the 1st herringbone half double crochet of the row, mark the stitch using a stitch marker. This way, you will know the last stitch of the row, which in turn will save the hassle of counting the same number of stitches again. This will also help in keeping the sides straight.
Additional Note: In case you want the herringbone crochet blanket to be bigger or smaller in size, change the number of chains you are working with by either increasing or decreasing the count respectively.
2. Weave in the Ends
After you are done with extending the blanket to the desired length, weave in the ends before making the borderline of the blanket; this will keep the blanket intact.
Use a tapestry needle to thread the yarn in and out the stitches several times to secure the ends. Cut the tail close to the blanket, and the end will disappear into the blanket. Make sure to thread in and out the yarn that is in the same color.
3. Moving to Work on the Border
Step 1: Lay the yarn over the hook, pull up a loop in the bottom right-hand corner, and then stitch 1 chain. Work 1 herringbone half double crochet in the same corner space. Then, work 1 herringbone half double crochet into the end of each row up the side of the blanket.
Step 2: When you get to the next corner, work 3 herringbone half double crochet into the same corner stitch. Continue working 1 stitch per stitch and 3 herringbone half double crochet into the corner spaces.
Step 3: Upon reaching the starting corner again, work 1 herringbone half double crochet and then slip stitch to the starting stitch. Stitch 1 chain and continue working in the same direction. Work 1 herringbone half double crochet into each stitch and 3 herringbone half double crochet stitches into the middle stitch of the 3 herringbone half double crochet stitches that made up the corner of the row below.
We have made 2 border rounds. You may make as many rounds as you like by repeating these steps. Once you are done, slip stitch to the beginning stitch, then tie off and weave in the end.
The herringbone crochet blanket is ready to be used now.
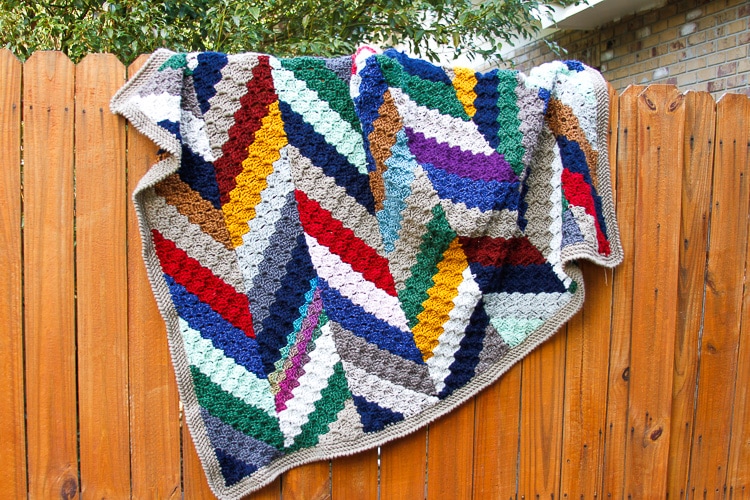
4. Changing Colors for Defining Details
Changing the colors of the yarn is an important aspect of crocheting garments or blankets. You need to be a little careful while changing the colors so they all blend to make a flowing rhythm.
When it is time to change the color, work till the last stitch of the row and only finish making the first step of that stitch. Before pulling through and finishing the stitch, lay the new colors across the hook and pull through with the new color. Cut the old color, leaving a 9-inch tail to weave in later. Begin crocheting with the new color.
Important Points to Note While Working Herringbone Half Stitch Blanket
Working with the herringbone half double crochet stitch is easy, but you still need to take care of certain points to achieve your desired results in one go.
- Herringbone half double crochet is a variation of regular half double crochet and can be used in any number of chains.
- Working on the side of the blanket can be tricky; have the patience to try and work only one stitch per row.
- Acquaint yourself well with the handling of the yarn and hook together for a smooth workflow of the blanket.
- Herringbone stitch is a reversible pattern. Thus, you need not worry about the right and wrong sides while working.
Common Mistakes People Make while Crocheting
We understand that crocheting is considered an ‘old granny thing’ to do. But, the fact that it is again gaining popularity and more and more people are trying their hands at the various patterns of crocheting made us realize the fact that there are certain common mistakes that people commit while crocheting, which leaves them unsatisfied with their results and thus they get disheartened.
We are here to help you rectify these mistakes so that you can make a successfully extended half-double crochet project.
1. Correct Hook Size
Remember the thumb rule- ‘the thicker the yarn, the bigger the hook and vice versa.’ The yarn label has all the information you need to know. The yarn label mentions the hook size that specific yarn will require to crochet itself. It is mentioned for UK and US terms, and you can refer to the conversion chart in case of confusion.
We suggest you go with the labeled recommendations in the beginning for your practice and then experiment with various sizes once you are comfortable with the stitch and the pattern.
2. US and UK Terms Confusion
Double Crochet(DC) in the UK is termed a Single Crochet(SC) in US crocheting terms. Likewise, Treble(TR) in the UK is termed a Double Crochet(DC) in the US and many other confusing terms. You must know the difference before you start working. Whichever technique tutorial you wish to follow, check for its UK or US terms first and then proceed. It is generally mentioned at the beginning of the tutorial.
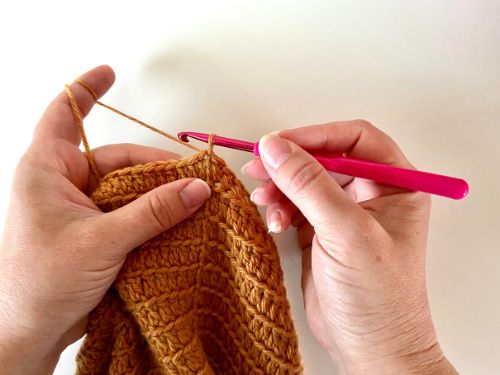
3. Holding Yarn and Hook
If you wish to hold the hook like a pencil, you will have to insert the hook so that you are writing a book. However, if you wish to hold the hook like a knife, hold it like you are about to cut the chocolate cake. You will have to figure out your individual preferences.
For the yarn, start to practice holding the working yarn with a little tension as you work with it. Wrap the yarn around your fingers to provide the tension. But make sure to keep the flow smooth.
4. Reading Instructions
One of the most common blunders mistakes people make while crocheting is not having enough patience to read and understand every instruction given in the tutorial.
What is the rush, after all? Spare the extra 5 minutes to save the ‘about to be wasted’ 60 minutes. The most important thing to follow in the instructions is the abbreviations. You must know the abbreviation used for every particular stitch the designer mentioned.
They usually mention it at the beginning of their written tutorial. Knowing the correct full form of the abbreviations lets you save time that might be wasted on wrong understanding. Craft Yarn Council has taken the initiative to explain each abbreviation for the crocheter community.
5. Givinging Up Too Soon
Crocheting is a skill that demands time, patience, and a lot of practice. You might get overwhelmed by the wonderfully worked project of your peer, but do not forget that there is no point comparing your first with someone’s 100.
At first, you might end up doing messy projects, but eventually, you will reach the point where someone will be in awe of your skill, and you will advise them to have patience when they get overwhelmed. But you need to have patience and keep crocheting.
Overview
The love for crocheting takes the crocheters to leaps and bounds by experimenting with various patterns every and then. Handmade crochets are a sign of the love and effort a person puts into making a gift for you.
The herringbone crochet blanket is a project that will keep you warm and cozy in the chilly weather. You can lay under them on a cold winter night and enjoy the hot chocolate with your partner and children. You can also knit one and gift it to your best friend as a gesture of happy times.
We have created the easiest method to knit the herringbone crochet blanket for beginners. Make sure you practice a patch before taking up a whole project. Work out and blanket carefully following the instructions and put down your views on the results.