Crocheters now had amazing techniques where they could transform a simple chunky yarn into a beautiful creation, and this technique is known as sedge stitch. They are super popular nowadays because they have an easy learning curve, and the crochet project can be completed within an hour.
The sedge stitch design has the power to create crocheters that resonate with warmth and texture; due to this, this design is used in a variety of applications like potholders, bags, and handbags. The application is not limited to here only; as of recent times, they are being used as toys also.
The customization feature available in this stitch design allows you to create the best toy project for yourself that suits your unique style and personality. With the help of this technique, you will able to install warmth, comfort, and coziness inside your crochet project.
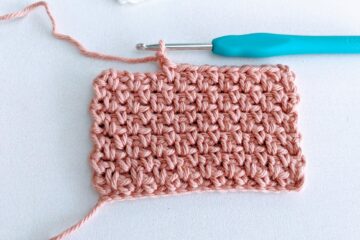
This tutorial contains photos and written instructions that will ensure that you master the sedge stitch technique using chunky yarn as your centerpiece.
Understanding the Basics of Sedge Stitch
Understanding sedge stitch can really set you apart from the crowd as this artwork blends your creation with elegance, sophistication, and warmth. Once you discover the world of sedge stitch, you will witness how sedge stitch applications can be used to create magical creations that reflect your personality and style.
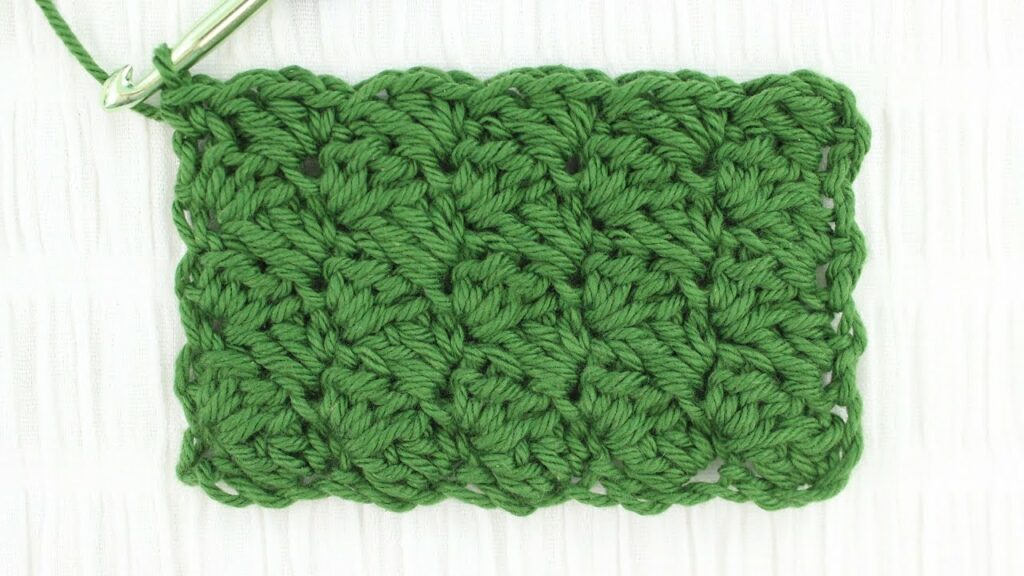
First, you need to realize that sedge stitch is a crochet pattern that involves a variety of artwork, and these are known as chains, double crochets, and single crochets. The result is a three-dimensional art that offers consumers a textured and cohesive look. Since they increase the visual element and aesthetics of any project, they are a top choice.
Breaking Down the Anatomy of Sedge Stitch
As we dig deep inside the world of sedge stitch, we need to understand some basic foundation work of this technique, and they are known as foundation chain, texture building blocks, and turning chain. Let’s understand each one in detail for a better understanding.
- Foundation Chain: They are created with the hook inserted in the yarn to create a loop. Without the yarn over, the pull-over loop foundation chain can never be created. Hence, make sure that you never leave or ignore this process. Without it, your final project would not be a success.
- Turning Chain: This chain technique is important to understand because, without it, you won’t be able to provide the necessary height that is needed to create the first row of the crochet project. Mastering the turning chain technique will ensure that for every crochet project, the stitch count is consistent.
- Building Blocks: Building blocks are basically chain spaces that you discover when you work on various stitchwork in building the row of the crochet project. You would need the combination of double crochets, single crochets, and the art of combining chains to make the fabric cozy and comfortable.
How to Apply Sedge Slitch for Creative Freedom
When you apply sedge stitch formation, you create a pathway for projects that appear functional and decorative. They are stated as follows :
- Bags and Tots: Crochets use a combination of chunky yarn and sedge stitch for preparing bags that are fashionable and also have functional use. To level up the look, pair it with matching outfits.
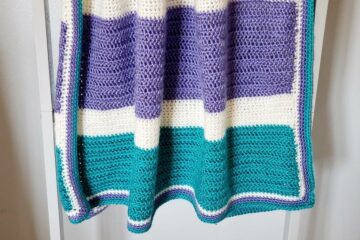
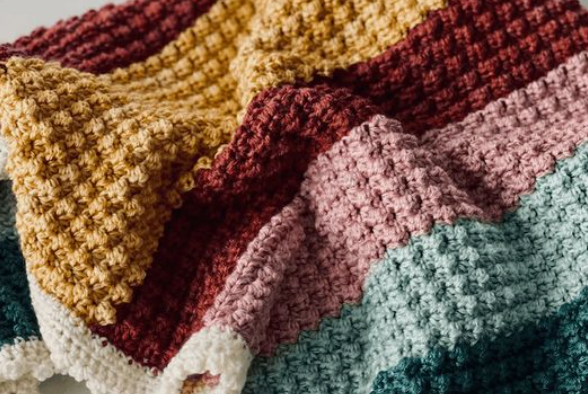
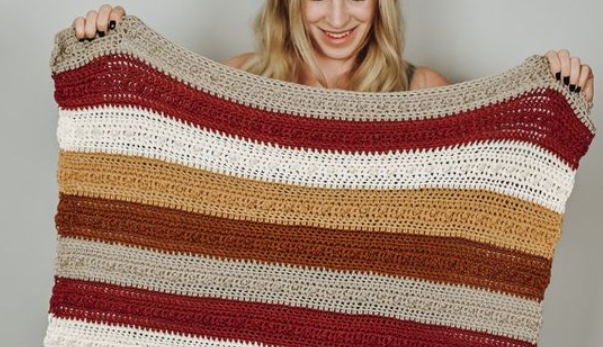
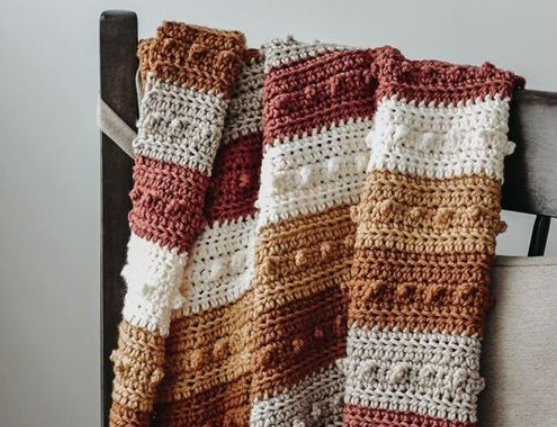
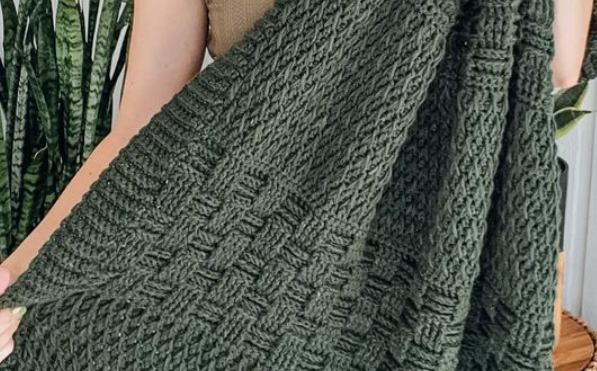
- Blankets And Throws: When you want to create throws and blankets that have warmth and also increase the aesthetic appeal of your living room, then using the sedge stitch is the best option.
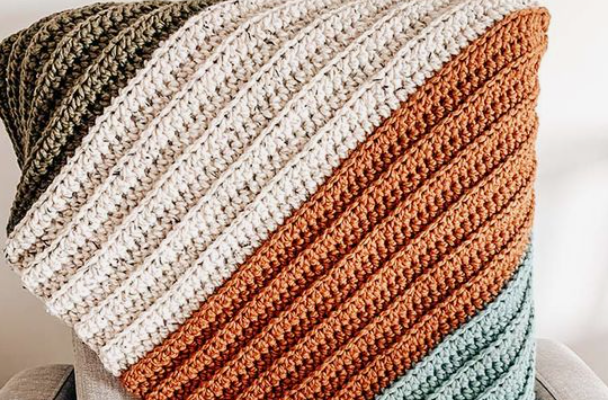
- Pillows And Cushions: Every sedge stitch owner has one thing in common, and that is elegance. The textured and cohesive look that this stitchwork offers is phenomenal, as it offers superior dimension in larger crochet projects.
- Hats and Headbands: This technique can be used for smaller projects too. Like many crocheters, they use the sedge stitch to create headbands and hats; when working with matching outfits, these become a lovely visual element.
How to Master Sedge Stitch Design
In order to master the sedge stitch designer, you need to take care of certain things. These are categorized as practicing, yarn selection, pattern variation, and tension awareness. Let us explain each one in detail for better understanding.
- Pattern Variation: Pattern variation doesn’t always mean trying out other stitchwork like double stitch, single stitch, etc. Thus, it is always recommended that you play with your sedge technique, where you can experiment with different colors.
- Tension Awareness: Even if you have the best technique available and you don’t maintain tension throughout the entire project, then the project will be untidy and messy. Hence, tension awareness is the key to making a remarkable piece.
- Yarn selection: Yes, chunky yarn is the best fit for the sedges stitch, but don’t be afraid to play with various types of yarn. Different yarns mean different types of fiber composition. So, each will provide you with a unique result.
- Practice: This is very attentive, as without it, your project can be a total waste of time. First, you must practice the sedge technique on the draft project and then move into the final one. This is very helpful as it will teach you how to practice rhythm while creating the crochet project.
The beauty of sedge stitch lies in the fact that it is a medium that can modernize traditional crochet-making techniques. When it is integrated with chunky yarn, it becomes a [powerful tool that produces beautiful aesthetics that makes your guest appreciate your creativity.
How Sedges Stitch Changes with Texture
The yarn is the most important part of the sedge stitch, and they can look extremely different with various textures. Some of them are stated as follows:
- Fluffy Yarn Texture: Using sedge stitch with this kind of yarn would give a soft and cozy crochet project where each stitch will be detailed.
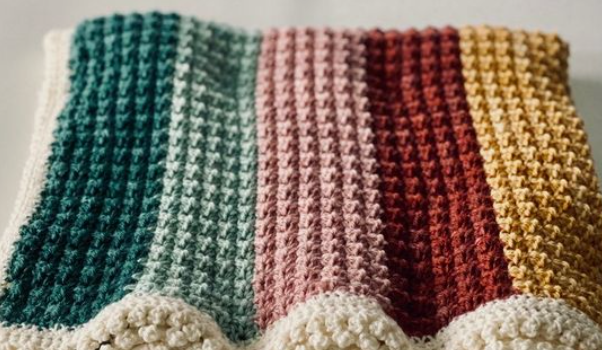
- Variegated Yarn: This yarn comes with a lot of color options. So, if you are in the mood for creating a sedge stitch design that involves a lot of colors, then this can be a good option as it produces a striped effect.
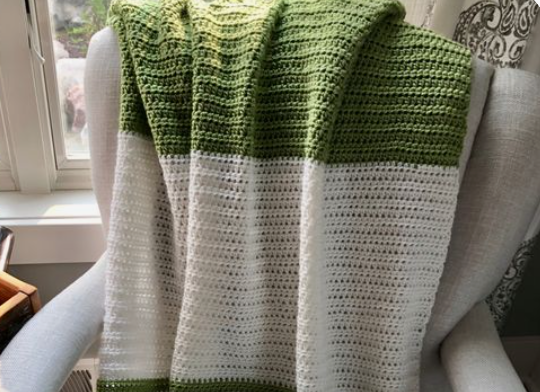
- Gradient Yarn: This yarn will let you witness color change as you keep progressing with the project. When the sedge stitch technique is integrated with this yarn, a transition of colors can be witnessed.
- Smooth Yarn: The rows and borders look neat when the sedge stitch design is introduced with this yarn.
- Fuzzy Yarn: A textured and soft look can be formed when this yarn is incorporated with a sedge stitch design. This provides the crochet project with an inviting and welcoming look.
Important Considerations While Working with Different Yarns
- Most of the yarns have low-quality stitch work, so to improve their quality, combine double and single stitches to start the process and end the project with triple crochet.
- When working with yarns, a hook size of normally 5mm needs to be incorporated to make it cozy and comfortable. In addition, make sure you always use a stitch marker. This will help you eliminate any loose stitches.
- A tapestry or a darling needle is the need of the hour to close all the remaining loose ends. Pay attention while completing the project since a minor mistake can make your project look untidy and messy.
How to Create a Sedge Stitch?
In the world of crocheters, one popular stitchwork that has gained popularity is the sedge stitch. The best yarn suited for this technique is chunky yarn, which brings elegance and warmth to the crochet project. With the help of this tutorial, we will lay out a step-by-step tutorial that will help you create remarkable pieces.
Materials that You Will Need
- Achunky yarn of the color of your choice.
- A crochet hook that would range from 7 mm to 10 mm.
- Scissors that would be needed to cut the loose ends when finished.
- A Tapestry needle that would help create a need for borders.
Step-By-Step Tutorial for Sedge Stitch
Now, with all your essentials, let’s begin by entering the detailed tutorial guide to create timeless art through the sedge stitch technique of class and touch.
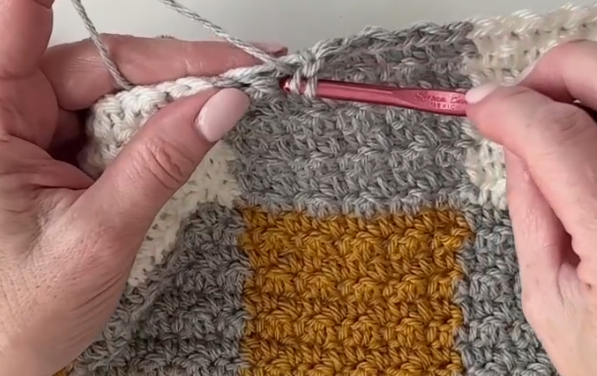
Step 1: Forming the Foundation Chain
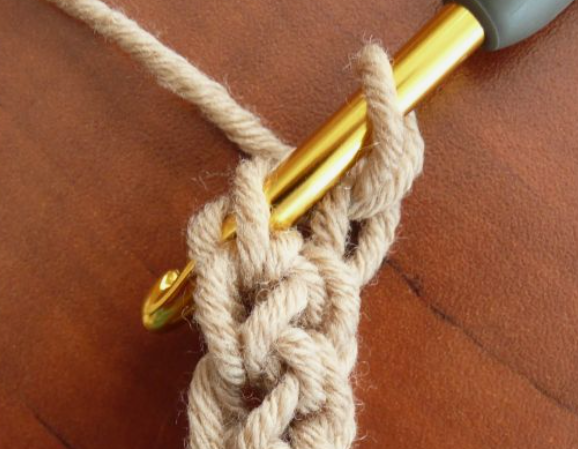
First, you need to apply three stitches directly to begin the project; once you keep making them, allow another stitch to get into practice. The additional chain is the turning chain, which is crucial for completing the crochet project.
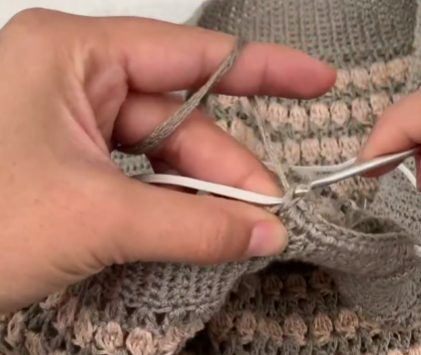
Step 2: First Row Formation
Now, the hook needs to be inserted on the additional chain that you have created in step 1. Once done, yarn over and create a loop. Repeat the process to create the second loop. Now, do the process again to create the third loop. This completes the first row.
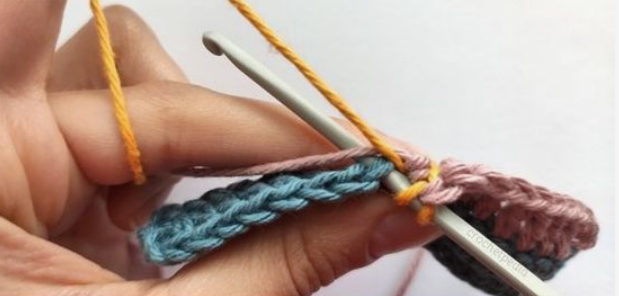
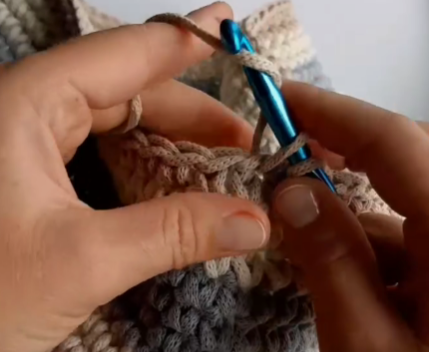
Step 3: Second-Row Formation
The second row is the continuation of the first row. Insert the hook in the first-row yarn over and make a loop. Repeat the process to create another two loops. Make sure the newly formatted loops are left on the hook.
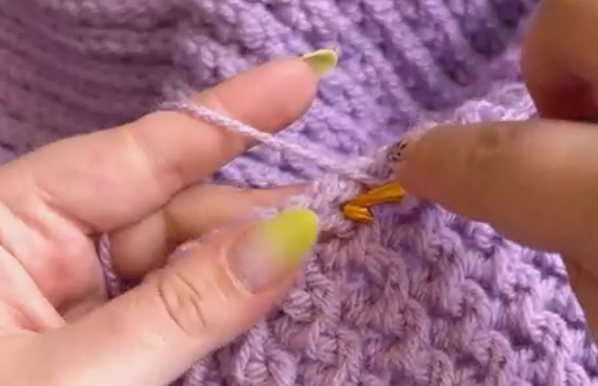
Step 4: Yarn and Loop
The first row is created, and the second row is also created. To create the rest of the loop, make sure that you yarn over and make a loop. Continue this for a while till you complete all rows. Once the row is complete, you need to check if the looping session that you created has a neat structure.
Step 5: Repeat the Looping
Once the rows are created, you will notice that the beginning of the loop denotes the chain, while the hook insertion in between the stitches creates the stitch count. This should create even rows for the crochet project.
Step 6: Adding Final Touches
Leave the tail of the crochet project to weave it with a tapestry needle. This will ensure that the borders are neatly created and the project looks tidy and comfortable. This step needs to be done with detail so that the project becomes a success.
Tip: All these steps would only work if you have the willpower not to give up. Sedge stitch design is a long and tiring process. So it’s recommended that you prepare your mind when you start your building session.
Takeaway
As we have reached the conclusion of the sedge stitch tutorial, we hope that we have successfully unlocked all the doors of mastering the design and teaching its applications. With the help of this tutorial, you will be able to create crochet artistry for yourself that brings forward your artistic skills.
This beginner-friendly technique helps you create personalized toys, handbags, potholders, blankets, and beanies in less than an hour, so you don’t have to spend the entire day working on a crochet project but a limited time that will help you create the creation of your choice.
With the help of written instructions, you will be able to perfect your sedge stitchtechnique and create a textured look for your crochet project that will make your consumers appreciate your uniqueness and creativity.
Always remember that you should enjoy it during the building session, so never be afraid to make mistakes, as mistakes give rise to innovation and personalization.
Frequently Asked Questions
Which Crochet Projects Need Sedge Stitches?
Sedge stitches are known for their versatility, and hence, they can be used in a variety of applications. Some of them are blankets, scarves, and fashion bags. Experiment with this technique to create a unique style that represents your personality.
What are the Crucial Factors for Sedge Stitch?
The most crucial factor would be practice and choosing the right yarn. Once these two are perfected, creating a sedge stitch design with perfection is not an issue. In addition, pay attention to the tension while working on the project.