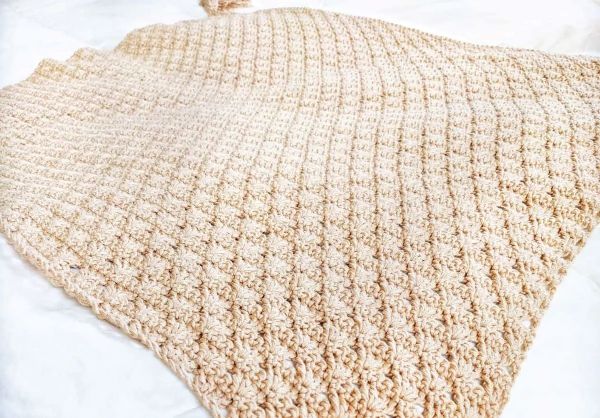
In the fascinating style of crochets, both artistry and skill co-exist. With these crochet patterns, one can make their place look more elegant and beautiful. You may use these crochet stitches for any of your desired projects, and the special shell pattern of these crochets provides a unique and aesthetic look that you must master.
The shell stitch’s delicate yet striking pattern equally brings together texture and elegance. The bumpy pattern of shells is not so difficult to create, and once you get to know the technique, you can make any desired projects with that pattern. So grab your yarn and hook and get ready to make some unique creations by following our step-by-step guide on how to crochet grit stitch.
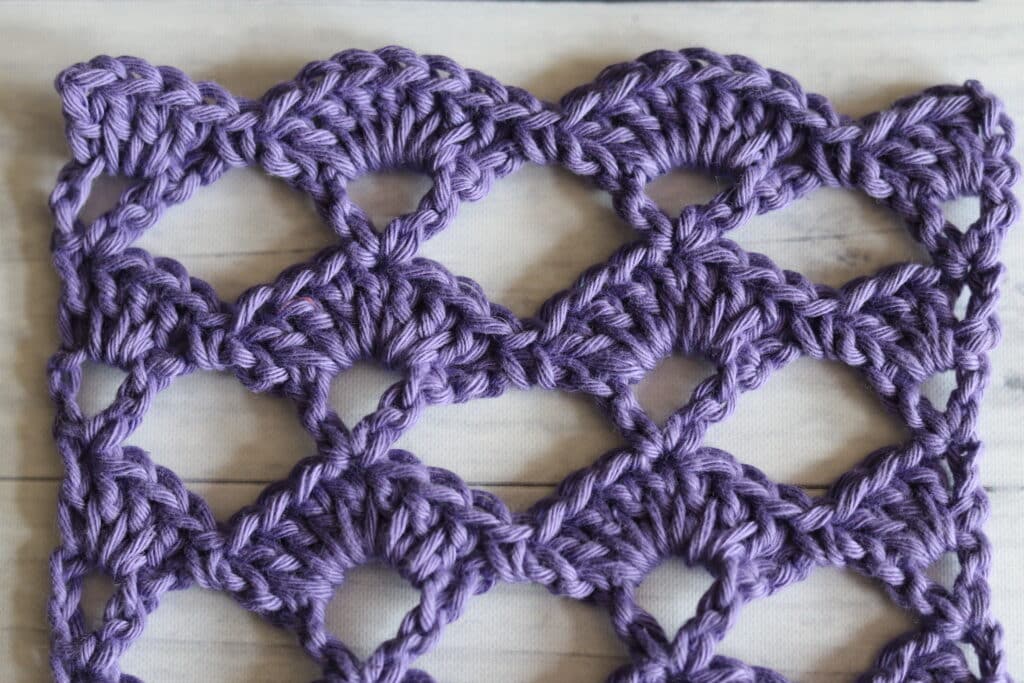
What is Shell Stitch Crochet?
A colorful and customizable crochet method known as shell crochet produces a shell-like structure, and this texture can be woven with your yarn. After you have completed your stitches and formed the shell, you need to do a Double Crochet into the same space to make gaps. When you follow these steps, what will appear next are curved shapes that give a wave-like or shell look.
With shell crochet, you may add different textures and patterns while doing various projects like weaving a blanket, shawls, scarf, and whatever you feel like creating. If you want to give an aesthetic look to your knitting work, then crochet shell stitch can give you what you desire. The designs are pretty enough to make you want to try one for yourself. And if you learn how to crochet shell stitch, then it will surely be a valuable asset in your skills.
How Can You Use Shell Stitch?
Once you learn the method of creating a shell stitch pattern, ideas will follow instantly. There are so many projects that you might want to try to beautify your items, enhance your home decoration, or make something beautiful for yourself. Some of the ideas that you may opt for your initial shell stitch pattern include-
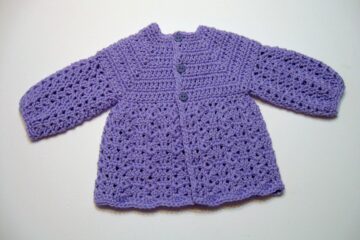
- Baby blankets
- Scarfs
- Shawls
- Home Decorations
- Christmas/ Thanksgiving decorations
- Mittens
These are a few ideas that are commonly used by many. But this is definitely not the limit. You can try creating even better and more exciting projects and share your ideas with others, which will surely earn you admiration and praise.
How to Crochet Shell Stitch- Step-By-Step Details!
If you haven’t yet tried the shell stitch pattern for your crochet, then this is your cue to give it a try. The amazingly elevated shell pattern provides a distinctive look to your crochet, and you can easily make those designs in round patterns, as shell stitch rows, or by creating a shell border for your project.
Required Materials:
Detailed Guide:
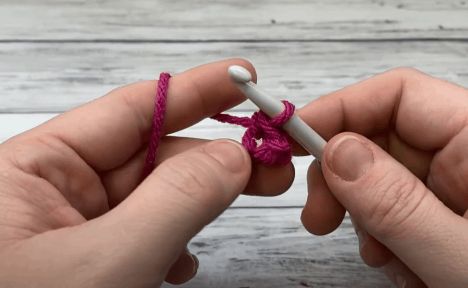
The first thing you need to do to initiate your knitting procedure is to make a chain. Create a slipknot first, and you can use your forefinger to make that knot. After that, you must insert your hook into it.
Begin with The Foundation Step
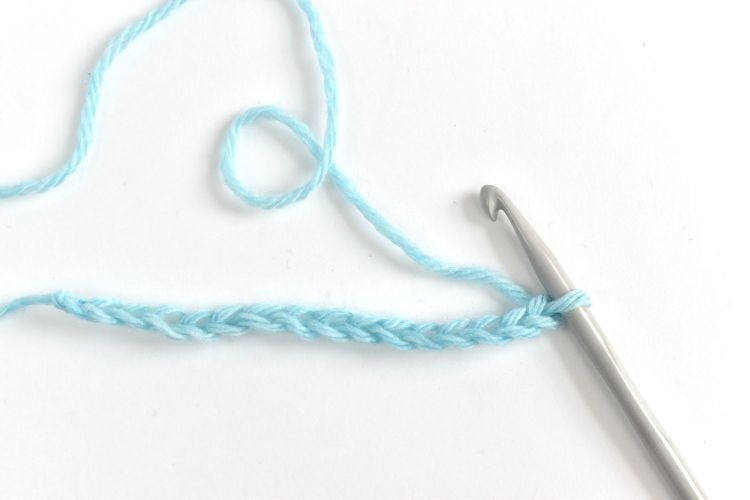
- It is now time to start with your foundation chain, and it must be made in multiples of six. You can choose the chain number according to the required width of your project.
- Now do the needed step, yarn over, and pull through and continue doing this till you achieve your desired length with multiples of six.
- After you have got the length you wanted, you must make an additional chain two, so chain two more, and this will be for turning.
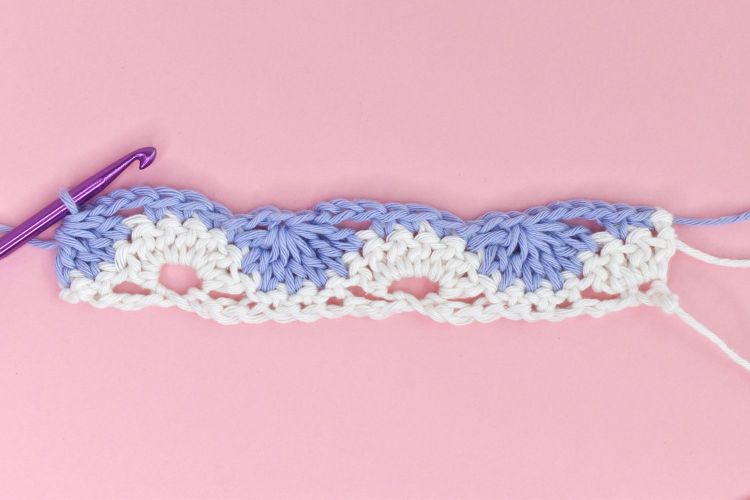
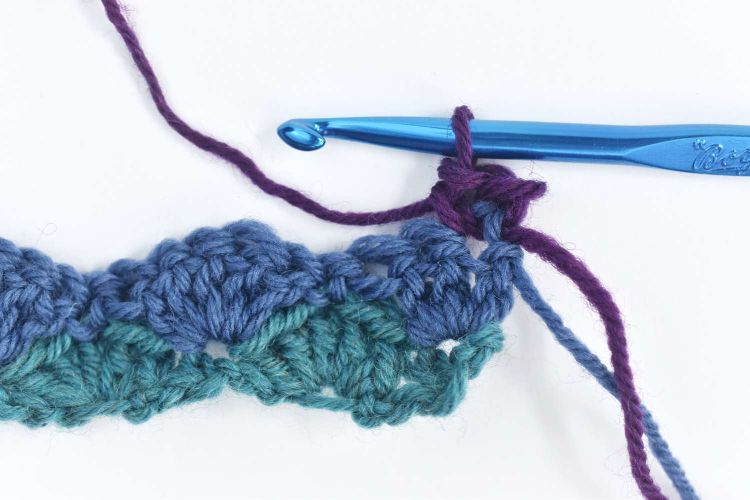
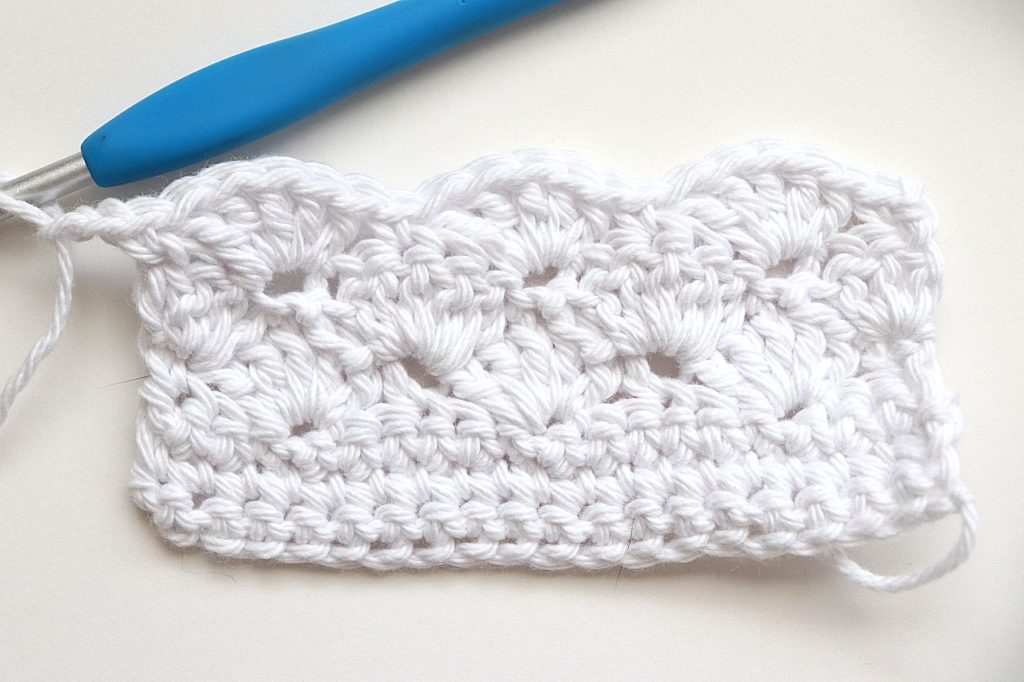
Row 1
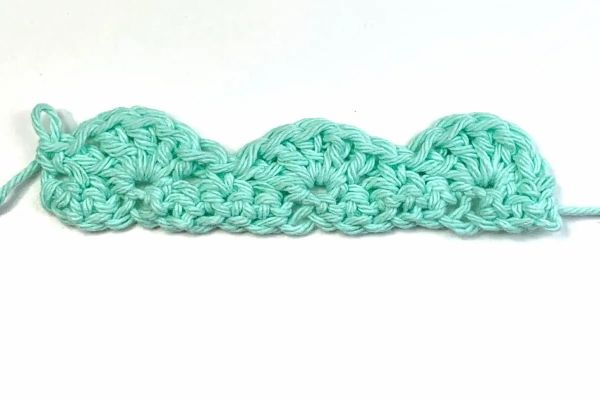
- Now, you must insert the hook for the first row of your shell stitch. Skip this chain and start working into the second chain from the hook. Now, you must do a Double Crochet and, thus insert your hook, yarn over, and pull through.
- Yarn over and pull through the other two loops on your hook. Now, skip two chains and work into the third chain. You will now be required to do a treble crochet, which is known as Double Crochet in the U.S. As you skip two chains, insert it into the third one.
- Again, yarn over and pull through two yarn to make a treble or Double Crochet and do it about five times. Skip two chains again and then do a Double Crochet in the third chain. Insert the hook straight into its yarn and pull through the two loops on the hook. This will be your first shell shape in your pattern.
- Now move straight to the next shell, skip two again, and create five trebles into the third chain. Yarn over and pull through, yarn over and pull through two, and do it five times. This will give you your second shell. You must now attach it to the chain, so skip two spaces and then make a Double Crochet into the third chain.
- Go straight into the chain, yarn over, and pull through, yarn over and pull through two, and repeat this step to the end of the chain. You have to skip two chains, do five trebles into the third chain, skip two chains, Double Crochet, and repeat it. After making the shells, you will have about three chains at the end.
- Now insert your hook in the last chain and yarn over, pull through, yarn over, and pull through two. Next, if you wish to choose another color for your pattern, then you can do that now or make all the rows of similar colors as you wish. Cut off the excess yarn and lock it.
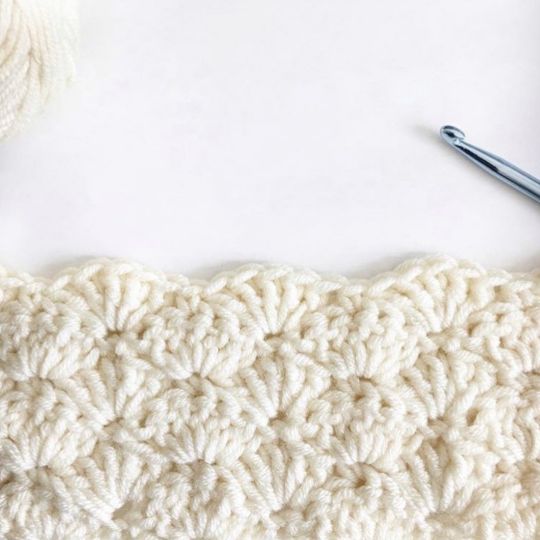
Row 2
- So if you wish to change the colors, then hook into the space on the last chain and then grab a different color you want to try and pull through. Tie it off and again insert your hook into the same space and yarn over and pull through. Chain one, turn the chain, and do a half-shell in the same space.
- So, insert hook, yarn over, pull through, yarn over, pull through two, and yarn over pull through two, completing a treble. You must do two more trebles. Now skip two chain spaces and insert your hook into the third space. Insert hook, yarn over, pull through, yarn over, pull through two to make the dip of the shell.
- Now skip the next two spaces and then you will have to do your five trebles in that stitch. Yarn over, pull through two loops, yarn over, pull through two and this is your first treble. There should be five trebles the same way. You must now attach this end so just skip two spaces and insert the hook into the third.
- Do the Double Crochet in the stitch and skip two and then do five trebles into the third stitch. Follow this step repeatedly till you are about to reach the very end of the row. Now at the end, do a Double Crochet into the last shell, skip two stitches, and work the three treble crochets into the third stitch, the very last stitch.
- Insert, yarn over, pull through, yarn over, pull through two, and do this two more. To finish off the row, insert your hook, yarn over, and pull through. If you wish to use the same color then just chain one and if you want to use a distinct color then cut off the yarn and pull through.
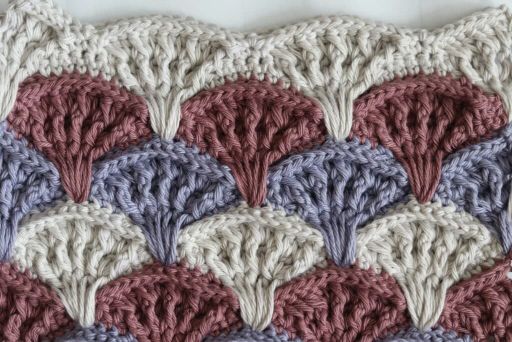
Row 3
- You can now select another beautiful color for this row. So insert the hook at the end space of the last row and wrap the yarn and pull through. Tie it off and again insert the hook into the same space. Yarn over, pull through, and chain one. Turn the project over again.
- Look for the stitch that attaches down to your previous rows and insert your hook into that stitch. Yarn over, pull through, yarn over, and pull through two and do this to create five trebles. Skip two chains and do a Double Crochet into the top of the shell in the row below.
- Skip two and make five trebles into the bottom chain. Do this till you reach the end of this chain. When you reach the end of the row, skip two chains and insert the hook into the third chain. Now do a Double Crochet into the chain.
Row 4
- You will have to follow a similar procedure for this row. Attach a new color as explained above or keep the one you already use. Do a half shell, which means three trebles at the beginning and the end of the row, and then follow the same shell pattern.
- Make enough rows according to your project by the same method, and you may or may not change colors for each row.
The Final Touch
When you are done with your project and have finished it off, then you must cut your yarn while letting a tail of a few inches stay. Insert the hook towards the end, pull your yarn through the two loops on your hook, and tightly seal it. You may want to weave the loose ends to finish.
Some Useful Tips To Go Through While Crocheting Shell Stitch
Following the step-by-step guide to crochet shell stitch, as discussed earlier, will help you create amazing patterns easily. And if you want your project to be one of your best creations, then learning some significant tips can enhance its value.
- Hook and Yarn: Select a good quality hook and yarn for your project if you want it to stay in the best position till it finishes. If you want your shells to be larger and more attractive, then thicker yarn and larger hooks will do the work here. However, smaller and daintier shells will be achieved with thinner yarn and smaller hooks.
- Perfect for lacy designs: You must make a project that requires lacy designs, as these shells appear most beautiful while in laces. You may want this lacy texture for your blankets, your scarves, and also your mittens.
- Master the foundation chain first: We suggest you first master your foundation chain and then only move to the next row. Once you have practiced the trebles and the crochets and have created an amazing shell pattern, completing the project while making the pattern in other rows won’t be difficult for you.
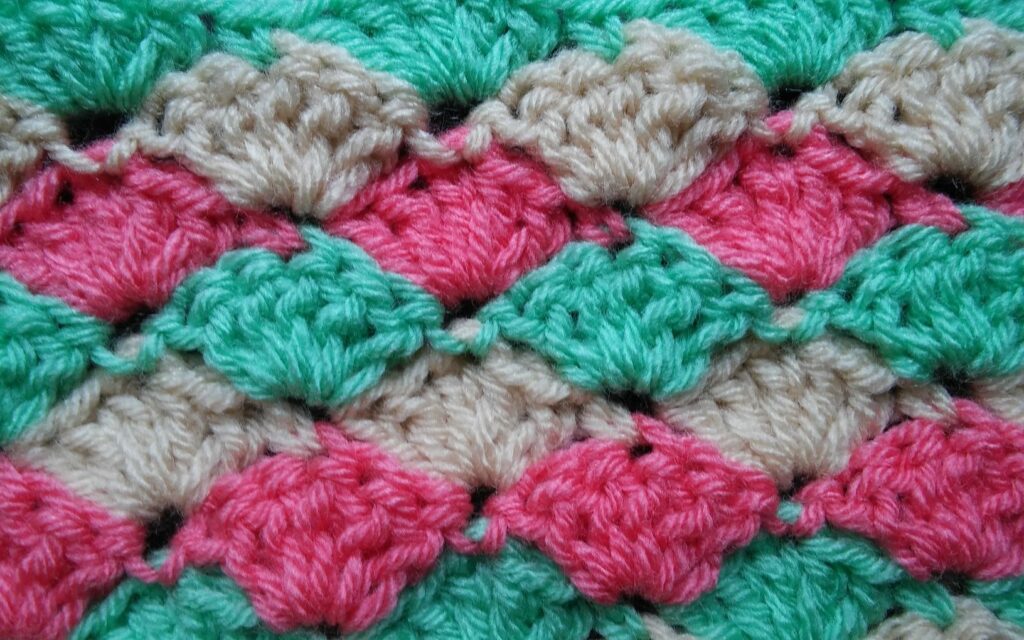
- Experiment with different colors: This is completely your choice, but we do feel that using a range of bright colors or any of your preferences will present the shell pattern even more beautifully. Using different colors gives a distinct, significant appearance to each shell, making it attractive to the eyes.
These tips are not compulsory to use, and you can definitely skip them if you have your design plans and ideas. For beginners, starting with the most basic looks and single colors can be a good option first to achieve the skill. And after that, you may proceed as you want to.
Wrapping Up!
By following the final thread of these detailed instructions mentioned above, you are now aware of crochet shell stitching and how beautifully these can be made.
When you have been swirling your hook through the yarn loops, you bring out the creativity inside you and the ideas into your creation. Shell stitch crochet isn’t the only simple mode, but a range of creative possibilities that you can try.
This beautiful shell stitch pattern that you will be able to make now after carefully going through the details we explained will definitely be your best work. You should start with a simpler project, and once you have mastered the important techniques, the sky is the limit.
So grab your yarn and hook, get into it, and make appealing crochet blankets, scarves, cute baby socks, shawls, and anything you want to put your hand on. And being your greatest cheering partners here, we would love to admire your projects.
Frequently Asked Questions
How Do You Crochet a Simple Lacy Shell Stitch?
Starting with a foundation chain, start crocheting a simple lacy shell stitch. To knit a shell, you must first skip a few stitches as per your project requirement, then proceed with the shell by doing various Double Crochets into one stitch. While repeating this process, ensure that you keep a constant distance between the shells. Align the shells with the rows below them and create an amazing pattern.
How Do You Crochet a Cluster Shell Stitch?
After completing your foundation chain, you must begin with making a single crochet into the second chain from your hook. Now, you must skip the next two chains and, into the next chain, work a cluster stitch chain. You can create a cluster by crocheting Double Crochet structures into one stitch. Skip a few stitches to create the desired spacing. Spread the clusters evenly for alignment. You can choose the number of clusters you want to create as per your project requirements.