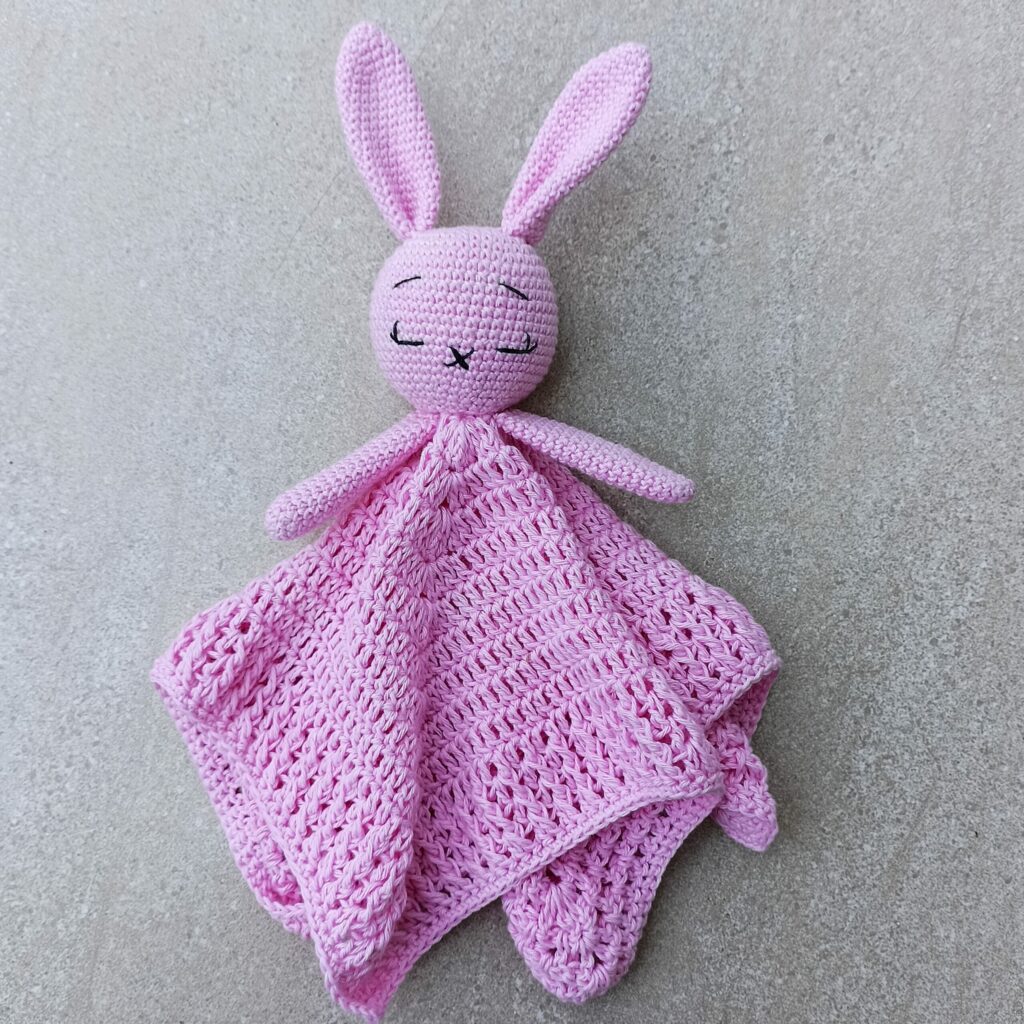
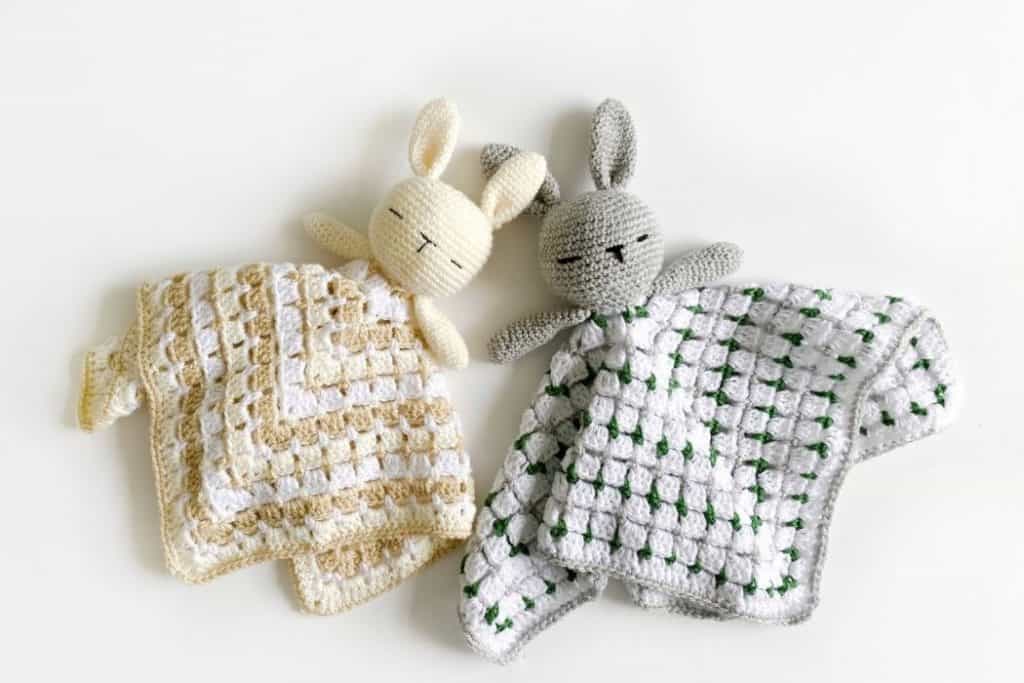
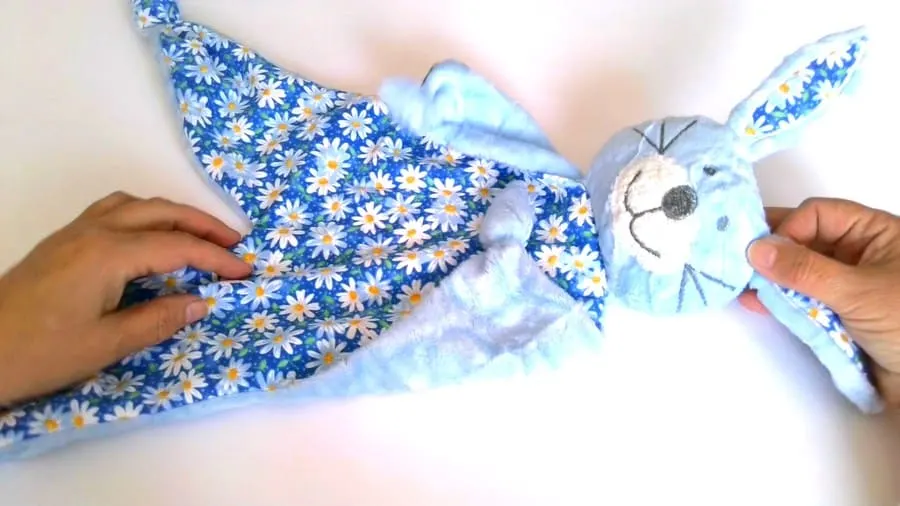
Looking to weave a soft and cozy companion that wraps warmth around your little ones? End your search here with our ‘Crochet Bunny Lovey Tutorial,’ an essential walkthrough for making stunning crochet bunny lovey with a soft toy.
Don’t hesitate, as we understand that not everyone can carry along with the complex steps. Therefore, we have simplified the steps into easy-to-follow instructions.
The tutorial includes everything from making a foundation chain, crafting and stuffing a bunny, to providing it a professional look. And the best part is that it’s a beginner-friendly article, so it doesn’t matter. Even if you’ve just started crocheting, you’ll end up making up something that will boost your confidence and a project to showcase your skills.
Let’s not prolong it further and delve into reading the essential prerequisites before diving into the crocheting process.
Essential Materials to Make Crochet Bunny Lovey Pattern
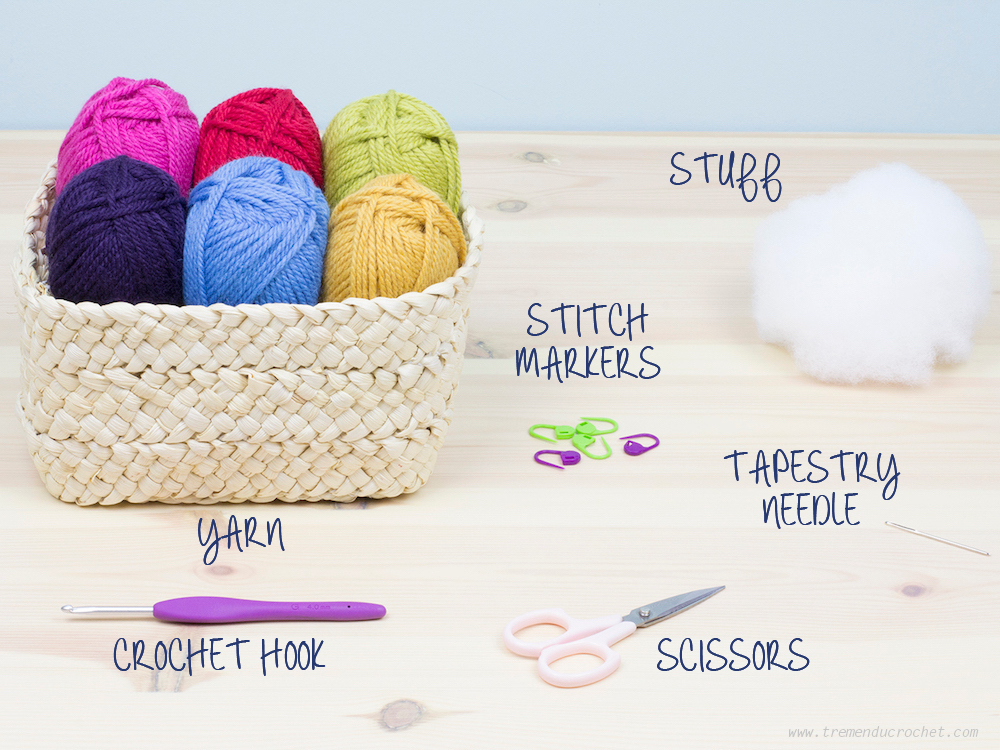
Making a crochet bunny lovey requires different material that plays a significant role during crocheting. Having these materials at hand will keep you focused while crocheting, hence ensuring better work. Here’s is a list of materials and how you can choose the best of them for smooth usage during the crocheting process:
1. Yarn
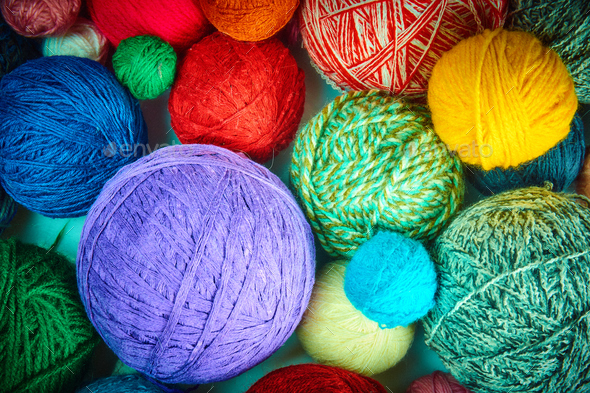
This forms the body of the yarn, i.e., the main material used in crocheting. For a crochet bunny lovey, choose a soft and baby-friendly yarn in two different colors that align well with each other. One we will use for the bunny and the other for the blanket.
Choose a ‘worsted weight’ yarn that is gentle on the baby’s skin and must be easy to care for. To check the same, refer to the chosen yarn label. We suggest using acrylic or cotton yarn because both are soft and durable.
Usage: Used to create the bunny’s lovely body, ears, and facial features along with the blanket part of the lovey.
2. Crochet Hook
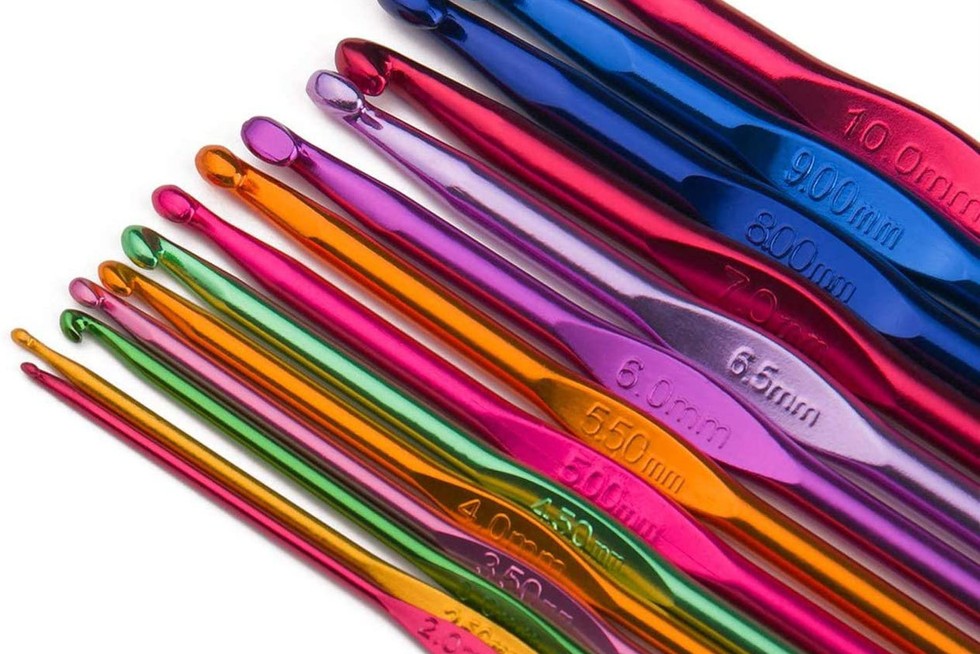
Crochet hooks make the stitches while playing with the yarn. The size of the hook determines the size of your stitches, hence the overall look. Choose the hook size by referring to the yarn label. However, a G/4mm or H/5mm is suitable for a worsted-weight yarn.
Usage: Used to work stitches in patterns, including single crochet, double crochet, and other stitches.
3. Stuffing Material

These are soft fillings to provide a spongy touch and plush appearance. Opt for a soft and non-allergic stuffing material and one that is easily washable and safe for babies. Polyester is a famous stuffing material, and we recommend the same.
Usage: Stuffing material fills the bunny’s lovely body and head to give it a three-dimensional shape.
4. Safety Eyes and Noes
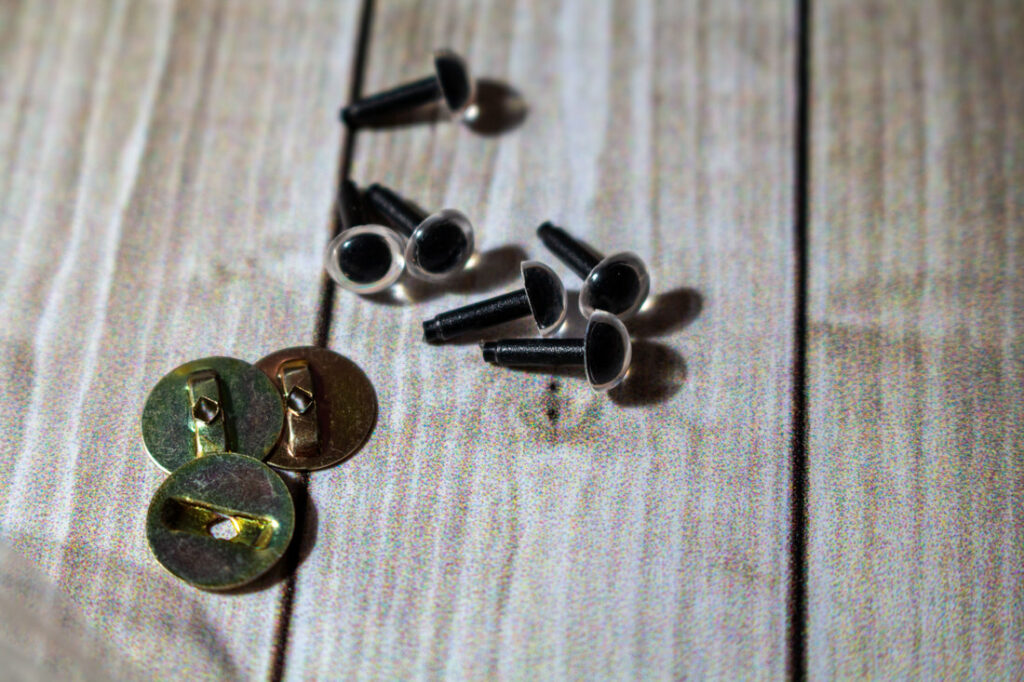
These are the decorative elements to provide a crochet bunny lovey, toy-like look. Choose the one that properly fits the bunny’s lovely size and is easily attachable. For embroidery, choose any complementing yarn colors.
Usage: Attach safety eyes and nose securely to the bunny’s face. However, you can craft the facial look using embroidery thread, too.
5. Tapestry Needle
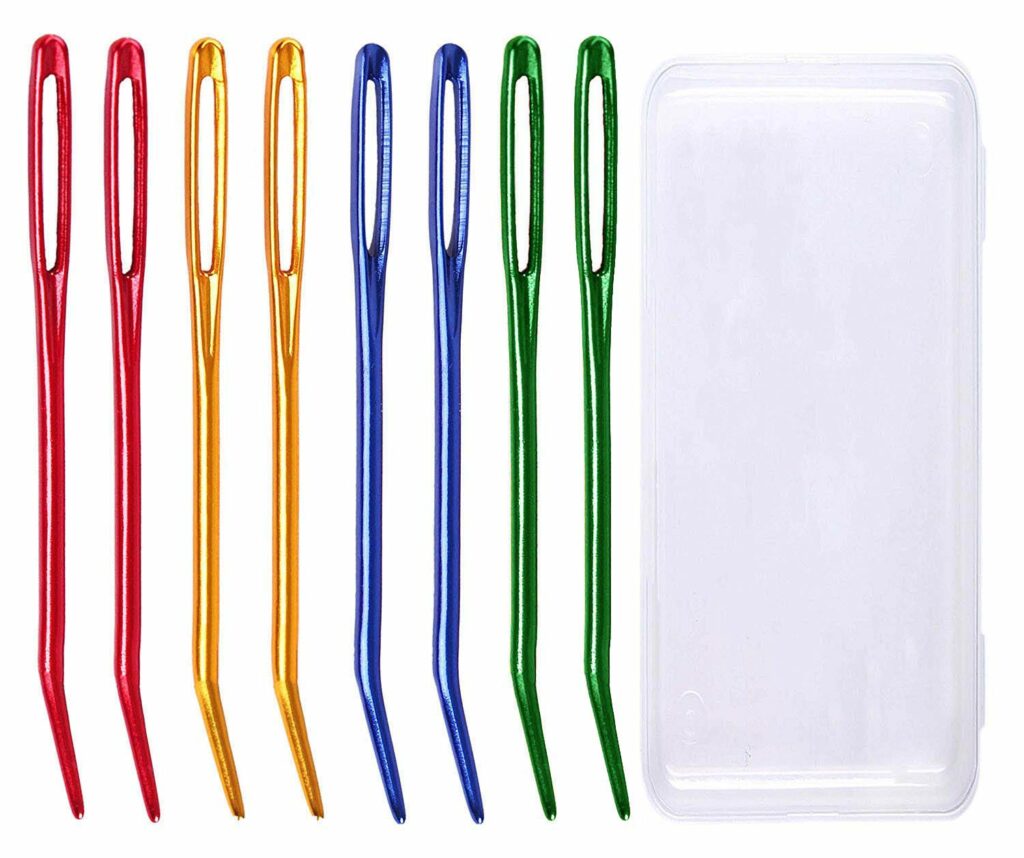
A tapestry needle has a blunt tip and a large eye for weaving in yarn ends and attached embellishments, if any. It should be blunt-tipped and easily accommodate your yarn thickness.
Usage: Used to weave in loose ends and attach facial features such as safety eyes and nose.
6. Scissors
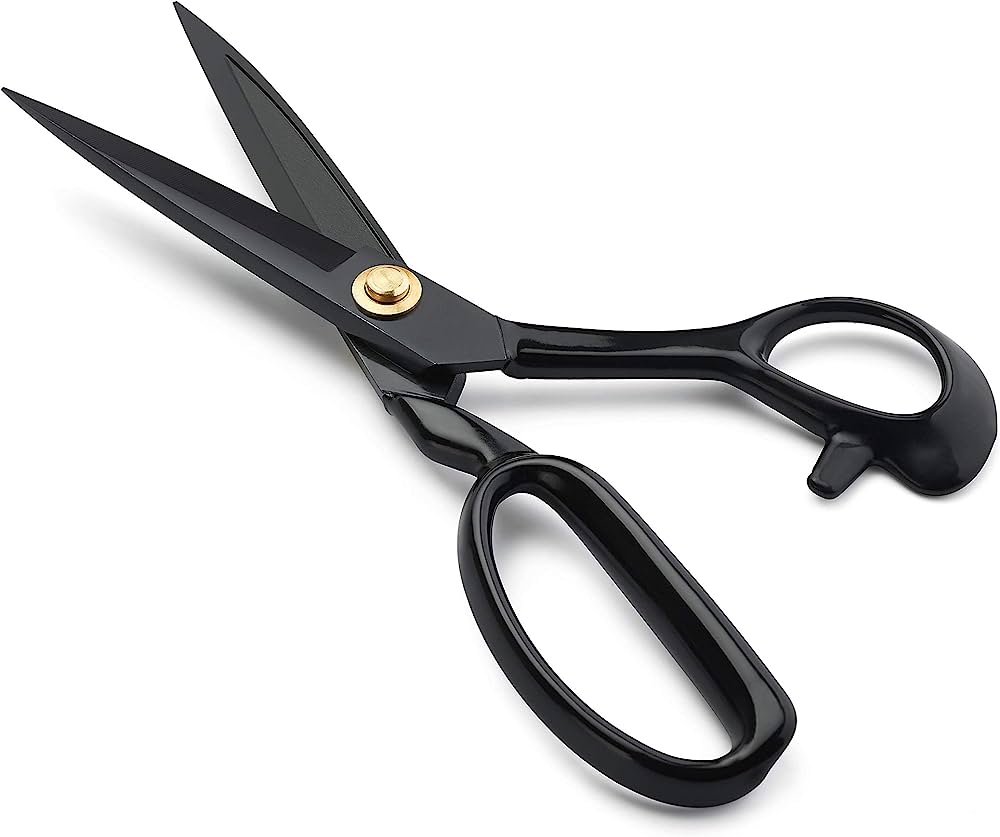
Scissors are used to cut and trim yarn. Opt for a sharp blade and fine-tipped for proper cutting. This will ensure the part you cut doesn’t make the yarn fray, preventing future unraveling of yarn.
Usage: Used for cutting and trimming the excess yarn and to clean up the finished lovey.
Simplified Steps to Craft Crochet Bunny Lovey
Crafting a crochet bunny lovey includes a series of steps, such as making a foundation chain and providing a final touch, like weaving in loose ends and blocking. But before heading on with steps, we suggest counting every stitch while crocheting and paying extra attention to the tension weaving for a better and more professional result. Here are the steps to guide you on how to make a crochet bunny lovey:
Step 1: Making a Foundation Chain
The foundation chain works as the base for your whole stitches. Just like the yarn is a must-have for making your first stitch, a foundation chain is required to carry on with those stitches for a strong foundation for your project. Here are the steps that’ll guide you to make the same:
- Start with the main color yarn: Before beginning, ensure you have enough yarn to crochet the desired length. Begin by leaving a tail of a few inches, say 5 or 6.
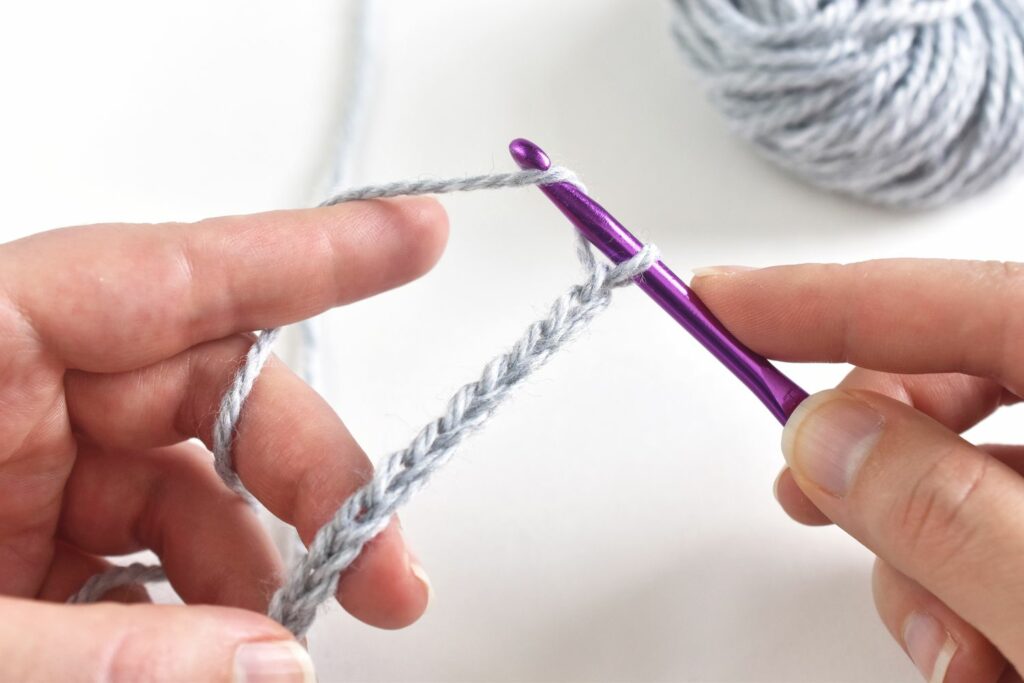
- Create a Slip Knot: Leaving the tail, form a loop with yarn, then pull the end through the loop. This will result in a knot that can slide along the yarn. Gently tighten the knot to fit but not too tightly on the hook.
- First Foundation Chain: Use your non-dominant hand to hold the end of the yarn attached to the slip knot. Now, take the yarn attached to the ball and drape it over the hook from the back to the front. Now, insert the hook through the loop of the slip knot. Finally, pull the yarn over the hook through a slip knot loop, creating your first chain stitch.
- Completing Foundation Chain: Yarn over, insert the hook into the loop of the last stitch made, yarn over again, and pull through to create the next stitch. Continue until you have reached the desired number of chains.
Step 2: First Turning Chain
Once you have reached the end of the foundation chain, it’s time to make your first turning chain. To do this, yarn over and pull through the loop on the hook. This will create the first chain, serving as the height for the first stitch of the new row.
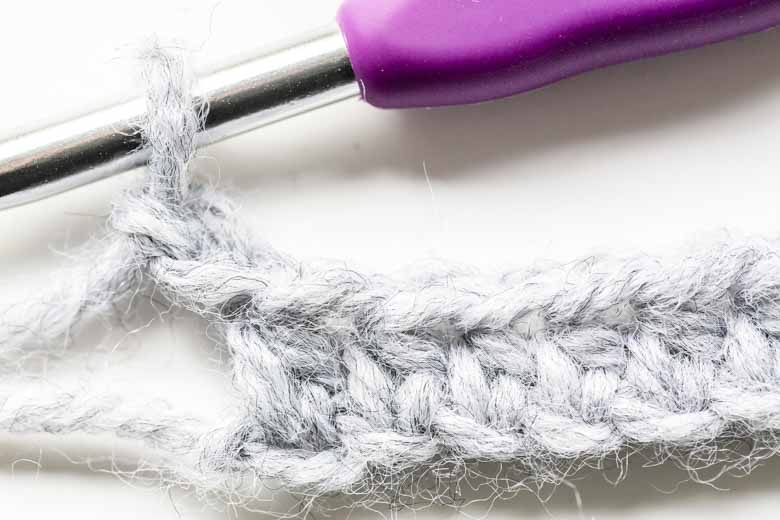
Step 3: Crafting First Row
- Insert the hook into the second chain from the hook: Begin counting from the hook, and insert the hook under the top two loops of the second chain.
- Yarn Over and pull up a loop: To do this, wrap the yarn around the hook from back to front, then pull it through the chain stitch. This will result in two loops on the hook. Again, yarn over and pull through both the loops on the hook, completing the first single crochet stitch, leaving you with one loop on the hook.
- Completing the Row: Repeat the steps above with each chain stitch in the foundation chain, creating a row of single crochets.
Step 4: Working Row 2
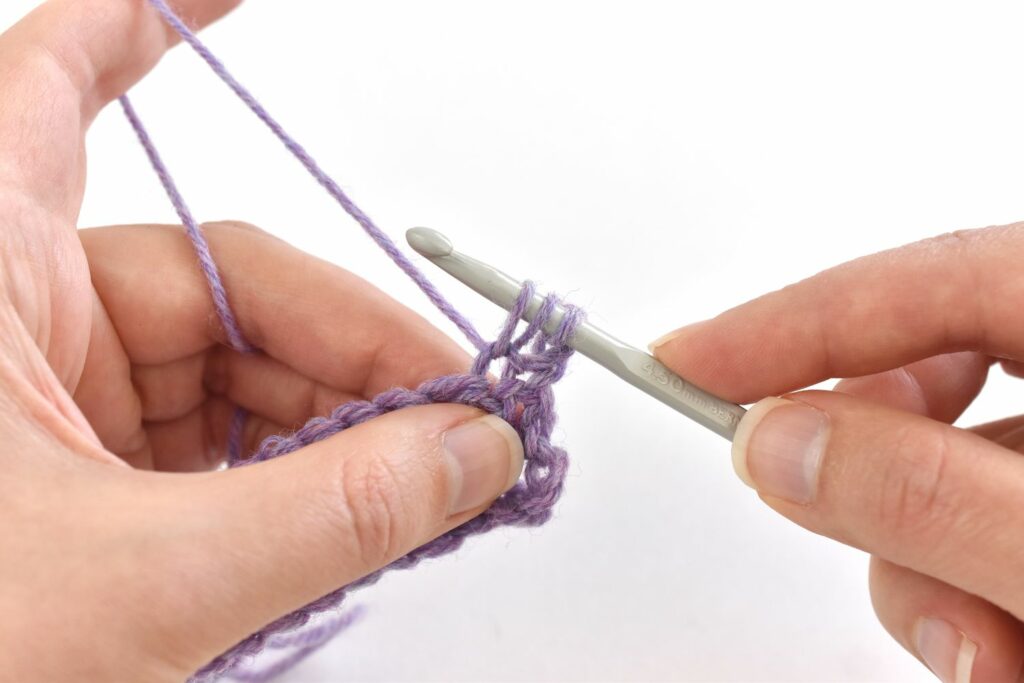
- Chain 1: Turn your work to start working with a new row. Chain a single stitch to elevate the yarn to the height of a single crochet stitch.
- Row 2 First single crochet stitch: Insert the hook into the first stitch of the previous row, which now faces you. Yarn over, insert into the hook, yarn over again, pull through the stitch, yarn over one more time, and pull through both the loops on the hook.
- Completing the Row: Repeat the above step to make each stitch in the row.
Step 5: Crochet Bunny Lovey Pattern
- Body: Make the foundation chain of the desired length, turn the work, and make a single crochet in each chain across the row. Chain one single stitch, turn and continue with a single crochet in each stitch. Repeat rows until the crochet bunny’s lovey body reaches the required height.
- Making the Head: Switch to the main color yarn if not. Decrease stitches at the beginning and end of each row to shape the head. Continue decreasing until the head is rounded and smaller than the body.
- Crafting ears: Make two ears with the main colors. Start by creating a chain, then work single crochet, decreasing stitches at the end and beginning of each row. Shape the ears to a point, and then fasten off.
- Blanket: Choose a secondary color and start crocheting the foundation chain in alignment with the required width. Turn and work a single crochet in each chain, then chain 1 and turn. Continue across the row till the blanket reaches the desired size.
- Assemble: Sew the head on top of the body using the main color. Now attach the ear to the corners of the head and sew the blanket on the back side of the bunny using a secondary color.
Step 6: Stuffing the Bunny Lovey Body
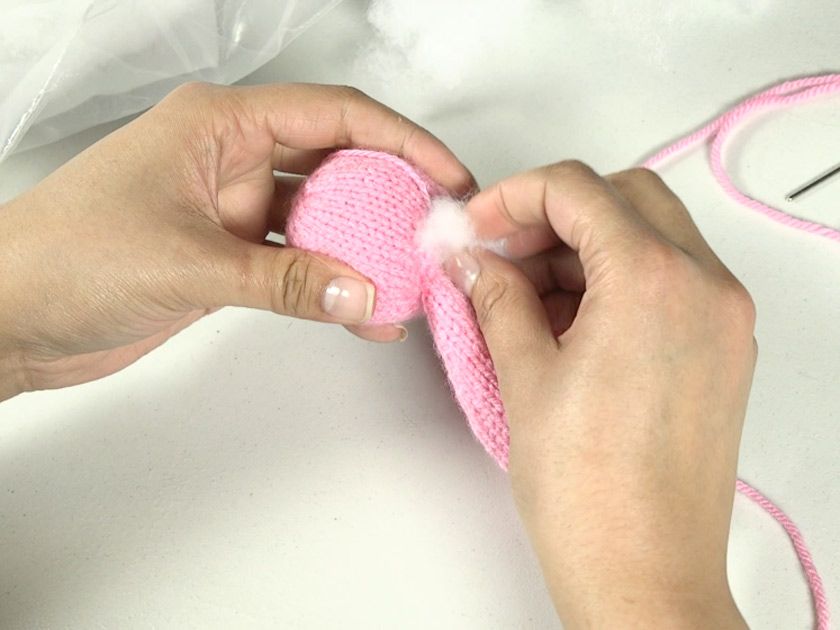
- Utilize tapestry Needle: Once you’re done working with the bunny’s body, use a yarn needle to weave in loose ends, if any, from color changing or fastening off. This helps keep the back neat and secure.
- Filling head and body: Slowly insert the polyester fiber or whatever filling you have chosen into the bunny’s head and body. Remember not to overstuff; otherwise, the shape will be distorted, ruining the overall look.
Step 7: Providing a Face
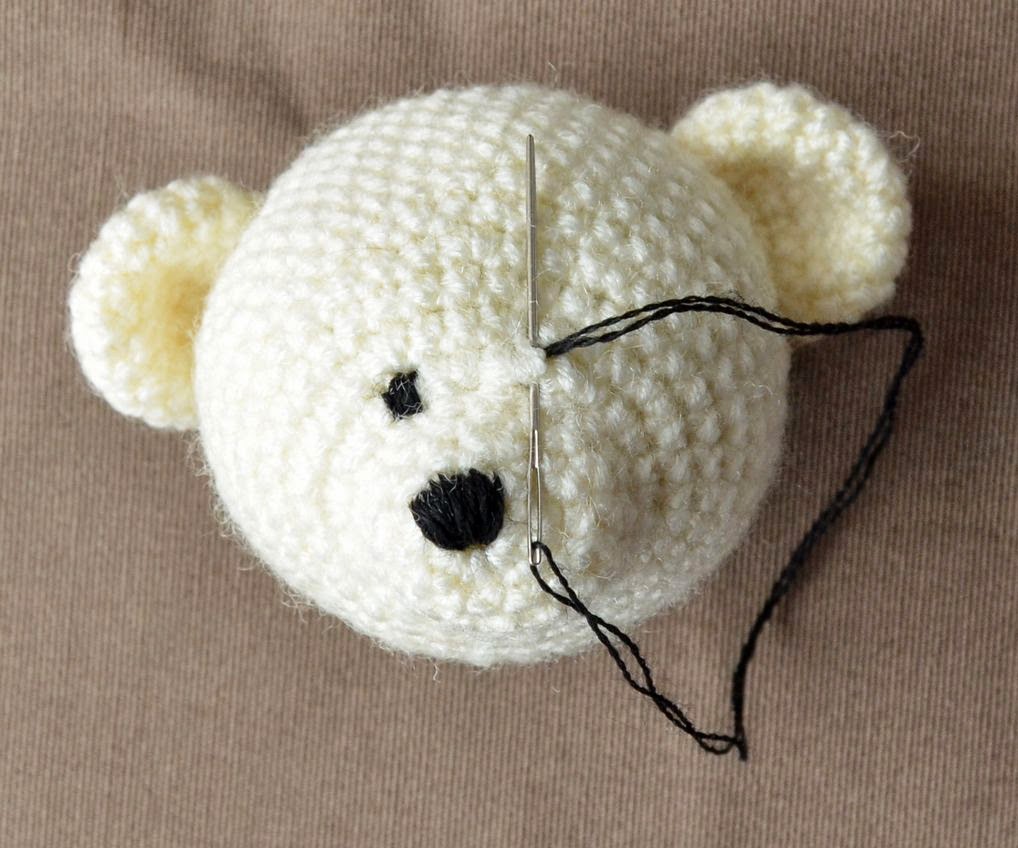
If you’re using safety eyes and nose, place them through the stitch in proper positions on the bunny’s face. From inside, secure the washers, if any, to hold the eyes and nose in position. If using embroidery thread, pass it through the tapestry needle and stitch the facial aspects that pair well with the pattern.
Step 8: Weaving in Loose ends
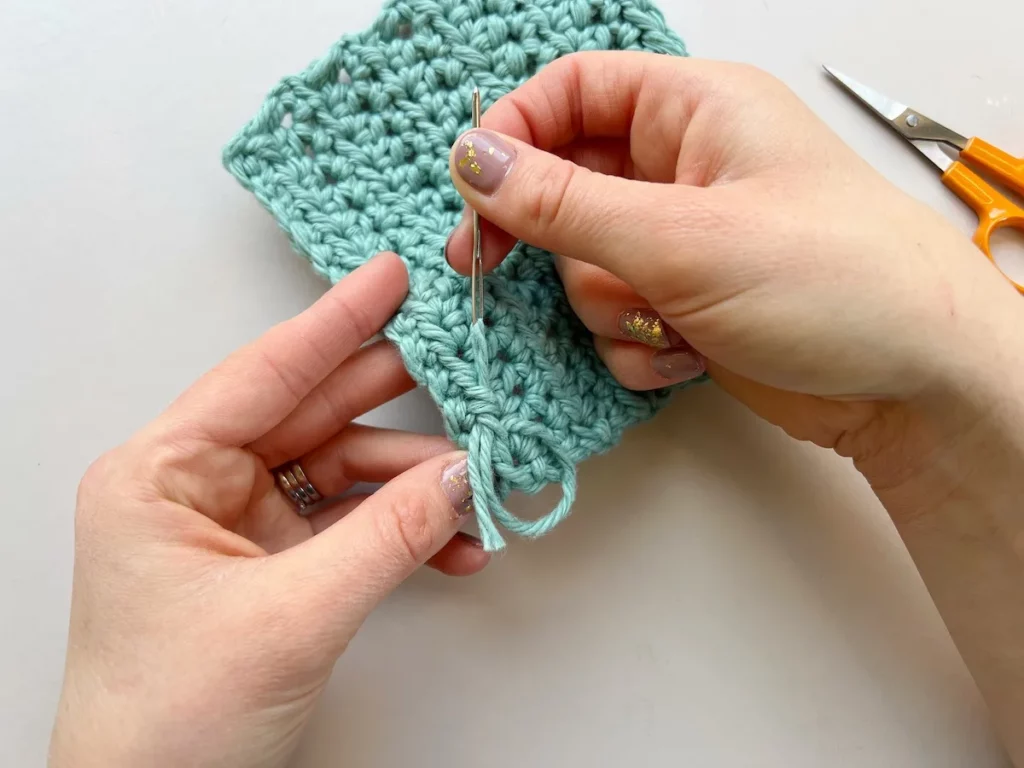
Check for loose ends throughout, i.e., the blanket and bunny. Pass the yarn tail through a tapestry needle and weave it under the stitches of the same color. This not only helps hide the ends but also prevents future unraveling.
Step 9: Blocking
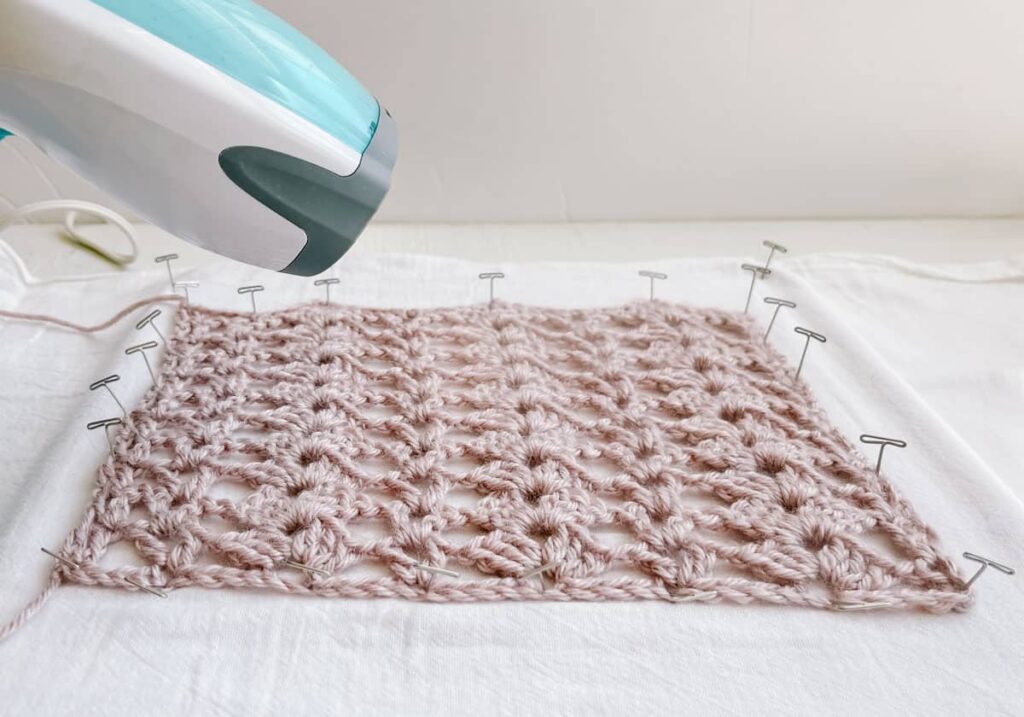
Before starting the blocking process, ensure your yarn fiber responds well to water; otherwise, chances are high that your crochet bunny lovey project will get fluffy. Below are the steps to provide your work with a polished and professional look.
- Wet your crochet bunny lovey: Soak the bunny lovey in water till it absorbs moisture fully. Now, squeeze out the excess water, if any.
- Flaten the Lovey: Place the lovey flat on the blocking mat. Measure if the dimensions, i.e., length and breadth, aren’t as required, make adjustments, and then secure using blocking pins.
- Air Dry: Let crochet bunny lovey air dry completely.
Conclusion
Making a crochet bunny lovey isn’t that hard until it comes to basic knowledge of crocheting the stitches. However, it’s now possible to follow our extensive and easy-to-follow ‘crochet bunny lovey tutorial.’ Don’t you want your little ones to adore and wrap the warmth around themselves while making fun of the toy bunny?
If yes, what are you waiting for then? Don’t hesitate wherever you feel like you’re stuck and not getting what to do next; comment your query below, and we’ll make sure your journey continues. Further, let us know how the guide was. Was it easy to follow? Did you enjoy the crocheting process? What color did you choose for the bunny?
Frequently Asked Questions
Is it Okay to Use Different Yarns than Mentioned in the Bunny Lovey Pattern?
Absolutely! While choosing a different yarn, ensure it is worsted-weighted and aligns with the crochet hook size mentioned in the pattern. Remember, using a different yarn might result in a different stitch size or overall texture of crochet bunny lovey.
Is Blocking Necessary for Crochet Bunny Lovey?
Blocking is always an optional task for any crochet project, but it’s always recommendable to incorporate it. It helps to shape your finished bunny lovey and smooth out irregularities, if any. Further, your blanket will face a transformation from a crumbled appearance to a polished look.